3-8
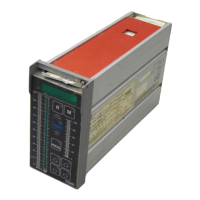
Controls and Indicators
(FISWIR)
3.6
Establishing a Setpoint
3.6.1 Local Setpoint (LSP)
The M button also lights to indicate Manual when
the output signal can be controlled by remote
signals. The yellow increase/decrease buttons are
disabled.
The output signal indicator changes to show the output signal with
0.5% resolution, compared to the normal 5%. This is done by
combining the normal bargraph with a brighter bar. The normally
bright column indicates the ten units, and the brighter bar single
units.
Example:
100
B-:
80
TENS
60 (=60)
4a UNITS
2o (= 3)
0
\\I/
0:
0
M
’
DPFwD48**
The normal brightness bargraph shows 60% and the brighter bar
shows 3%. This combination represents an output signal level of
63%.
If the increase/decrease button is held until the single unit bar goes
beyond 0 or lOO%, the bargraph indication will revert to its normal
5% resolution and the stepping speed will increase to 5% per step.
2. Use the yellow increase/decrease buttons to step to the required
output signal value. if the output signal has its limits applied for
Manual setting, the bargraph indication will stop at the limit.
3. Return to the Auto mode by pressing the M button.
The controller must be in the local mode to enter a local setpoint
(LSP). The LED in the R should be off. If the LED is lit, pressing the R
button switches it back to the the local control mode.
uM6.1:DPR900:9102
May 1991