INSTRUCTION MANUAL FIT REMOTE DISPLAY PINION
screen directly without needing to go through all the different screens first. Either press the rocker switch or wait
briefly to enter the required screen (if the rocker switch is not moved for more than 1 sec., you enter the selected
screen automatically). You can press the rocker switch while in any screen except the Drive screens or the settings
menu to enter the main Drive screen directly. In the drive screens, you can use the rocker switch to scroll through the
individual screens.
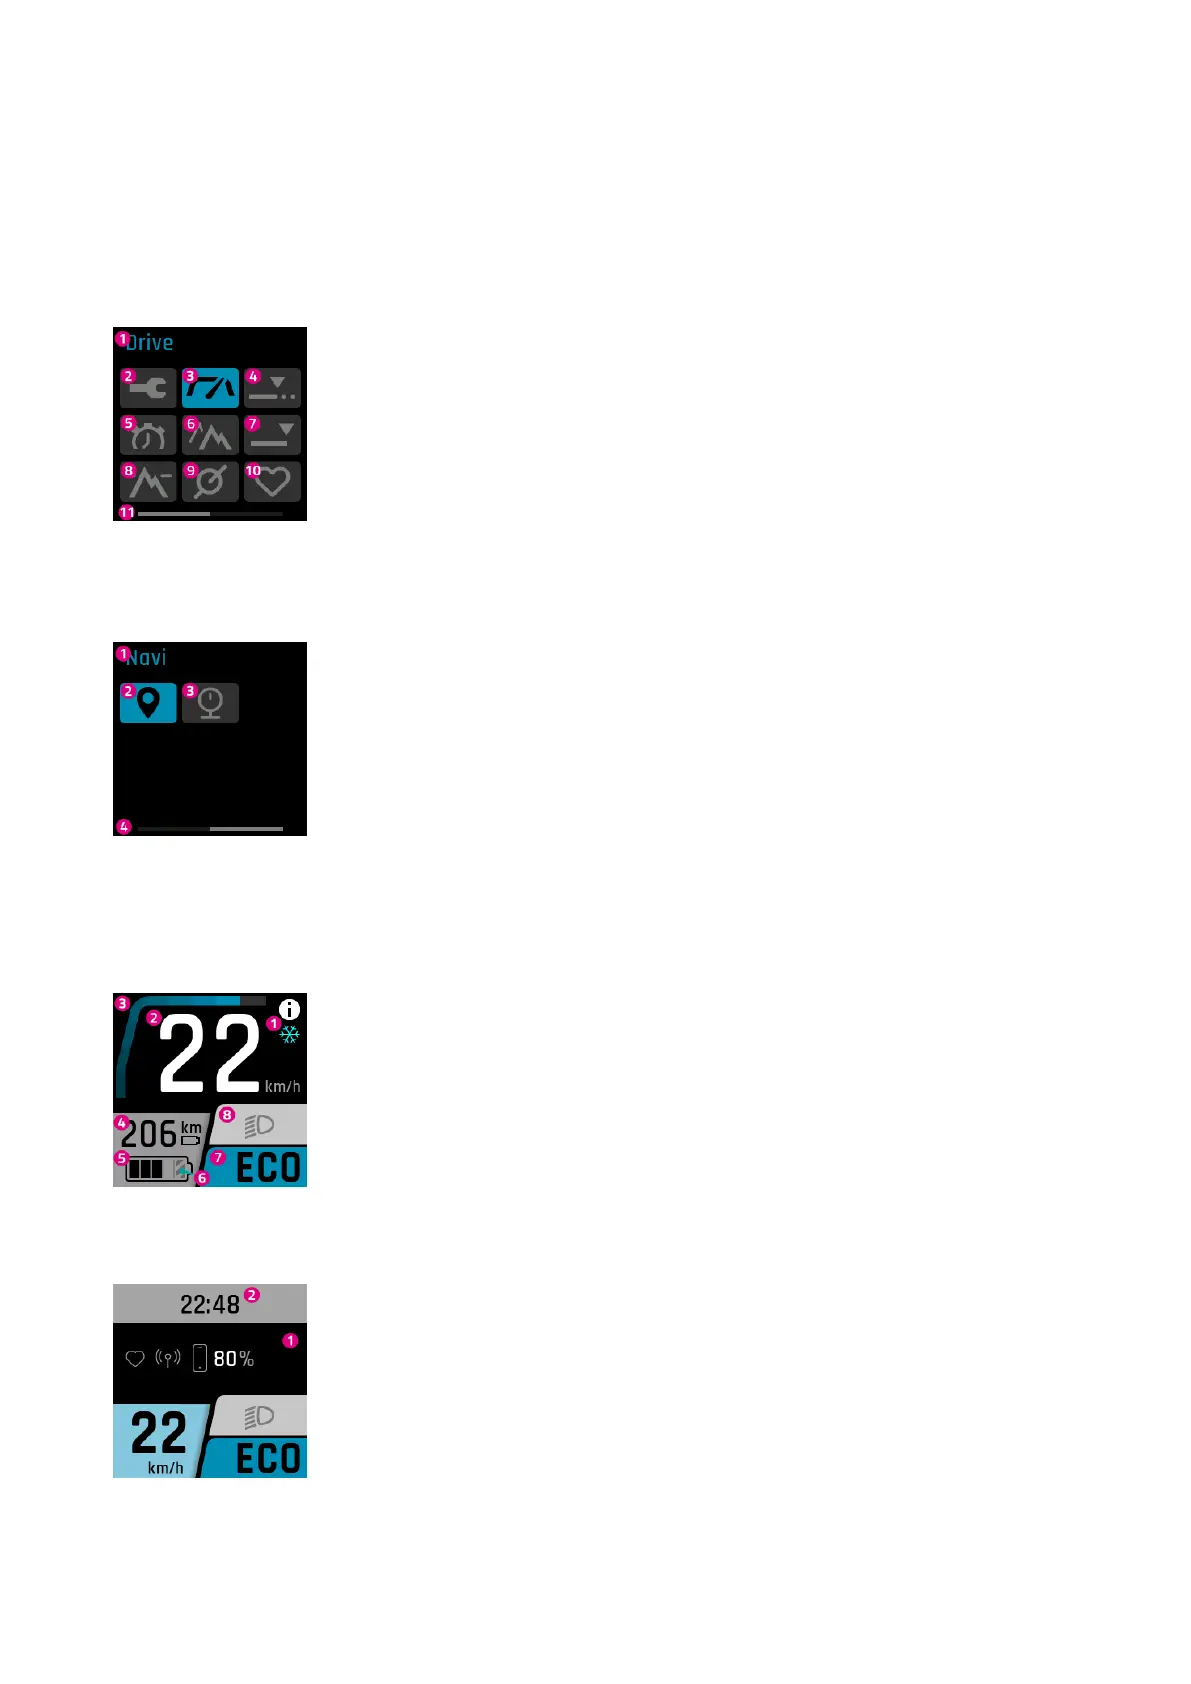
SELECTION DISPLAY PAGE 1
1. Name of the screen currently selected (symbol highlighted with colour)
2. The settings menu (can only be accessed when the e-bike is stationary.)
3. Main Drive screen
4. Trip distance – distance ridden during the current trip
5. Trip time – duration of the current trip
6. Trip altitude – difference in altitude ridden during the current trip
7. Total - odometer
8. Altitude – current altitude
9. Cadence – current pedalling rate
10. Pulse – current heart rate
11. Page status bar
SELECTION DISPLAY PAGE 2
1. Name of the screen currently selected (symbol highlighted with colour)
2. Navi - navigation
3. Pressure – current tire pressure
4. Page status bar
6.6 MAIN / SUB-SCREENS
DRIVE MAIN DISPLAY
1. Notice / danger alert messages
2. Current speed
3. Current motor assistance
4. Range (in current assistance setting / level of assistance)
5. Battery level
6. The hatched part indicates that the battery is in Long Life mode.If Long Life mode is
deactivated, the hatching disappears. (For more information, see Section 6.7)
7. Current level of assistance
8. Light (main beam / dimmed headlight / off)
DRIVE SUB DISPLAY
1. Linked devices (heart rate sensor, smartphone, including smartphone battery charge
level)
2. Clock
FIT_Manual_Remote_Display_Pinion_V3_en | Version 03 | 24.10.2023 16