AIRFRAME REPAIRS
19
The Cessna 170 is molded from durable EPO foam and is repairable with most adhesives. Similar to building and repairing wood or composite
airplanes, the correct glue for a given applicaon is crical to the repair holding and not breaking again. For major repairs, such as a broken
fuselage, epoxy is preferred because it allows me to correct any misalignment. For smaller repairs, such as a cracked control surface or small chunk
of material missing from the airframe, regular CA is very eecve. The use of oderless (foam safe) CA is not recommended on EPO foam aircra
because it is weaker than regular CA and takes a longer period of me to cure and the bond tends to be weaker.
If a part is damaged too badly to be repaired, please refer to the back of the manual for a complete lisng of spare airframe parts.
NOTE: Avoid the use of CA accelerant in repairs. It can damage paint and will weaken the bond of the glue. If CA accelerant is used, be
mindful of the locaons of CA to prevent premature bonding of parts, or bonding a hand or clamp to the airframe.
NOTICE: If a crash is immenent, fully reduce the throle to prevent further damage to the power system and reduce energy to lessen
impact damage. Never allow the propeller to contact the ground under power, even idle.
BE ADVISED THAT CRASH DAMAGE IS NOT COVERED UNDER ANY PRODUCT WARRANTY.
Avoid keeping the airplane in direct sunlight or in hot vehicles when not ying. Excessive heat can damage the airplane's structure and UV
damage can permanently discolor decals.
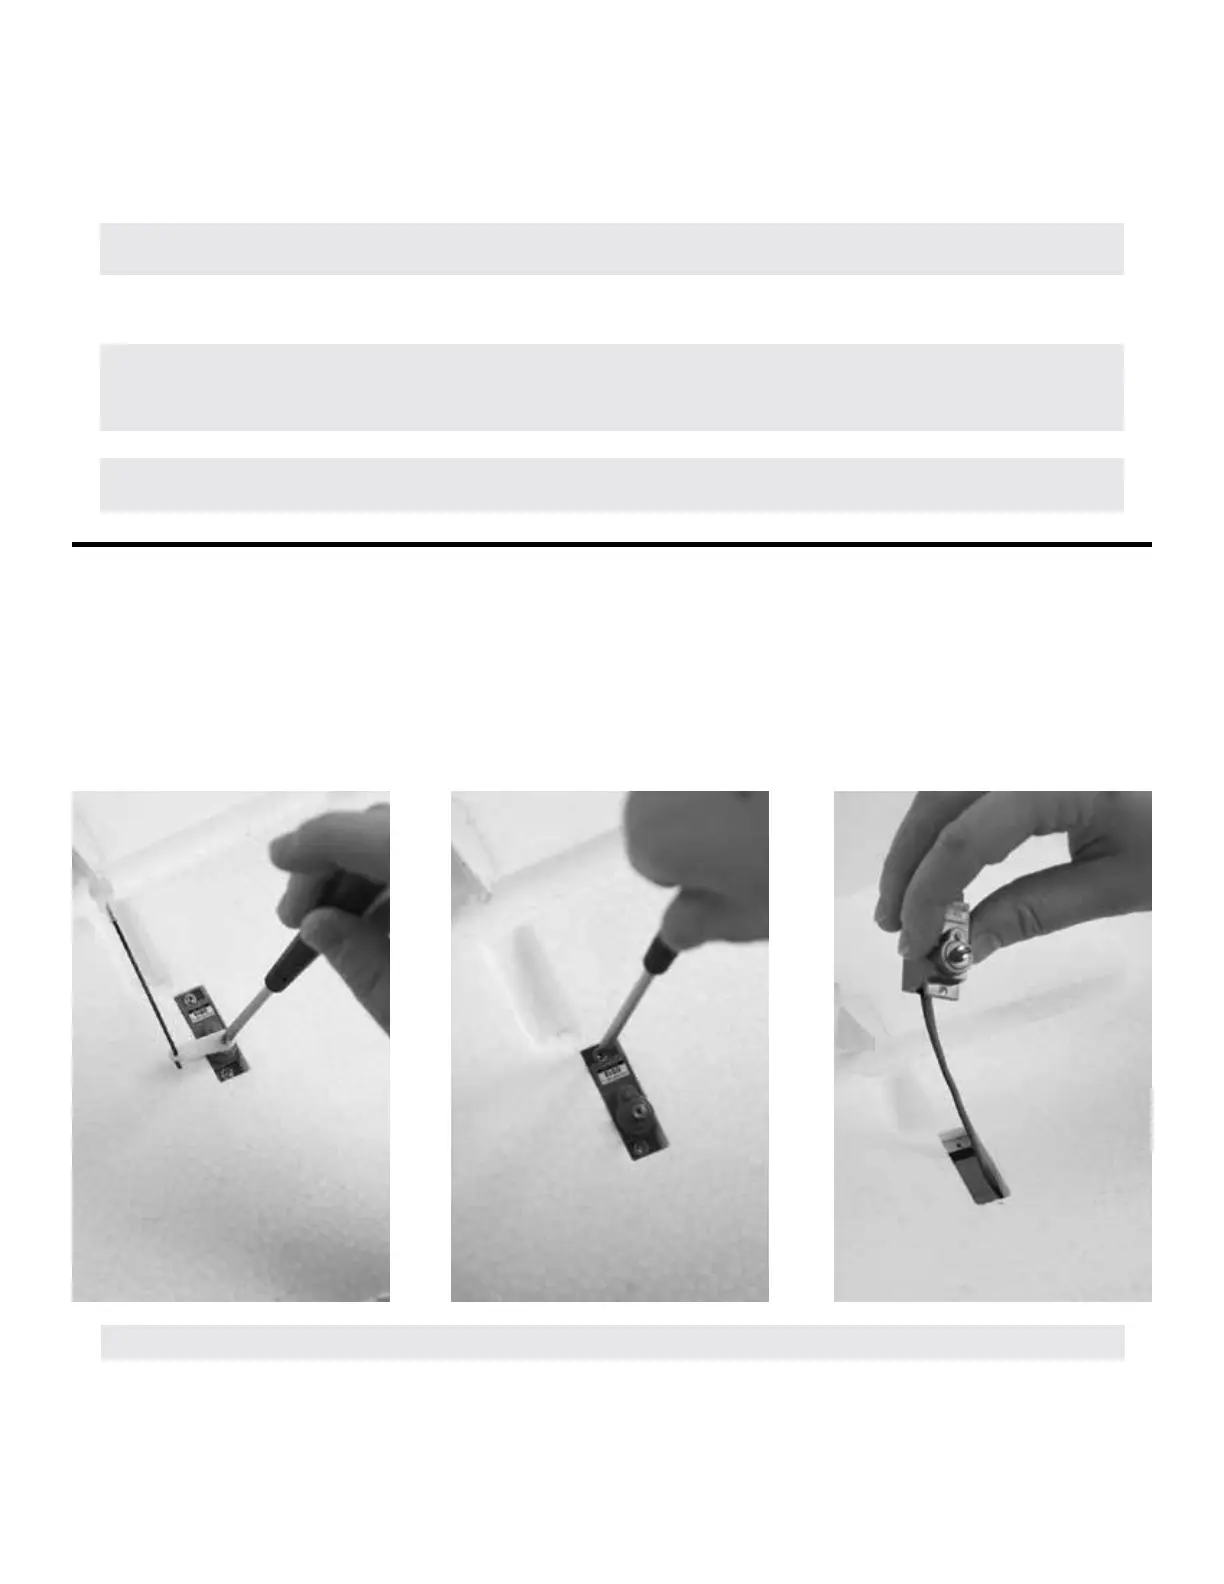
REPLACING SERVOS
Required Tools and Fasteners: #1 Phillips Screwdriver
1. Unplug the servo from the receiver or any extension.
2. Unscrew the servo arm from the servo and remove the servo arm.
3. Unscrew the two mounng screws located at each end of the servo and remove. Note that the aileron servos are connected to the navigaon lights
with a Y-harness. The wires are also taped to the inner wing skin, and may require a rm pull to remove.
Tip: Plug a spare extension lead into the servo when removing to make it easier to install the lead of the servo when replaced.