PROP ADAPTER, PROPELLER AND SPINNER INSTALLATION
6
1.
2.
3.
4.
5.
Required Tools and Fasteners:
3 - M3x9 Hex Head Machine Screws
1 - M3x30 Phillips Head Machine Screw
1 - Prop Washer
1 - Propeller Nut
2.5mm Hex Driver
#1 Phillips Screwdriver
Adjustable Wrench
Blue Thread Lock
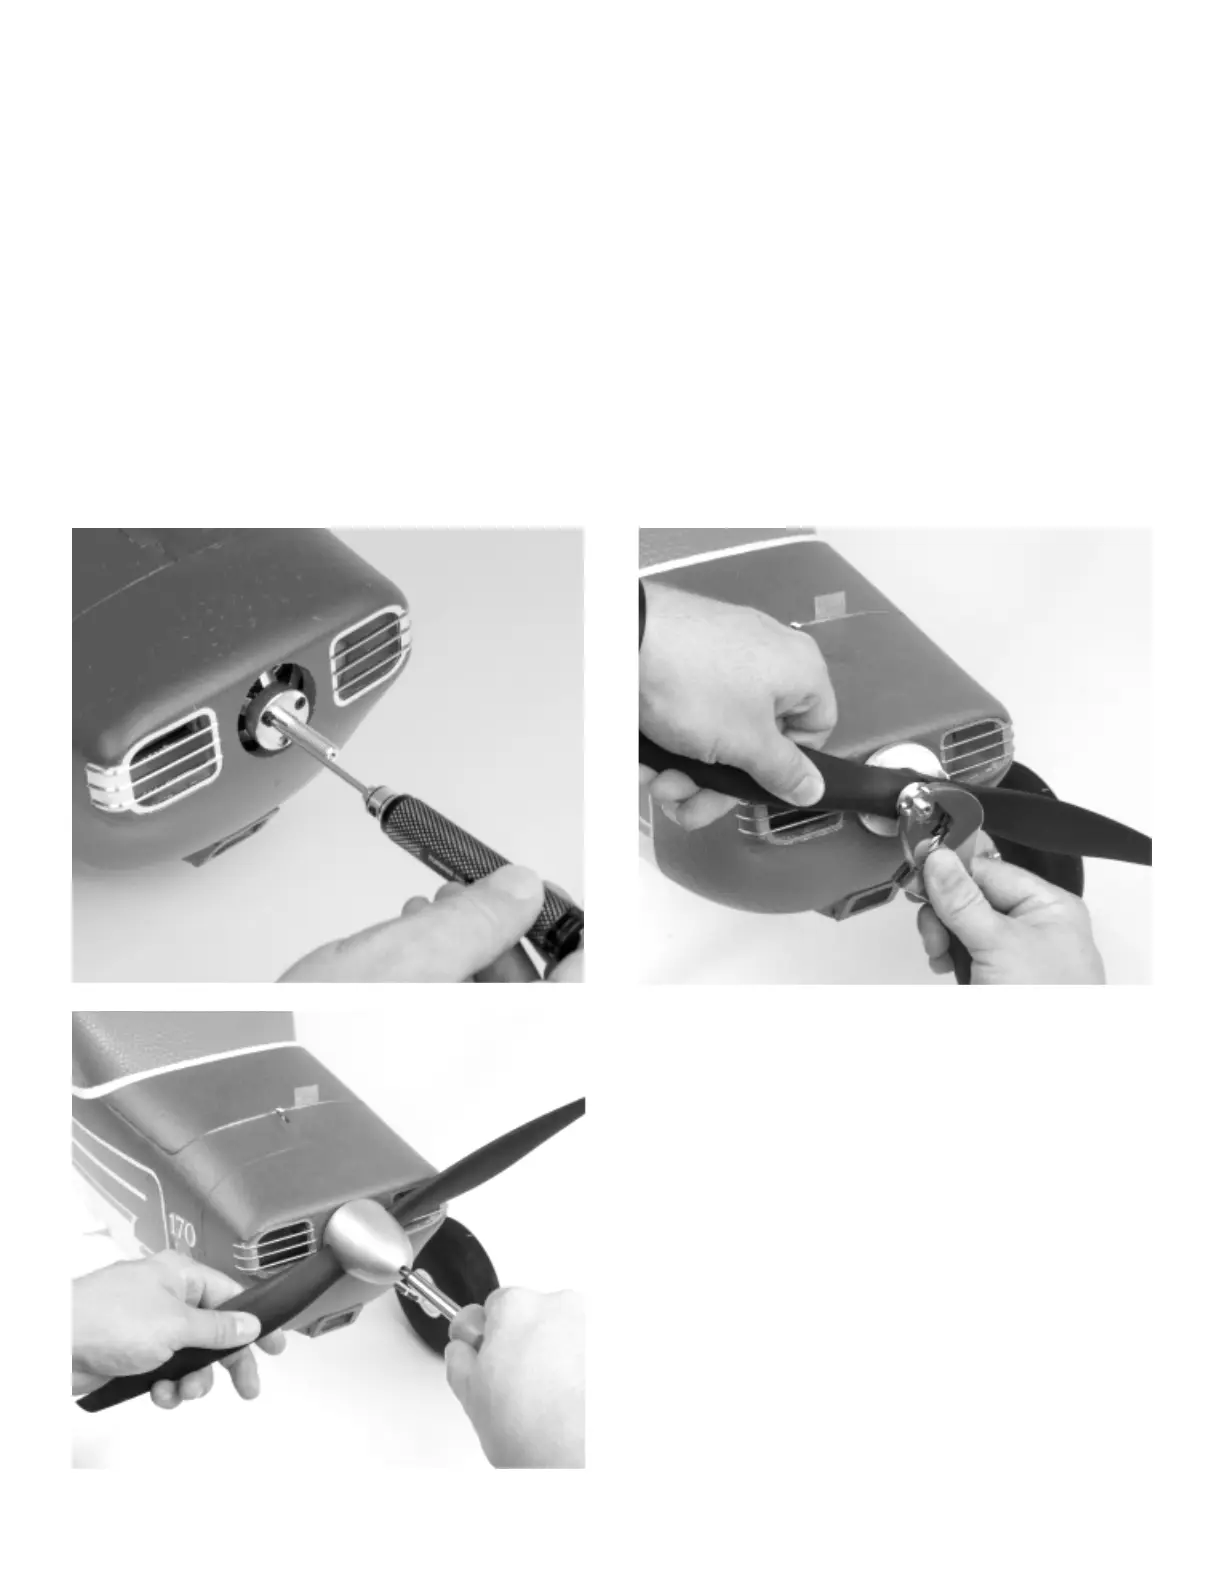
Locate the bolt-on prop adapter for the motor. Apply blue thread lock to each of the three M3x9 hex head machine screws, and secure the prop
adapter to the motor. Make sure that the propeller adapter seats fully against the motor face, and is concentric with the motor sha.
Install the spinner backplate onto the motor sha. Ensure that it is fully seated.
Install the propeller with the convex surface facing forward. The propeller size numbers are printed on the front face of the prop and should
orient forward.
Slide the prop washer on the sha with the widest face a, and ghten the prop nut.
Install the spinner cone, and ghten the M3x30 Phillips Head screw using a #1 Phillips screwdriver. Do not apply blue thread lock and do not
over ghten.
Note: It is important to check the rear motor sha collar and set screw for thread lock before rst ights. If no thread lock is found, remove the
set screw, add blue thread lock, and re-secure. It is always a good idea to check all hardware connecons every few ights to ensure they stay
ght.
Note: Do not complete transmier, receiver and/or Aura setup with the propeller installed.