9 Mounting of the Transducers FLUXUS ADM 8027, F801, ADM 8127B
UMFLUXUS_F8V4-6-1EN, 2018-10-10 57
Overview of the mounting steps
• step 1
disassemble the transducer mounting fixture Variofix L
• step 2
fix the clasps to the tension straps
• step 3
fix one tension strap to the pipe
• step 4
use screws to fix the rail to the tension strap and fix it with the second tension strap
• step 5
insert the transducer in the cover, use screws to fix the cover with the transducer to the rail
If the transducer distance is small and when measuring in reflection arrangement, only one transducer mounting fixture
has to be mounted (see Tab. 9.1).
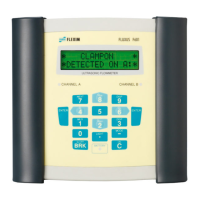
Fig. 9.4: Transducer mounting fixture Variofix L (diagonal arrangement)
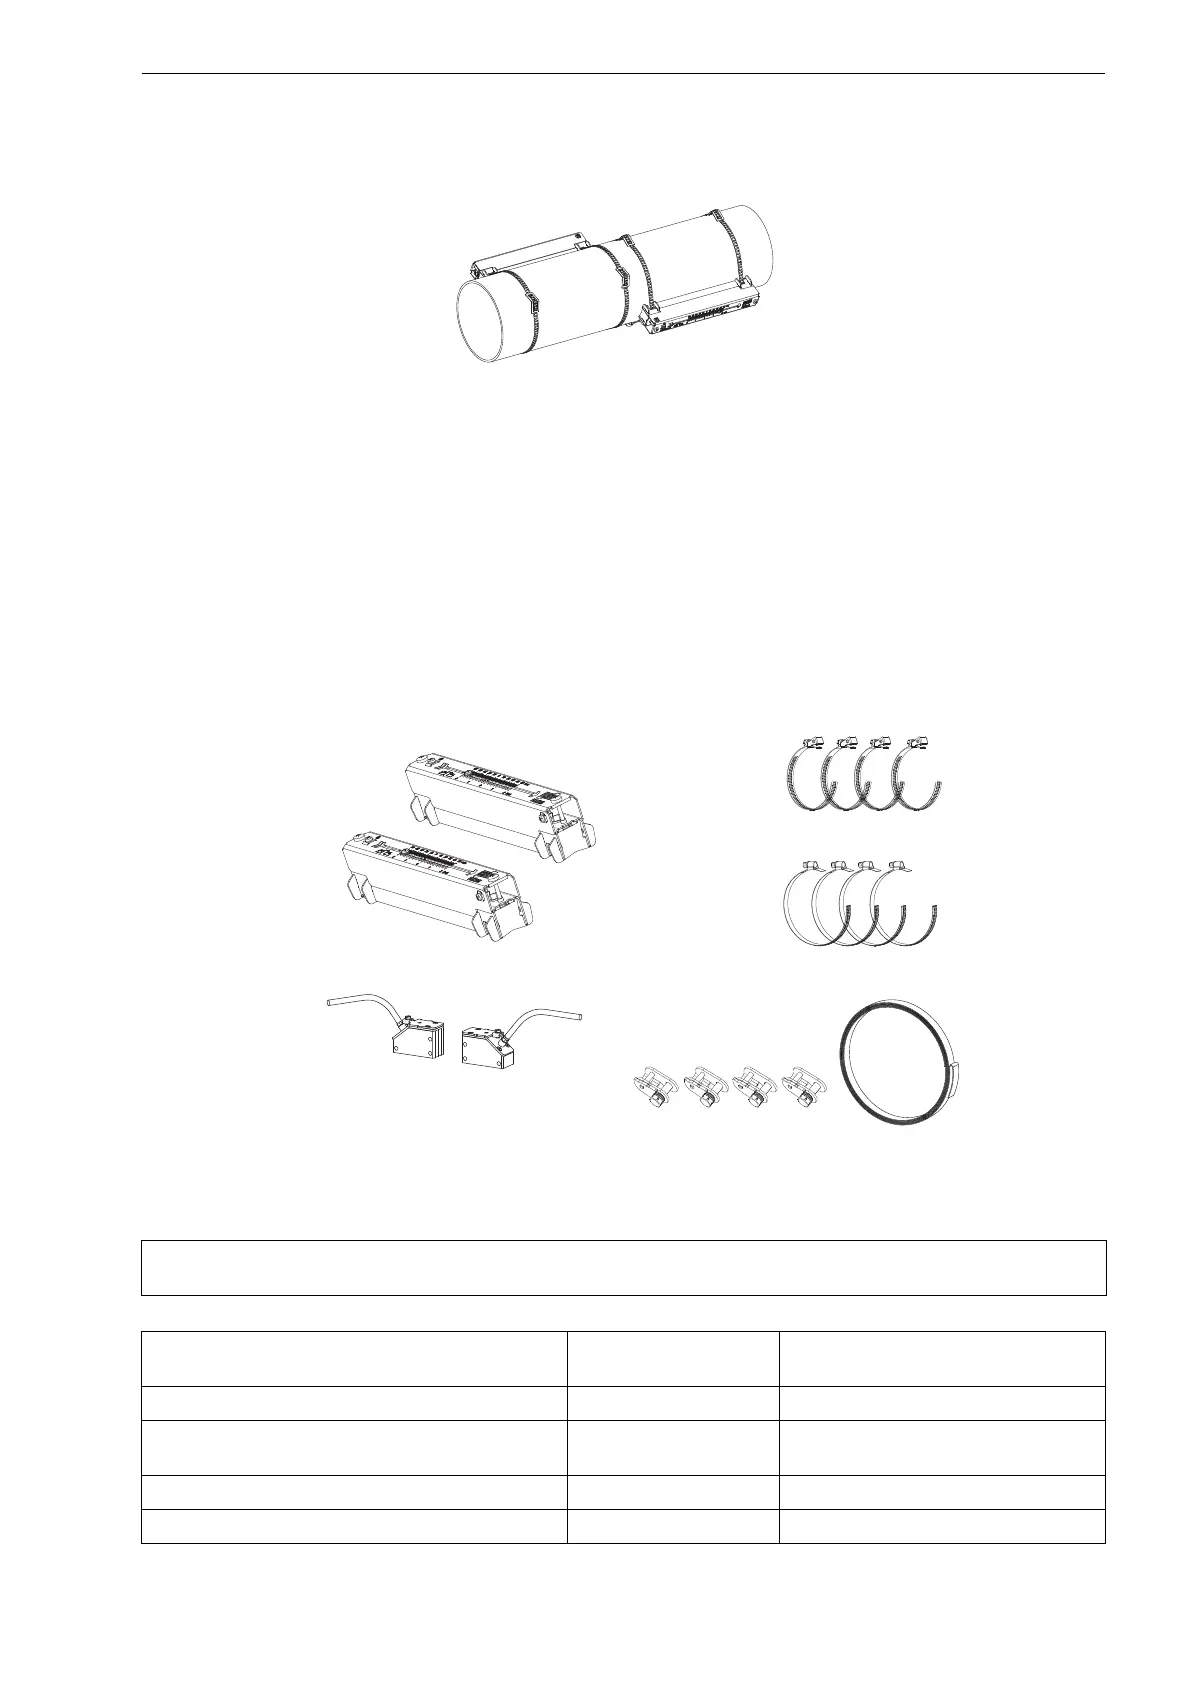
Fig. 9.5: Scope of delivery
Note! When measuring in diagonal arrangement with 2 beams and displaced X arrangement (see section
5.3), 4 transducer mounting fixtures have to be installed.
Tab. 9.1: Approximate values for the mounting of a Variofix L
transducer frequency
(third character of the technical type)
length of the rail
[mm]
length of the rail
[mm]
Q176< 69
M, P 234 < 84 (Lamb wave transducers)
< 100 (shear wave transducers)
G, H, K (all but ****LI*) 348 < 89
G, H, K (only ****LI*) 368 < 94
2 Variofix L
4x band
clamp clasp
with tension
strap
4x quick
release clasp
with tension
strap
4x ratchet clasp and
tension strap coil
1 transducer pair
or
or
 Loading...