427-0030-00-12 Version 180 March 2018 17
2 Basic Operation and Configuration
2.2.1 Set IP Address using the FLIR Discovery Network Assistant (DNA)
The F-Series camera is shipped with a static IP address: 192.168.250.116. Configuring the camera for
IP communications generally involves the following steps:
Step 1 Connect the Ethernet port of the camera to the existing IP camera network.
Step 2 Connect a PC or laptop to the same network.
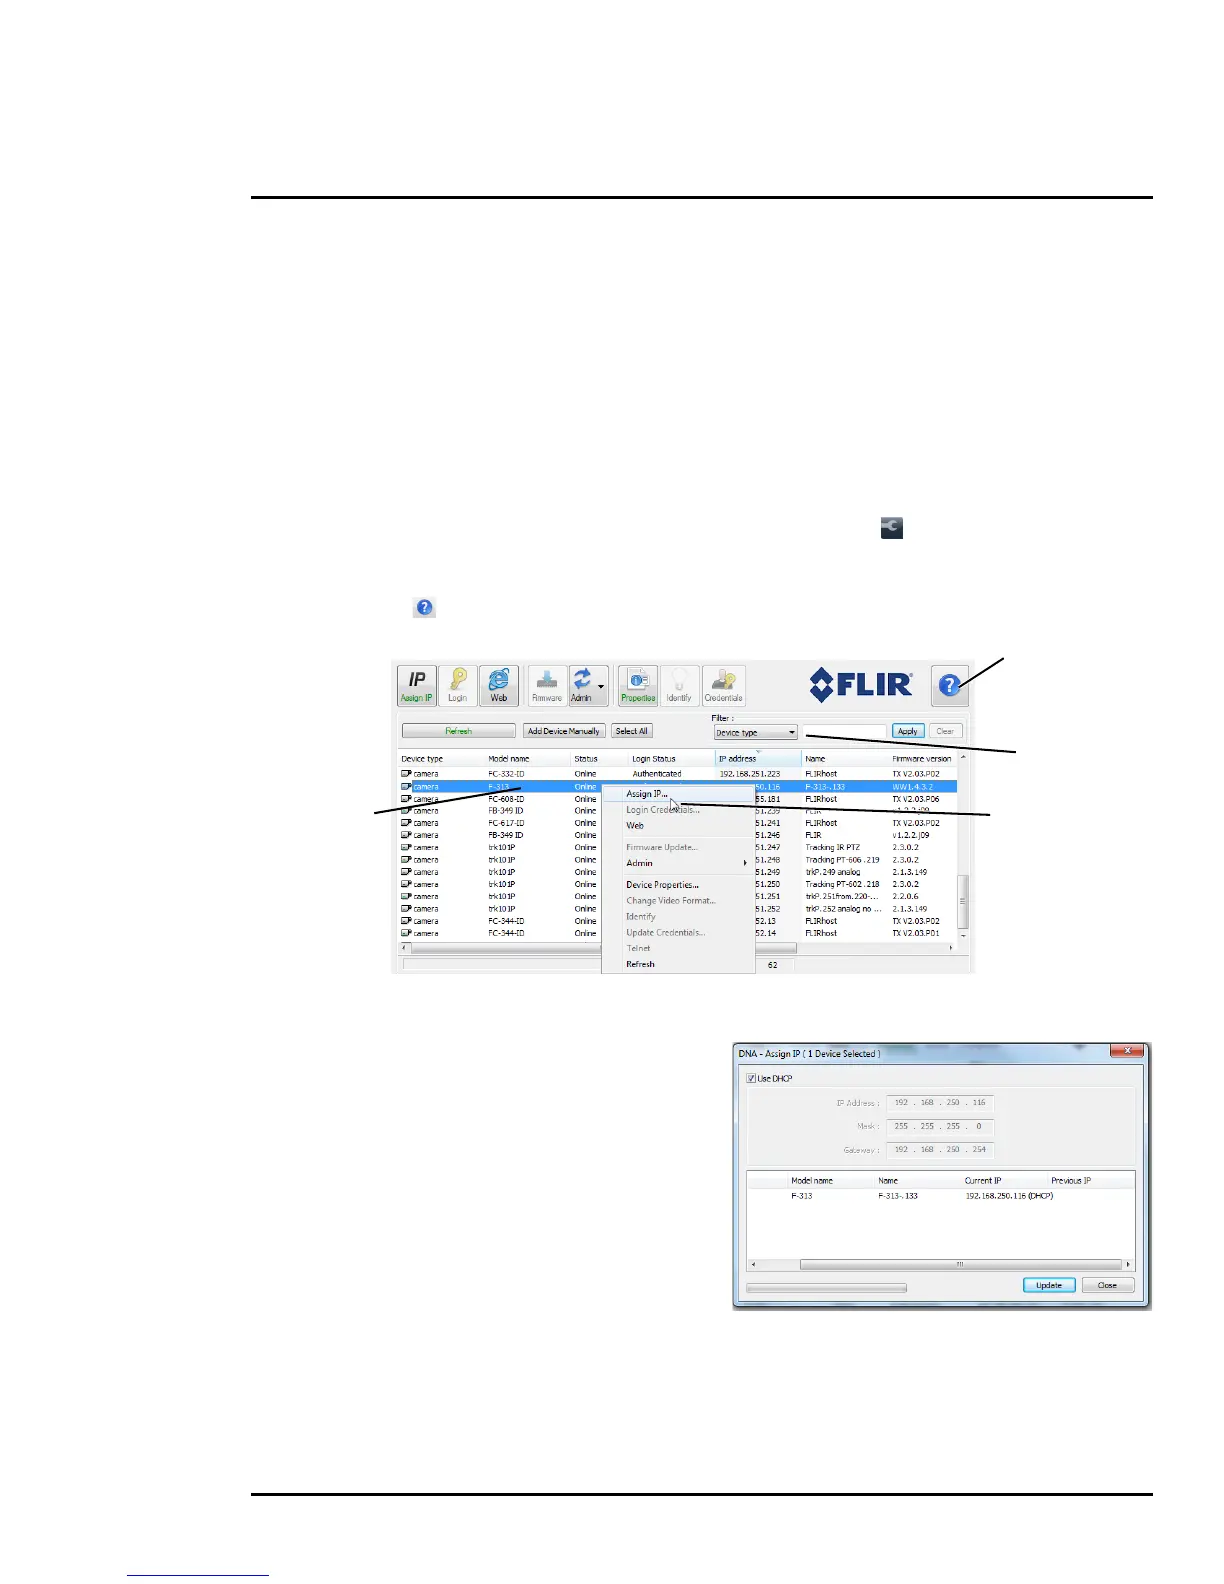
Step 3 From the PC connected to the camera network, use the DNA utility to discover and display
the camera’s current IP address.
a Download the DNA utility.
b Unzip the utility, then double-click to run the executable file ( DNA.exe). All the units on
the VLAN are discovered.
c For additional instructions on using DNA, refer to the DNA User’s Manual available in the
Help (
) link while the software is running.
Step 4 Right-click on the camera, select Assign IP
to change the IP address or select between
static IP or DHCP addressing.
Step 5 Double-click the camera in DNA’s
Discovery List to open the camera’s web
server Login page in Internet Explorer or
point your web browser to the camera’s IP
address.
Step 6 Using a web browser, configure the
camera settings, such as camera date/
time, and other parameters, so the camera
is compatible with the existing network.
Online manual
Select a filter
Select Assign IP
Right-click