FLIR MR160 USER MANUAL Document Identifier: MR160-en-US_AF
Images can be deleted one by one by pressing the Select button while viewing the image. A
prompt will appear asking to ‘Delete’ or ‘Cancel’. Choose ‘Delete’ to permanently discard the
image; choose ‘Cancel’ to keep the image.
Images can also be transferred to computer or other compatible device using the MR160 USB
port (bottom of meter, under flap) and supplied USB cable.
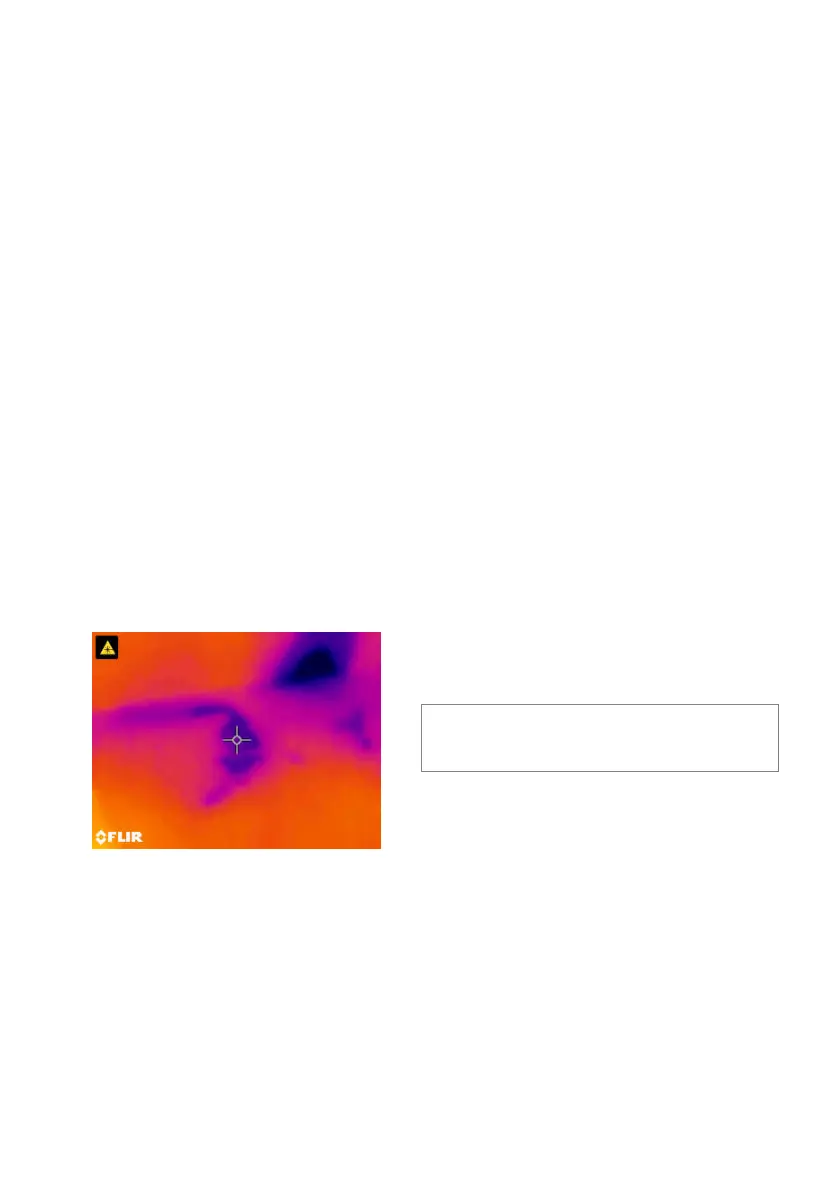
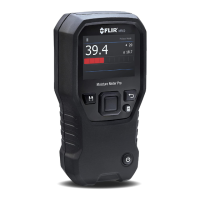
5.6 ‘Combination’ Feature: Save Thermal Image with Pinless Moisture Reading
The Combination feature allows the user to ‘freeze’ a thermal image and take a pinless moisture
reading, saving both the thermal image and the moisture reading on a single image. The ‘held’
thermal image, with continuous moisture reading shown on the same screen, can then be
captured as explained in Section 5.5 above.
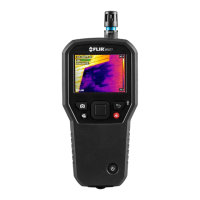
1. Enter the IR + Moisture Image mode (refer to Section 5.2.3 Image Mode).
2. Hold the Image Capture button until crosshairs appear, and the laser is visible (Fig. 5-
7(a)).
3. While continuing to hold the Capture button, aim the laser at the measurement spot.
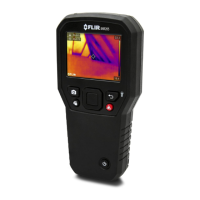
4. Release the Capture button. The image will freeze but the moisture reading will flash and
continue to update as it waits for a measurement.
5. Place the pinless measurement sensor pad of the MR160 against the item targeted by
the laser pointer to make the moisture measurement. Press the Select button to capture
(save) the image; note that the image will include the moisture reading; see Fig. 5-7(b).
6. After a seven second hold period, an image filename will appear on the screen
(FLIRxxxx.bmp), indicating that the image has been saved. During this time-out period,
the user can press Back to cancel the image capture or Select/Capture to save the image.
Fig. 5-7(a) Laser and Crosshairs visible;
Aim the Laser at the test surface