Maintenance of the Machine
66
14/03/2023 212601
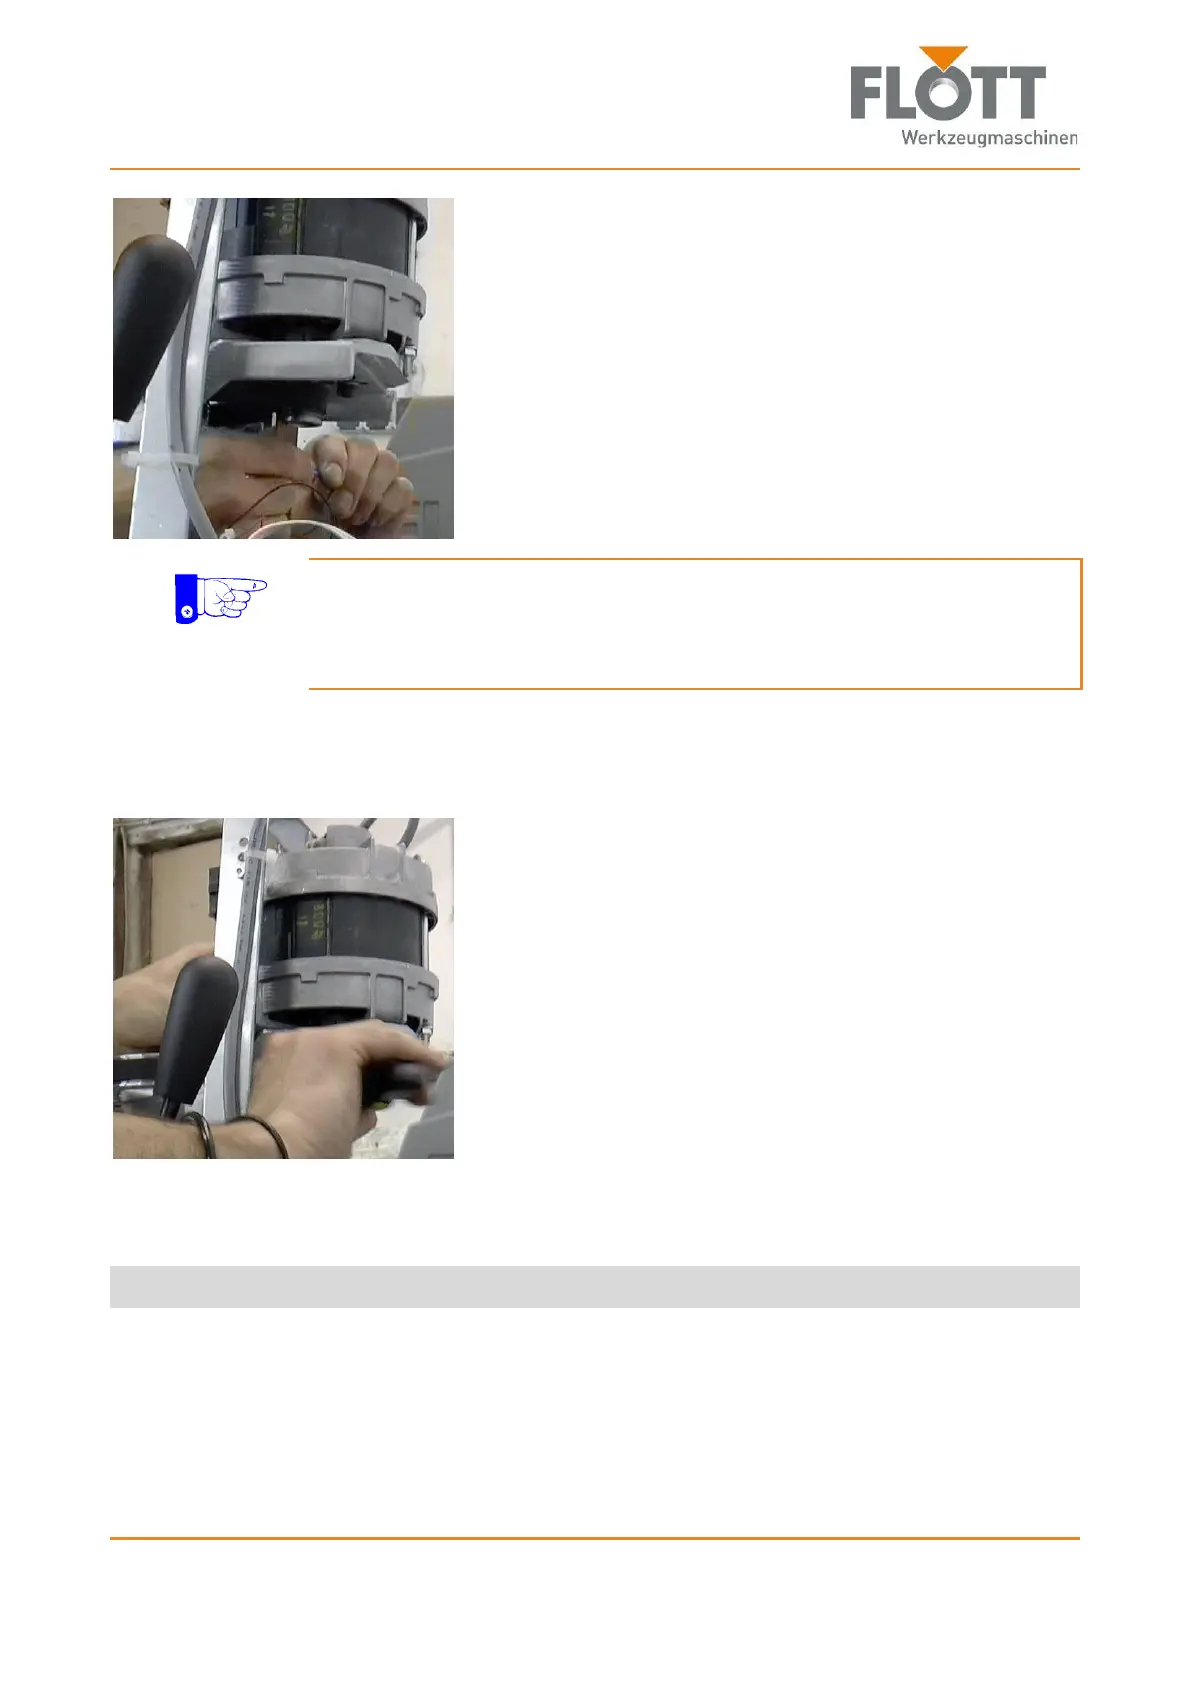
4. On the bottom of the motor bracket, loosen the two size 4
and 5 hexagon socket screws, respectively, to loosen the
motor and rear pulley.
This will relieve the tension of the ribbed V-belt.
Note
Please note that only original spare parts from the manufacturer May be used.
If you use other spare parts, the manufacturer gives no warranty and is not li-
able for functionality and safety of the machine.
5. If necessary:
Remove the damaged ribbed V-belt and replace it by a new one.
When installing the new ribbed V-belt, make sure it is seated correctly and
in alignment on both pulleys.
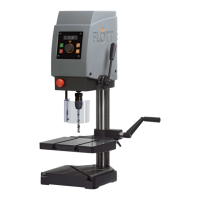
6. Clamp the ribbed V-belt in by
slightly pushing the drive motor backwards with one
hand
checking the tension of the ribbed V-belt with the other
hand.
The tension is correct if the ribbed V-belt between the
pulleys can be pressed in 3-5 mm.
7. Hand-tighten the 2 size 4 and 5 hexagon socket screws,
respectively, on bottom of the motor bracket.
8. Then check that the ribbed V-belt is seated correctly and
runs smoothly when turning the front pulley by hand.
9. Install the protective hood prior to using the machine
again (see section 9.3 Installing/removing the protective
hood, page 62).
The ribbed V-belt is now replaced (if necessary) and correctly tensioned.