Tools required
1¼ in. socket (½ in. drive) and handle
1 in. open-end wrench
7
8
in. open-end wrench
13
16
in. open-end wrench
Check valve outlet replacement kit (014885-1)
Blue Lubricant (A-2185)
Service steps
1. Shut down the system.
WARNING
Place the main electrical disconnect in the OFF
position and bleed down the high-pressure lines.
Place an “Out of Service” tag on the main electrical
disconnect and lock it out. Failure to do so can cause
equipment damage or injury to personnel.
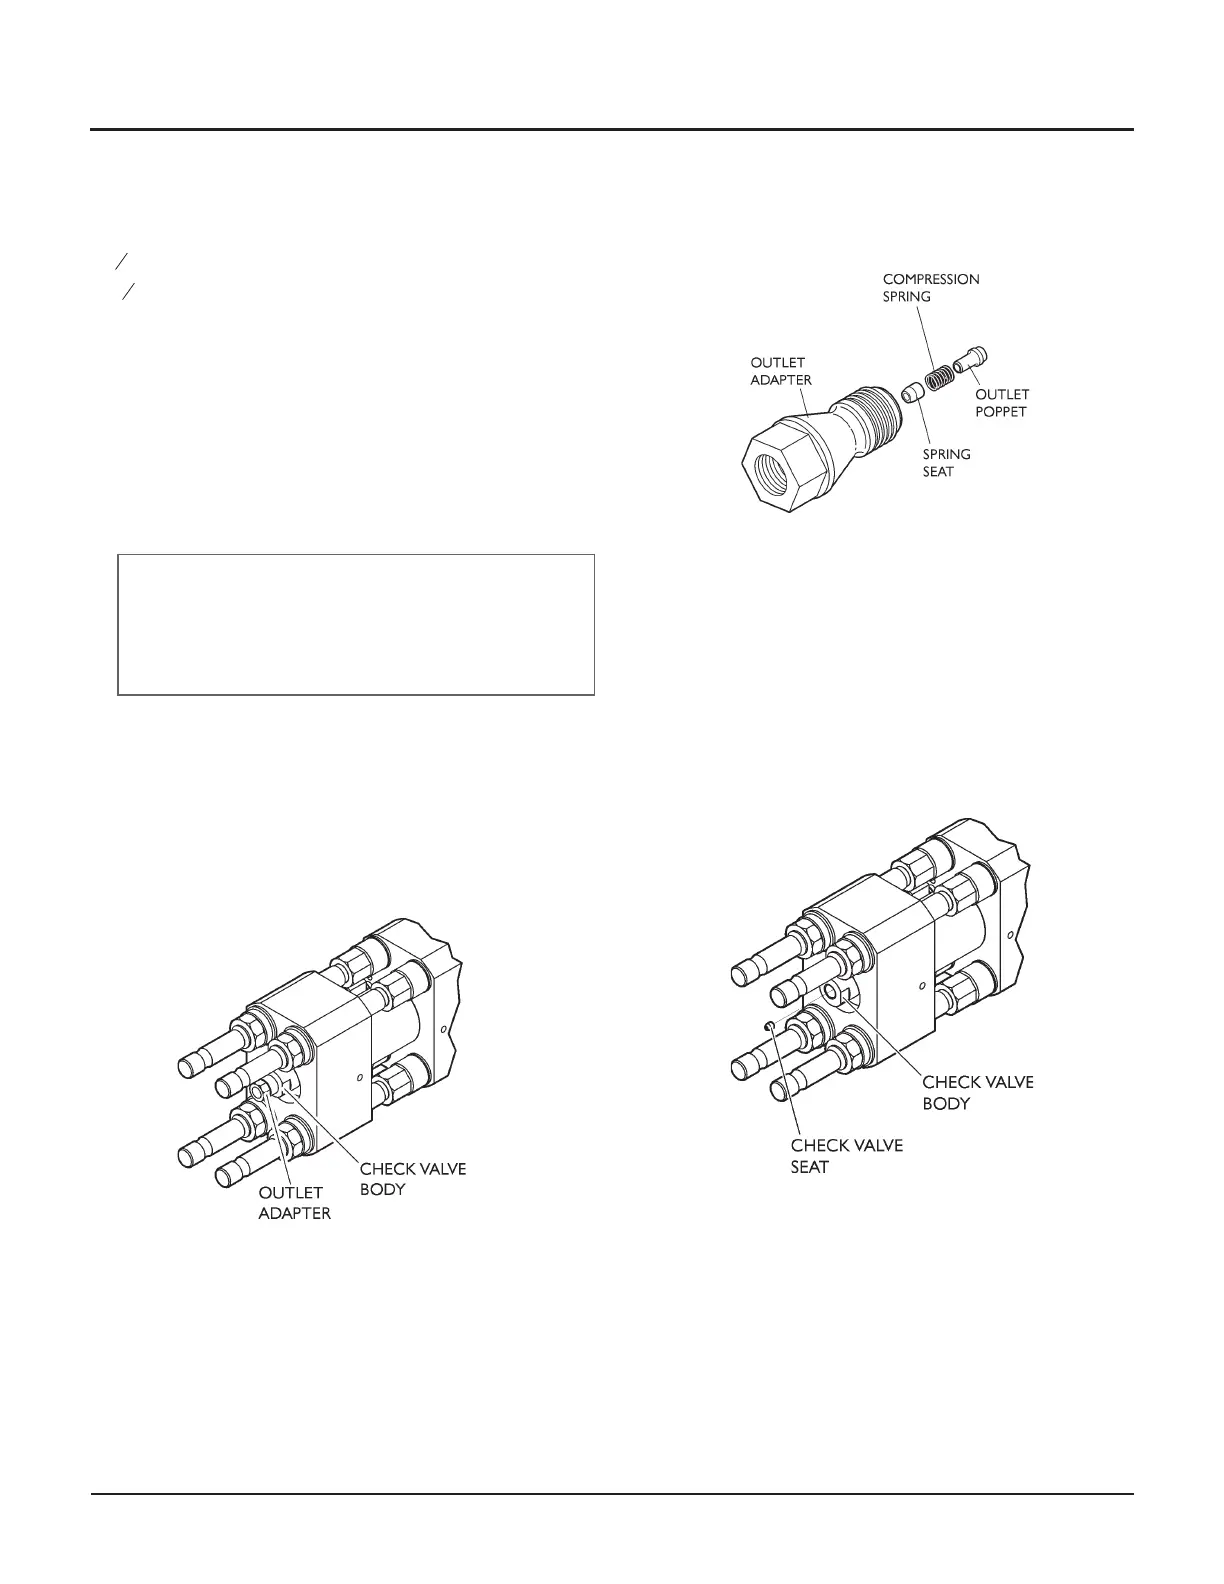
2. Using two wrenches, disconnect the high-pressure
tubing from the check valve outlet adapter. Loosen
the other end of the tubing and move it out of the
way.
3. Using a 1¼ in. socket and handle, unscrew the out-
let adapter from the check valve body.
4. Remove the outlet poppet, compression spring, and
outlet spring seat from the outlet adapter. Discard
the poppet and spring, but set the spring seat aside.
5. Remove the check valve seat from the check valve
body.
Note: The check valve seat can be difficult to re-
move. If necessary, insert the sharpened end of a
small dowel or a sharp pencil into the check valve
seat. Push until the check valve seat is fixed to the
dowel, then pull it out.
6. Using fresh solvent, clean the threads and bore of the
outlet adapter and check valve body.
44 | M-376 © Flow International Corporation
94K HYPERPRESSURE INTENSIFIER