Disassembling the intensifier
1. Shut down the system.
WARNING
Place the main electrical disconnect in the OFF
position and bleed down the high-pressure lines.
Place an “Out of Service” tag on the main electrical
disconnect and lock it out. Failure to do so can cause
equipment damage or injury to personnel.
2. Disconnect the high-pressure tubing from the intensi
-
fier outlet adapter and move it out of the way.
3. Disconnect the supply water hose from the end cap.
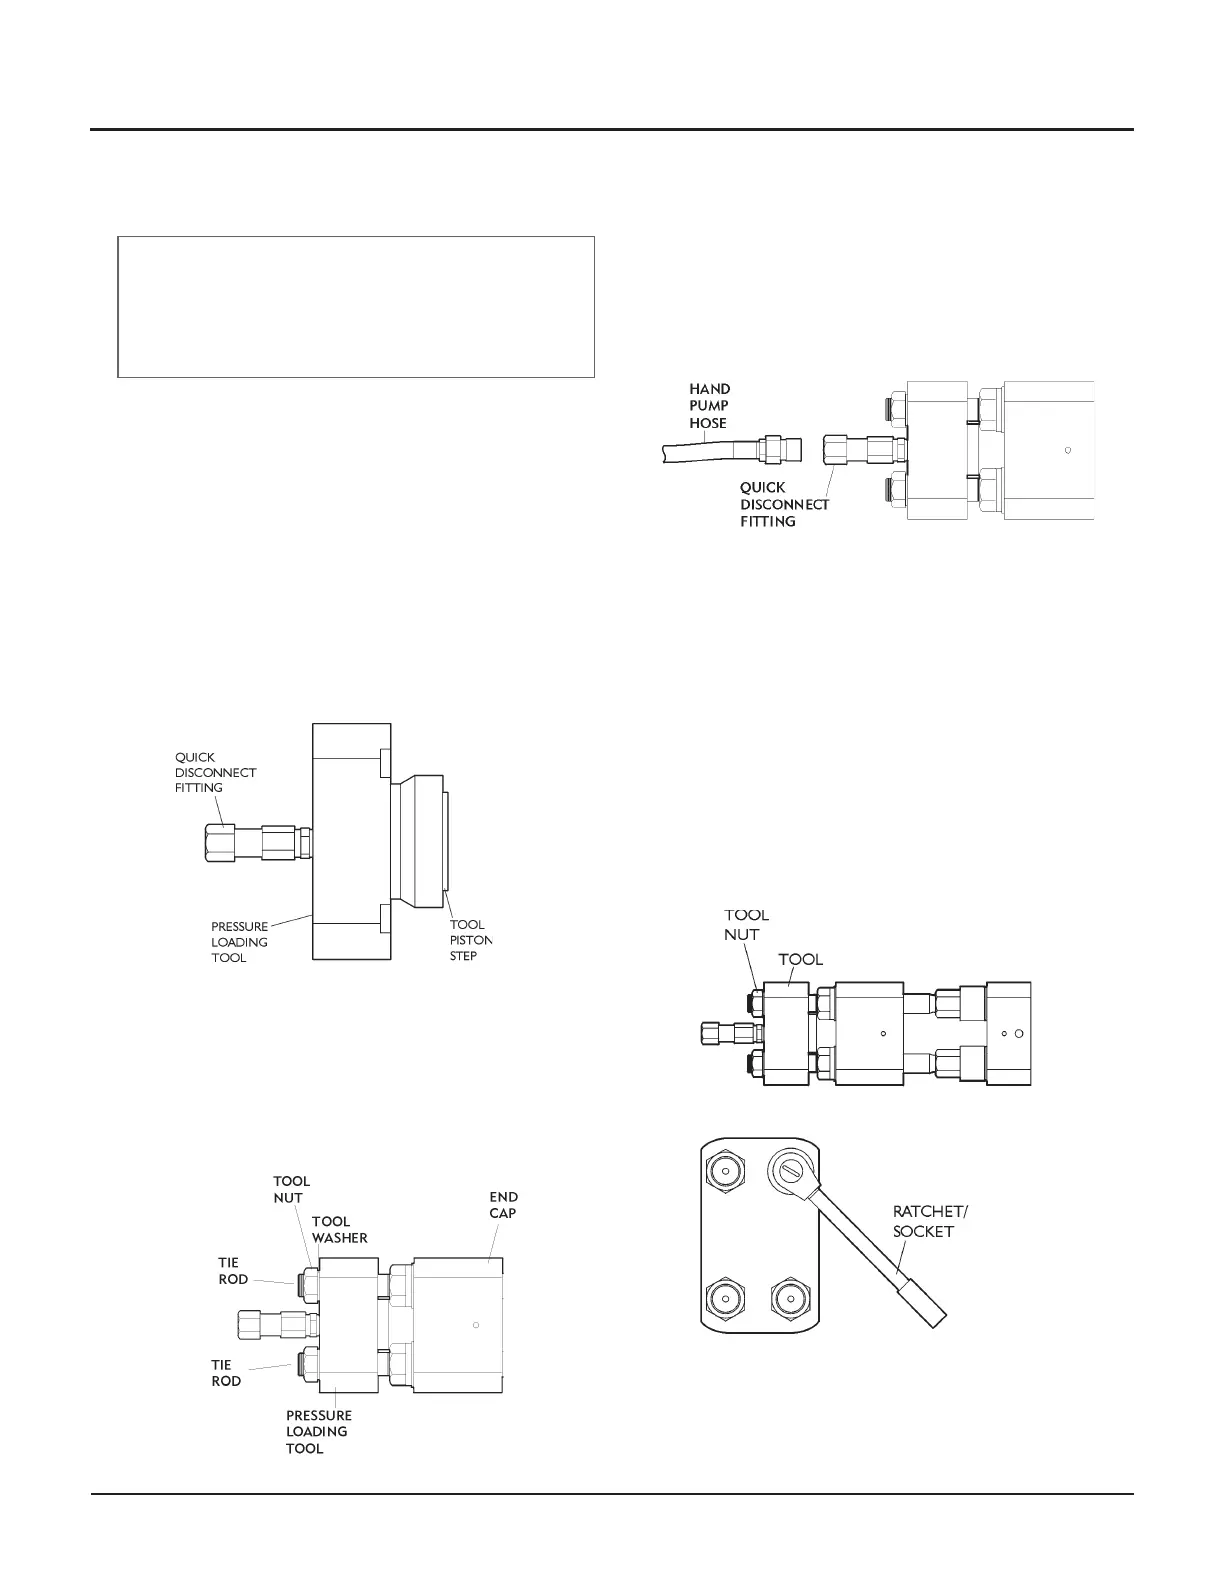
4. Install the pressure loading tool on the tie rods, being
careful to correctly locate the tool piston step in the
end cap counterbore.
CAUTION
Make sure the tool piston step is fully engaged in the
counterbore before continuing. Failure to do so can damage
the end cap or the pressure loading tool.
5. Thoroughly clean the tie rods to ensure no old
anti-seize lubricant remains. Apply fresh anti-seize to
the threads at the end of the tie rods, and on both
sides of the tool washers.
6. Install the tool washers and nuts on the tie rod ends
and run up hand tight to the tool.
7. Connect the hand pump hose to the tool at the
quick-disconnect fitting.
Note: On some tool models the hand pump hose
does not have a quick-disconnect fitting. If this is the
case, leave the hose attached to the tool at all times
to prevent leaking.
8. Open the pressure-release valve on the hand pump
by turning the valve handle counterclockwise one
turn.
9. Collapse the pressure loading tool using a ratchet
and socket on the tool nuts, tightening all of the nuts
until they are snug against the tool.
Note: Oil from the tool will flow back to the hand
pump reservoir.
© Flow International Corporation M-376 | 21
CHAPTER 3
Maintenance Procedures