Getting Started
Reading the Screen
5
Reading the Screen
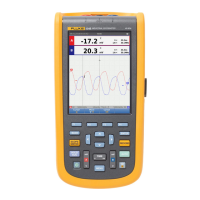
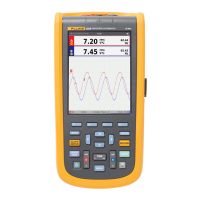
The screen is divided into three areas that are indicated in
Figure 1. The areas are:
Reading area (A): Displays the numeric readings. If only
Input A is on, you will see the Input A readings only. If
Input B is on you also will see the Input B readings.
Waveform area (B): Displays the Input A(B) waveform.
The trace identifier (A) is visible on the left of the
waveform. The zero icon (-) identifies the ground level of
the waveform. The bottom line displays the ranges / div
and the power indicator (line or battery).
Note:
When battery powered, the battery indicator
informs you about the condition of the battery
from full to empty:
Menu area (C): Displays the menu that provides choices
available through the blue arrow keys and the ENTER key:
+
Fluke 123
Fluke 124
Figure 1. The Screen Area's