45
Users Manual
5-2
To determine which computer interface is enabled, press in POWER to turn the meter on.
Press S, then press R
. If "baud" and a rate are displayed, the RS-232 interface is
enabled; if "IEEE" is displayed, the IEEE-488 interface is enabled.
Preparing the Meter for Operations via the RS-232 Interface
The RS-232 interface allows ASCII, asynchronous, serial communication between the
meter and a host, a serial printer, or terminal.
Setting Communication Parameters (RS-232)
The communication parameters for the RS-232 computer interface are shown in Table
5-1 as they are set when the meter leaves the factory. Interface, baud rate and parity
parameters can be set directly by the user; data bit and stop bit parameters cannot.
In order for the meter and host to communicate via the RS-232 interface, the
communication parameters of the meter must match those of the host. Setting RS-232
communication parameters can only be done from the front panel. If the communications
parameters of the host and meter do not match, proceed as follows to select the
appropriate baud rate and parity parameters for the meter:
1. Press in the POWER button on the front panel to turn the meter on.
2. Press S, then press R.
The baud rate currently selected is shown in the primary display, and "baud" is
shown in the secondary display.
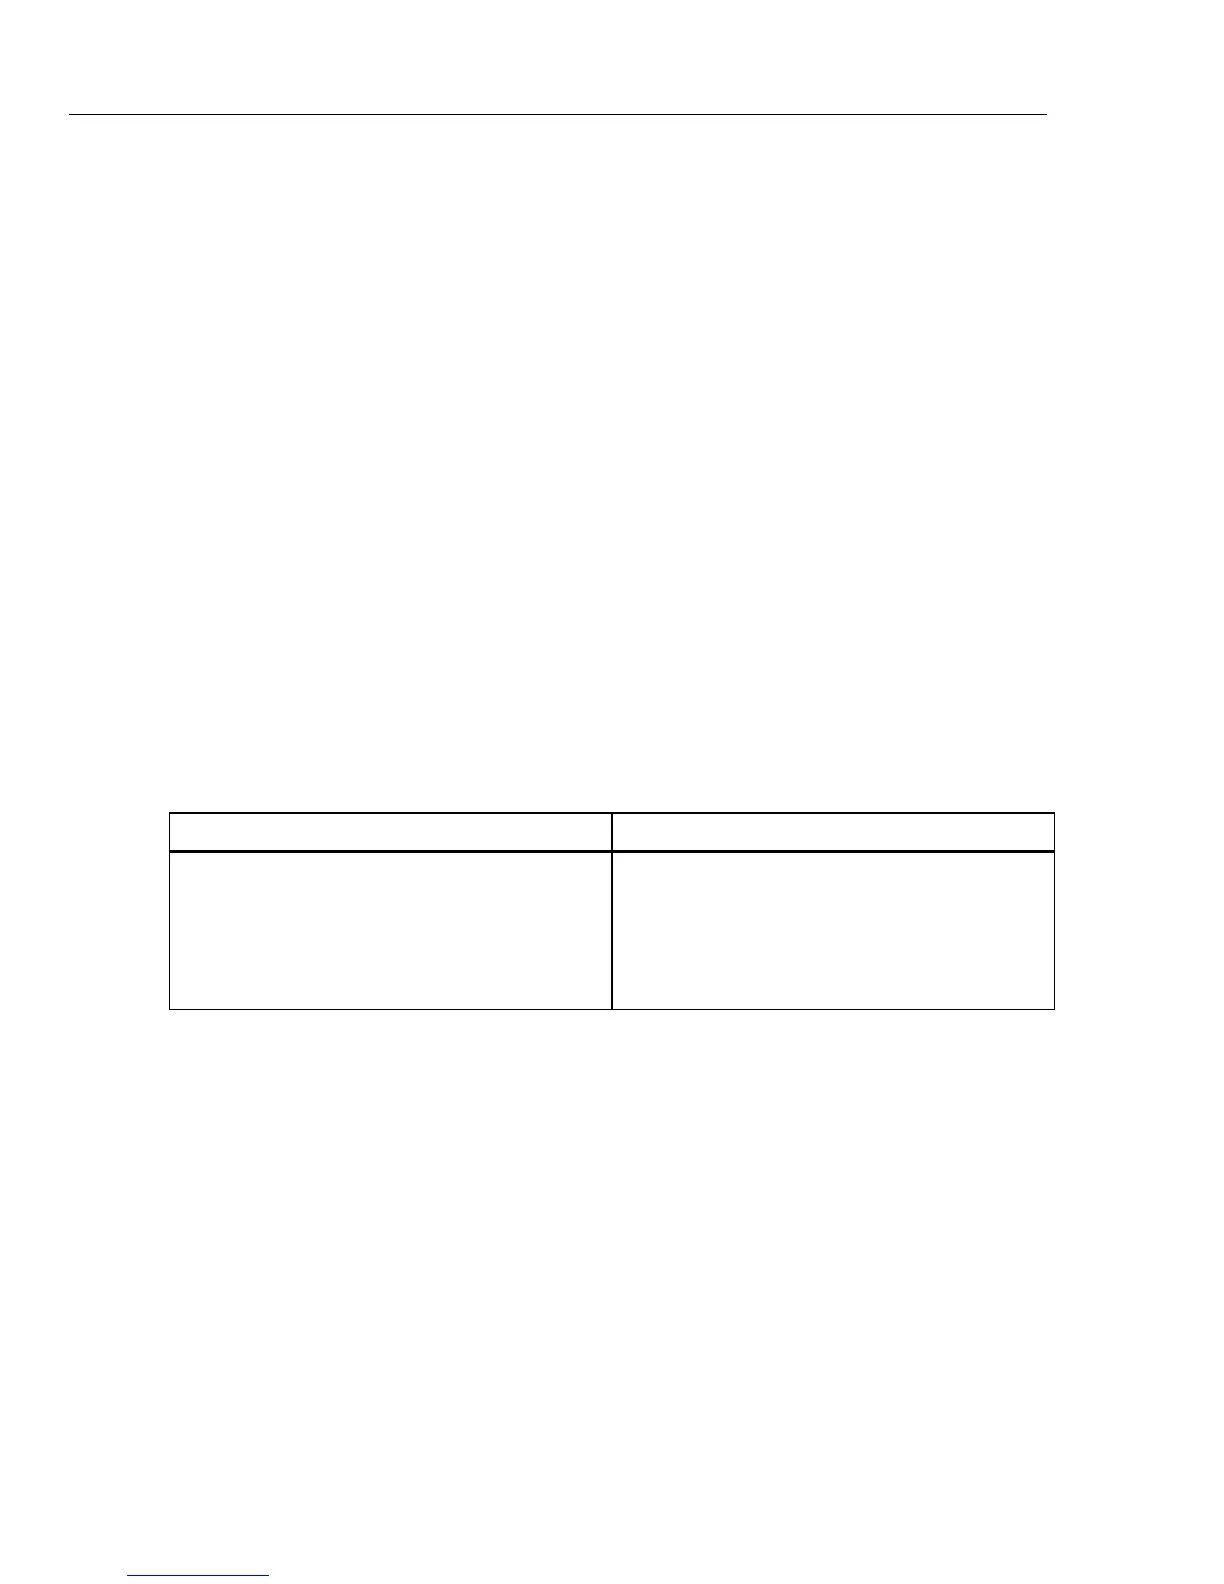
Table 5-1. Factory Settings of RS-232 Communication Parameters
Parameter Factory Setting
Interface
Baud Rate
Parity
Number of Data Bits
Number of Stop Bits
Echo
RS-232 (Print-only rate set to 0)
9600
None (Parity bit 0)
8 (7 Data bits plus 1 parity bit)
1
On
3. Press U or T to scroll to the desired baud; then press E to set the selected
baud rate.
If a baud rate other than "IEEE" is selected, the RS-232 interface is enabled, and the
list editor is invoked on parity.
4. Press U or T to scroll to "E" for even, "Odd", or "no" for none; then press E
to set the parity.
5. "Echo" now appears on the secondary display, and "On" or "OFF" appears on the
primary display.
When Echo is "On", each command sent to the meter over the RS-232 interface is
"echoed" to the host’s display screen. If Echo is "OFF", commands are not echoed.
To select an Echo mode, press T or U to select "OFF" or "On", respectively.
Then press E to set the selected Echo state.