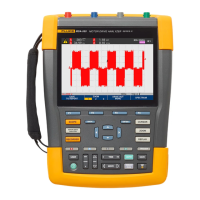
MPS450 SERVICE MANUAL CALIBRATION
15
¾ Zero the DMM.
¾ Select NEXT by pressing the [F4] key.
2) ECG High-Range Gain:
¾ Note the words that appear on the LCD screen above the function keys:
DOWN (the [F1] key) decreases the calibration setting.
UP (the [F2] key) increases the calibration setting.
PREV (the [F3] key) returns to the previous calibration step.
NEXT (the [F4] key) advances to the next calibration step.
(The display also indicates the DMM connections, the name of the step, and the required
DMM reading.)
¾ Select UP or DOWN (by pressing the [F2] or [F1] keys) to adjust the MPS450 so that the
DMM reads 5.0 ± 0.005 mV.
¾ Select NEXT by pressing the [F4] key.
¾
3) ECG Low-Range Reference:
¾ Zero the DMM.
¾ Select NEXT by pressing the [F4] key.
4) ECG Low-Range Gain:
¾ Select UP or DOWN (by pressing the [F2] or [F1] keys) to adjust the MPS450 so that the
DMM reads 0.5 ± 0.0005 mV.
¾ Select NEXT by pressing the [F4] key.
5) ECG PACER Gain:
¾ Select UP or DOWN (by pressing the [F2] or [F1] keys) to adjust the MPS450 so that the
DMM reads 10±1 mV.
¾ Select NEXT by pressing the [F4] key.
6) RESPIRATION Reference:
¾ Change the DMM setting to read 30 Ω.
¾ Zero the DMM.
¾ Select NEXT by pressing the [F4] key.
7) RESPIRATION Gain:
¾ Select UP or DOWN (by pressing the [F2] or [F1] keys) to adjust the MPS450 so that the
DMM reads 3 ± 0.03 Ω.
¾ Select NEXT by pressing the [F4] key.