Launch Compensation: If you will use launch/tail cords set
this to On.
Wavelength: Select the wavelengths for the test.
Fiber Type: On the FIBER TYPE screen, select a fiber type
that is applicable. To see a different group of fiber types,
tap MORE, then tap a group.
Test Limit: Select the correct test limit for the job. To see a
different group of limits, tap MORE, then tap the name of
a group.
2-4
To save the settings, tap SAVE on the TEST SETUP screen.
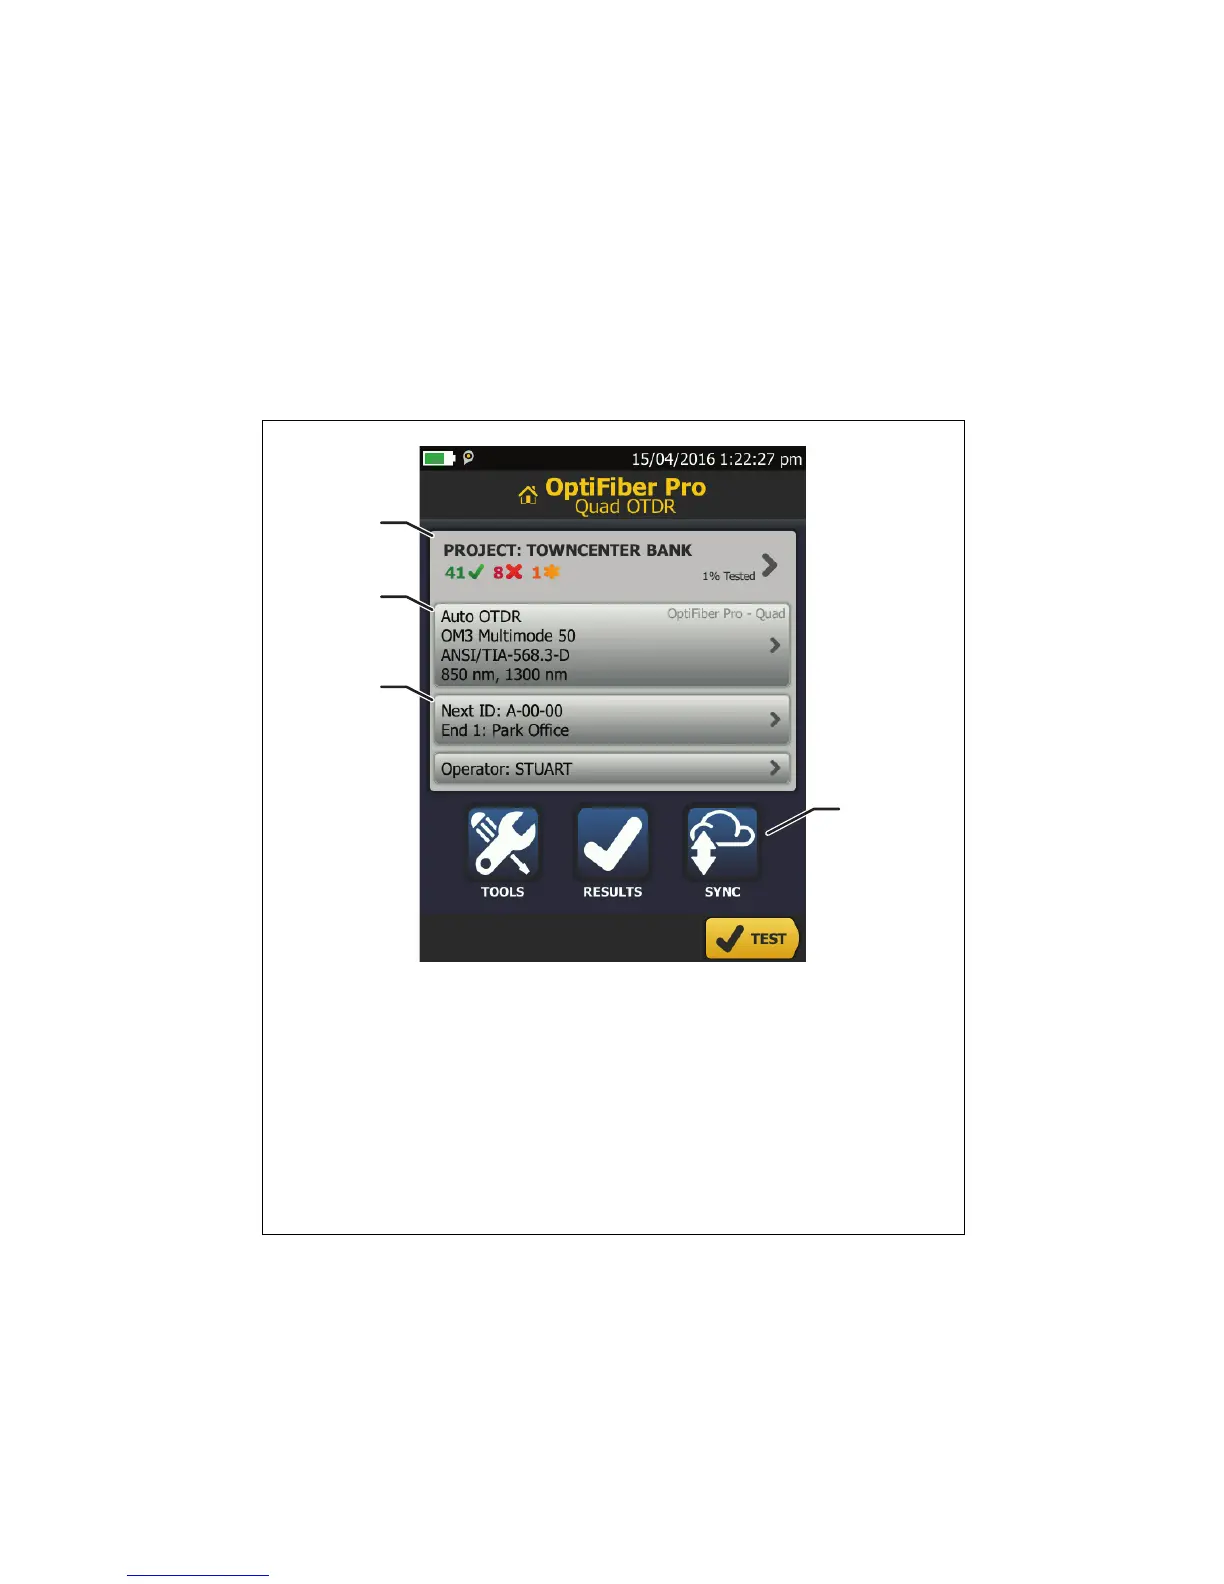
Figure 2. Panels on the Home Screen
GSM01.EPS
To set up a project, tap the PROJECT panel.
To change settings for the test or select a different test, tap
the test setup panel.
To set up cable IDs, turn on Auto Save, and change the
settings for the fiber End, tap the Next ID panel.
To upload test results to LinkWare Live, tap SYNC.