WWarning
*
Do not look directly into optical connectors. Some sources
emit invisible radiation that can cause permanent damage
to your eyes.
Button that controls the VFL.
Micro-AB USB port: This USB port lets you connect the tester to
a PC so you can upload test results to the PC and install
software updates in the tester.
Type A USB port: This USB host port lets you save test results on
a USB flash drive, connect the FI-1000 video probe to the tester,
or connect a Wi-Fi adapter for access to Fluke Networks cloud
services.
Headset jack.
: Starts a test. To start a test, you can also tap TEST on the
display.
Power key.
: Press to go to the home screen.
Connector for the ac adapter. The LED is red when the battery
charges, and green when the battery is fully charged. The LED
is yellow if the battery will not charge.
RJ45 connector: Lets you connect to a network for access to
Fluke Networks cloud services.
Decal with laser
safety information:
How to Do an OTDR Test
1.
Power the Tester
Charge the battery if necessary. Connect the ac adapter to
ac power and to the adapter connector () shown in Figure
1. You can use the tester while the battery charges.
2.
Select Settings
2-1
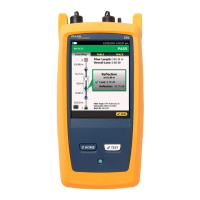
On the home screen, tap the test setup panel (see
Figure 2).
2-2
On the CHANGE TEST screen, tap EDIT.
2-3
On the TEST SETUP screen, tap the panels to change
settings:
Test Type: Select Auto OTDR.
-continued-
Shop for Fluke Networks products at:
1.800.561.8187
ShopFlukeNetworks.ca