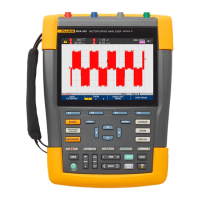
Performance Verification
4.5 Input A and Input B Tests
4
4-17
• Press to open the SCOPE INPUTS menu, and choose:
INPUT A: ■ AC | ■ NORMAL | INPUT B: ■ AC | NORMAL■
• Press to open the SCOPE INPUTS menu.
• Press
to open the TRIGGER menu, and choose:
INPUT: A | SCREEN UPDATE: ■ FREE RUN | AUTO RANGE: ■ > 1HZ
3. Set the 5500A to source an AC voltage, to the first test point in Table 4-4
(NORMAL output, WAVE sine).
4. Observe the Input A and Input B main reading and check to see if it is within the
range shown under the appropriate column.
5. Continue through the test points.
6. When you are finished, set the 5500A to Standby.
Table 4-4. Input A and B AC Input Coupling Verification Points
5500A output, V rms 5500A Frequency Reading A-B
500.0 mV 10 Hz > 344.0
500.0 mV 33 Hz > 469.0
500.0 mV 60 Hz > 486.5
4.5.12 Input A and B Volts Peak Measurements Test
WARNING
Dangerous voltages will be present on the calibration source
and connecting cables during the following steps. Ensure that
the calibrator is in standby mode before making any connection
between the calibrator and the test tool.
Proceed as follows to test the Volts Peak measurement function:
1. Connect the test tool to the 5500A as for the previous test (see Figure 4-5).
2. Select the following test tool setup:
• Press to open the SCOPE INPUTS menu.
• Press
to open the TRIGGER menu, and choose:
INPUT: A | SCREEN UPDATE: ■ FREE RUN | AUTO RANGE: ■ > 15HZ
• Press to select auto ranging (AUTO in top of display).
• Press to open the INPUT A MEASUREMENTS menu, and choose:
MEASURE on A: ■ PEAK
From the INPUT A PEAK sub-menu choose:
PEAK TYPE : ■ PEAK-PEAK
• Press to open the INPUT B MEASUREMENTS menu, and choose:
INPUT B: ■ ON | MEASURE on B: ■ PEAK