4. Sensors and input/output installation
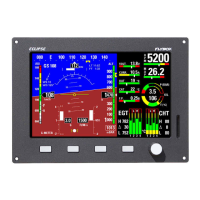
CHT sensors
Up to 6 CHT sensors can be installed; the supported types of sensor are:
- ROTAX 912/914 preinstalled CHT sensors
Rotax install 2 CHT sensors with a single wire each. Connect the first sensor to pin #14 of CON3 connector; connect the second
sensor to pin #15.
- J-type thermocouples
Thermocouple probes have a two wires connection: positive wire and negative wire. The positive wire are connected to pins #14
to #19 (CHT1 to CHT6) of CON3 connector, the negative wires are connected to pins #1 to #6.
NOTE: Use only thermocouples with insulated wires.
- PT1000 resistive sensors
This two wire resistive sensors must be connected between aircraft ground (GND) and pins #14 to #19 (CHT1 to CHT6) of CON3
connector.
NOTES:
•
It's not possible to mix different type of CHT sensors (i.e. 2 Rotax + 2 thermocouples).
•
If less than 6 sensors are installed you must leave unconnected the higher CHT inputs (i.e. for 2 sensors installation connect
only CHT1 and CHT2 inputs, for 4 sensors installation connect inputs CHT1-CHT2-CHT3-CHT4).
•
If you use all 6 inputs with 6 thermocouples, the autopilot remote button can't be connected.
EGT sensors
Up to 6 EGT K-type thermocouples can be installed. Thermocouple type sensors have a two wire connection: positive wire and
negative wire. The positive wire is connected to pins #20 to #25 (EGT1 to EGT6) of CON3 connector, the negative wire is
connected to pins #7 to #12 of CON3 connector.
NOTES:
•
Use only thermocouples with insulated wires.
•
If less than 6 sensors are installed you must leave unconnected the higher EGT inputs (i.e. for 2 sensors installation
connect only EGT1 and EGT2 inputs, for 4 sensors installation connect inputs EGT1-EGT2-EGT3-EGT4).
Flybox® EGT thermocouples
Flybox® EGT thermocouples are K-type; positive wire is RED, negative is GREEN.
•
INSTALLATION NOTES:
- Drill a 6 mm diameter hole in the exhaust manifold (at the position indicated by the engine's manufacturer) and weld
the furnished probe coupling.
- Insert the thermocouple (with the nut and the probe retainer) in the probe coupling and position its extremity near the center
of the exhaust manifold
.
- Fix the thermocouple in this position by blocking the nut. Note that if required the thermocouple can be
bended but with a minimum radius of 3 mm.
15