TESTING FOR SPILLAGE ((continued)
NOTE: IIf sspillagge iiss sstill iindiccated aafter uundertakingg aall oof tthe aabove, tthere mmay bbe aa ffault iin tthe fflue, oor iinssufficcient
ventilation iiss ppressent.
If the problem cannot be rectified immediately, then expert advice should be sought. Inform the user, disconnect
the fire, and attach an explanatory label.
BRIEFING TTHE CCUSTOMER
All instructions must be handed to the user for safekeeping.
Show tthe ccusstomer hhow tto lligght aand ccontrol tthe ffire
.
After commissioning the appliance, the customer should be instructed on the safe use of the appliance and the
need for regular servicing. Frequency of service depends on usage, but MUST be carried out at least once
annually.
The stainless steel bowl may be cleaned using a soft damp cloth or stainless steel cleaner.
IMPORTANT
- Always clean in the direction of the grain, and never across it as this will scratch the surface. It is
recommended that a small area is attempted before cleaning the entire stainless steel area - to ensure the clean-
ing material is suitable.
Pebble Models : DO NOT attempt to spray paint the pebbles, or wash them in water.
SERVICING
Ensure that the fire is fully cold before attempting service. A suggested procedure for servicing is detailed below.
1. Lay out the dust sheet and tools.
2. Carefully remove the control knob, and front panel of the fire, and ceramic components (where
applicable).
3. Remove the decorative frame, and check frame top for discolouration and signs of spillage.
4. Remove the control knob and remove the front panel of the appliance.
5. Isolate the gas supply at the appliance inlet elbow, and disconnect the gas supply pipe. Remove the
four screws securing the burner to the firebox.
6. Lift the burner tray from firebox.
7. Remove the firebox as detailed in the relevant section.
8. Check the area behind the firebox for rubble accumulation and remove. If debris is excessive,
initiate remedial work on the flue.
9. Check the flue with smoke pellet for correct operation.
10. Re-fit the firebox using new seals where necessary.
11. Strip off the burner pipes and clean thoroughly.
12. Clean out the injector and pilot assembly. DO NOT attempt to dismantle the pilot unit.
13. Ensure the injector is aligned squarely with the venturi tube. Re-assemble and re-fit the burner unit.
14. Re fit and replace the glass crystals and ceramics where applicable, using genuine spares where
necessary.
9
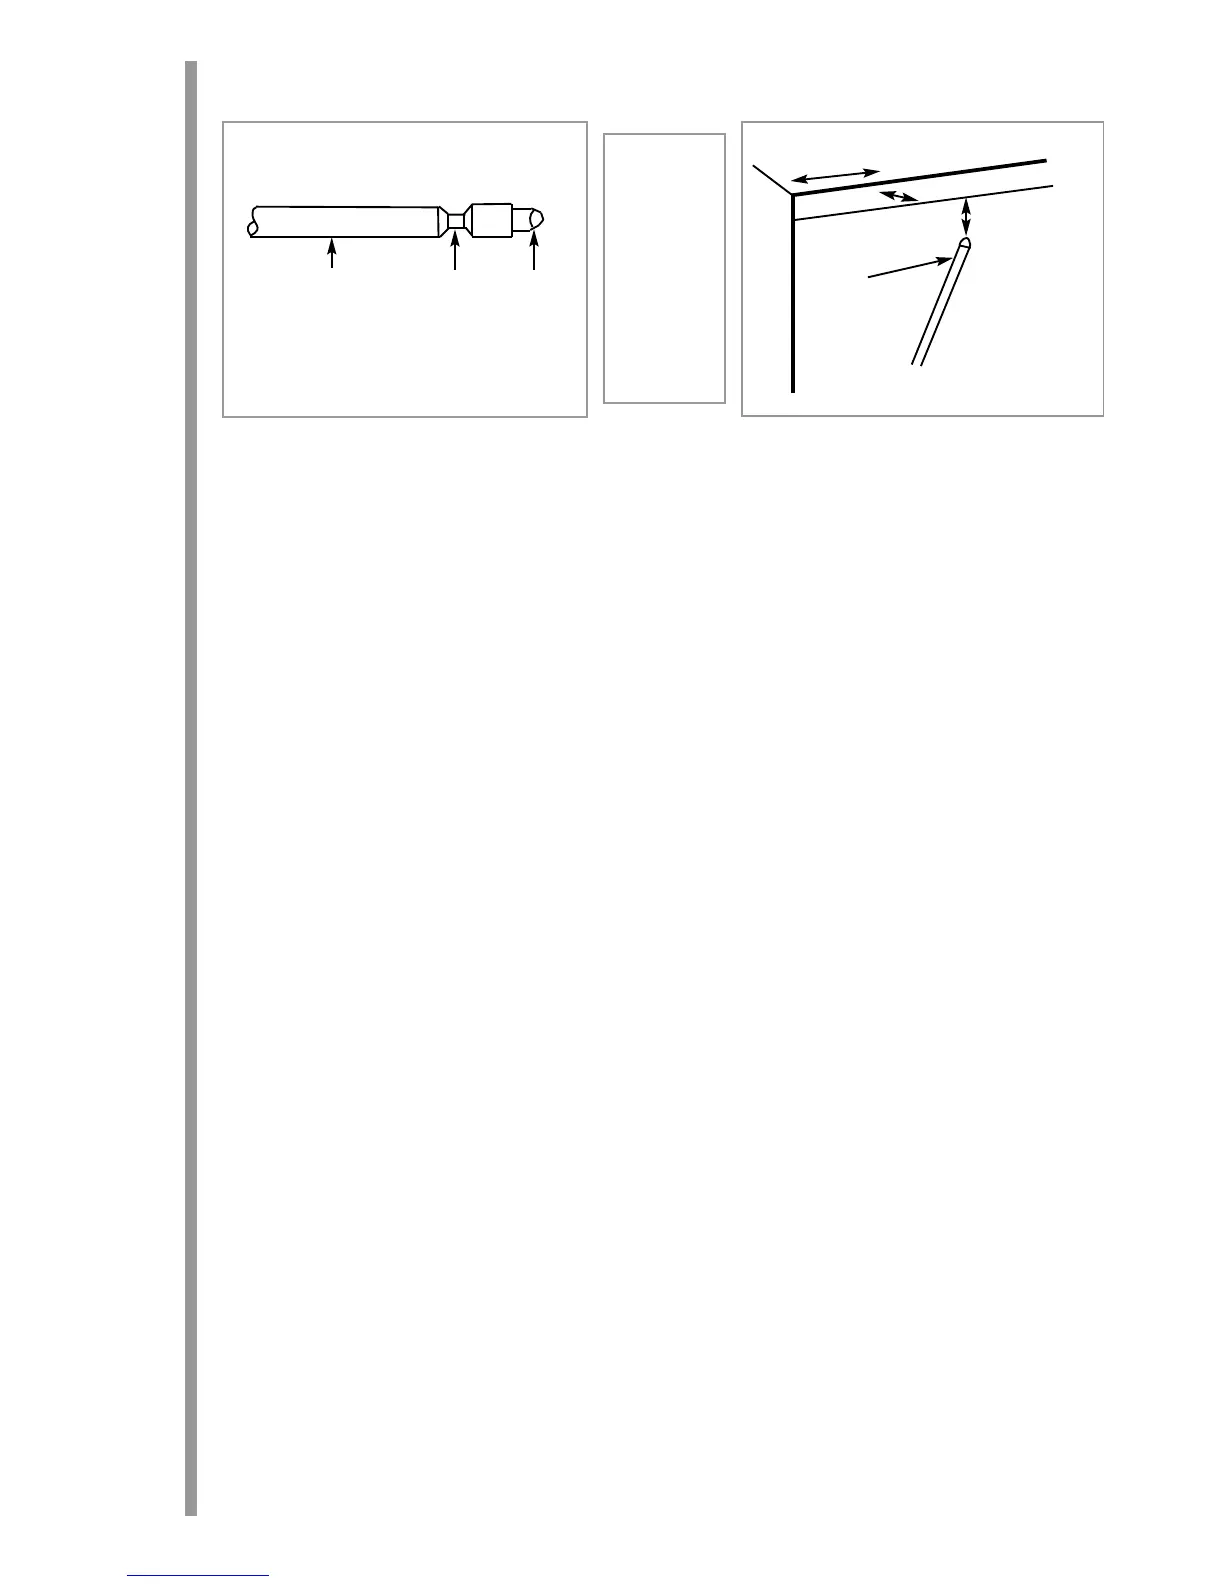
Match
Crimp
Tube
Cross section of smoke match tube
Make a smoke match tube from 10mm
diameter tube. Seal off one end and crimp
the tube to prevent the smoke match from
sliding down inside.
A.25mm down
from top of
opening
B. 25mm in
from front of
opening.
C. Disregard
outer 50mm
either side of
fireplace open-
ing
A
B
C
Smoke Match
In Tube
14.6
15.0
14.5