FoMaKo -
Focus Your Streaming www.fomako.net
4. Network Configuration
4.1
Network Connection
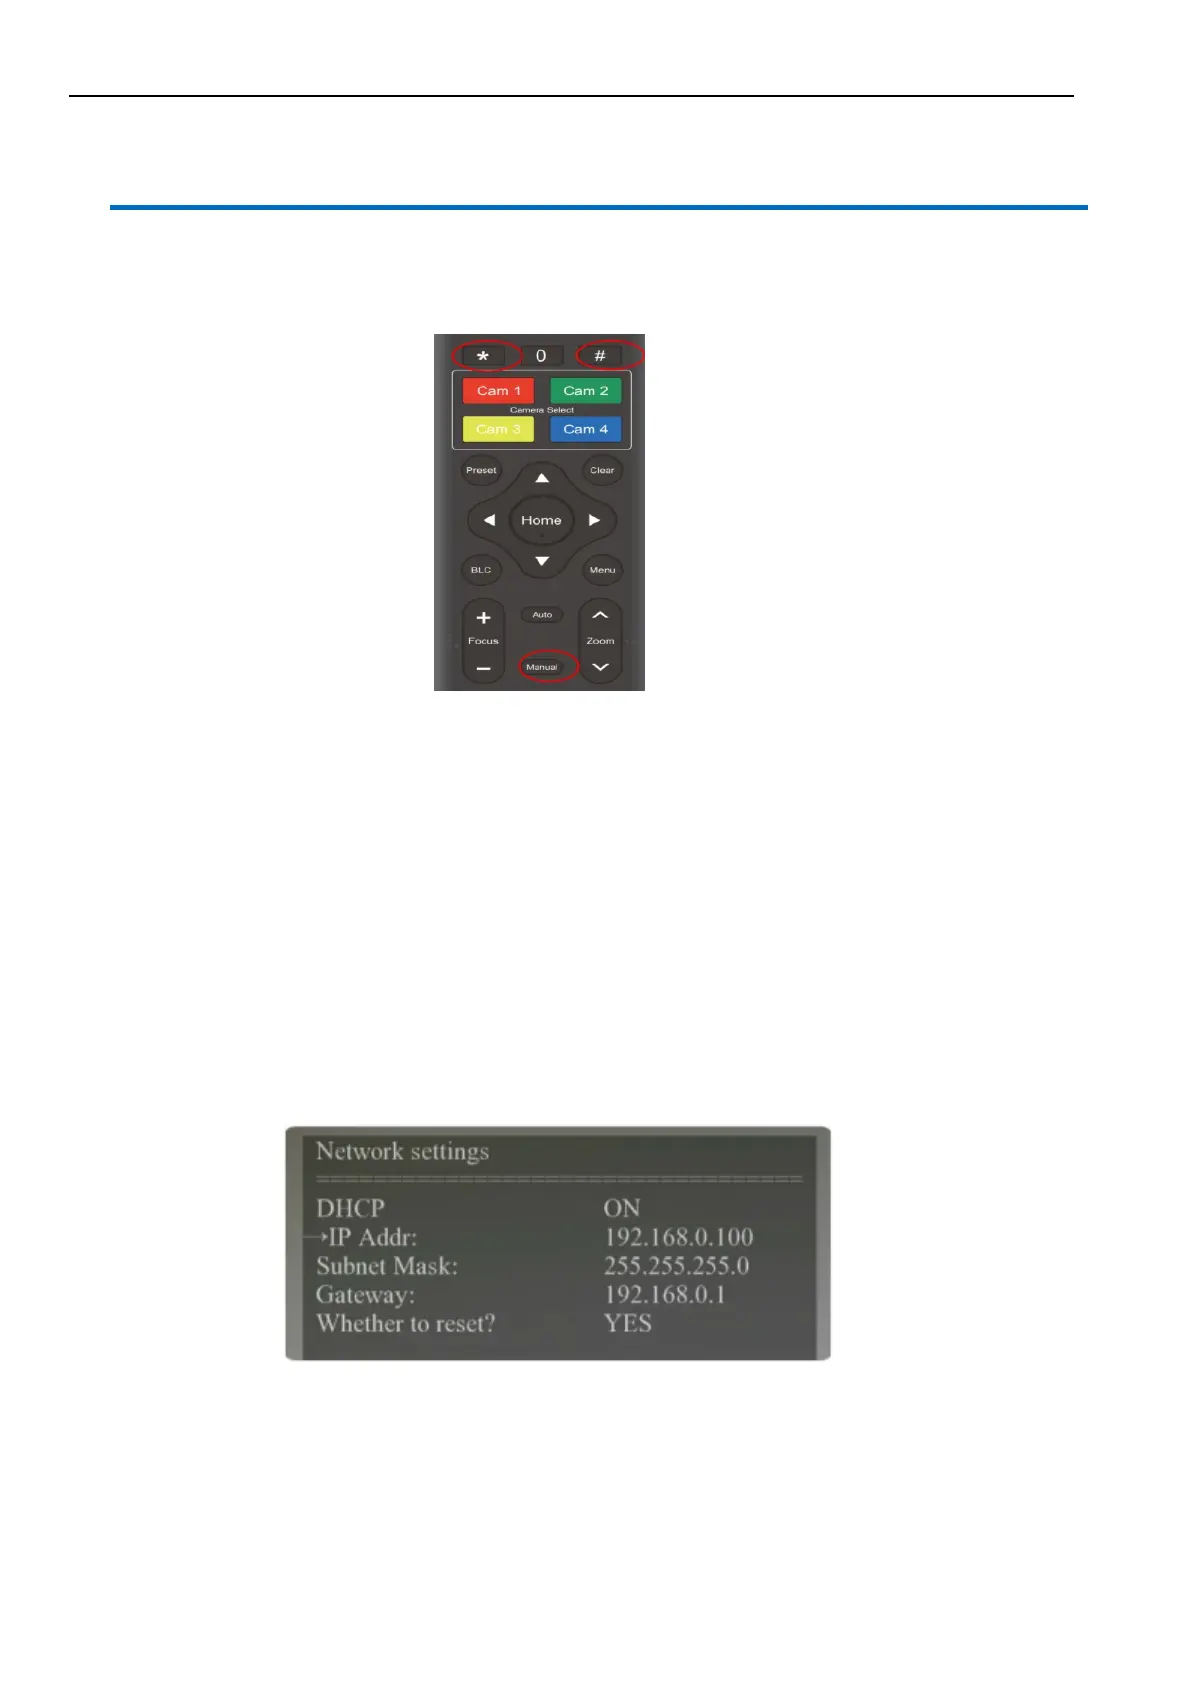
When you powered on the camera for the first time, please press “* # Manual” one by one on the remote control to
restore the camera, it will be more easier to do the following settings.
If you have more than one camera, please restore the cameras one by one:
Power on Cam1, restore Cam1, power off Cam1;
Power on Cam2, restore Cam2, power off Cam2;
Power on Cam3, restore Cam3, power off Cam3;
.......
Now, Please follow the steps to add the camera to your network:
Step 1: Power on the camera
Step 2: Camera HDMI port ->HDMI Cable->TV/monitor-> Camera’s video come out on your screen
Step 3: Camera LAN port -> Network Cable- > Router/switch (which your PC connected to)
Step 4: Go to camera’s menu by press “menu” button on remote control -> Network-> IP Addr.
you can see camera’s IP address which assigned by your router. Please check the picture, this camera’s IP is
192.168.0.100 (Camea’s LCD screen will show the IP address too)
Step 5: Turn “DHCP” to “OFF” , “whether to reset”: YES,
Press “Home” button to confirm the settings on remote control, the camera will reboot.
(Important: turn off DHCP, the camera will keep currently IP address, or when camera reboot, the IP address
will be changed.)
4.2
Web Login
Input the Camera’s IP address(example IP: 192.168.0.100) in the browser (Google Chrome recommend) and click
Enter button to enter into Web Client login page. User can login as administrator and normal user. If login as
administrator (Default User name/Password: admin), users can preview, playback, and set configuration in the Web