P a g e | 15
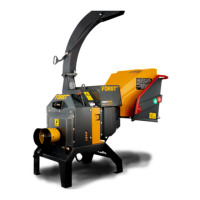
Attaching to the Tractor
Ensure tractor horsepower and lift arm capacity are matched to the chipper
and has a PTO speed of 540rpm
Ensure both tractor and chipper are on level ground
Attach chipper to 3 point linkage, making sure lower arms are the same
length
Attach and adjust top arm on the tractor making sure the chipper is level
Ensure tractor is turned off, ignition key removed and handbrake applied
Connect PTO shaft to Tractor and chipper
Connect power cable from the chipper to the tractor socket
Ensure all PTO guards on tractor, chipper and PTO shaft are all in place with
guard chains attached to prevent rotation.
Engage the PTO shaft on the Tractor and slowly increase the speed to 540
RPM.
Connecting the PTO Shaft
Check the angle of the PTO shaft, never goes beyond 16° when PTO shaft is
rotating and when lifted never goes beyond 40°
Ensure that the two halves of the PTO shaft have at least 150mm overlap
and when lifted, be of a suitable length so as not to butt up against each other
Caution The PTO shaft is protected with a shear bolt, this end of the shaft
must be attached to the tractor PTO.
Transportation
Do Not move the chipper with the PTO engaged
Clear machine of loose woodchip material before departing.
Ensure the chute is securely fixed at the inboard position before departing.
Ensure that the hopper tray is closed in the up position and the locking latch
is fully engaged before departing.
Stopping the Chipper
Push rear stop bar or touch red stop button
Set tractor throttle to idle
Turn off Tractor engine and remove ignition key
When engine stationary disengage PTO shaft
Warning Never disengage PTO shaft when tractor running as chipper flywheel
will continue to run after engine has stopped