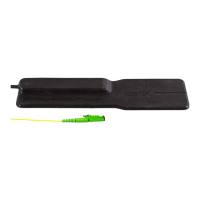
5. Installation
5. Apply Sikaflex-521UV or ergo 6305 (1) to the bottom side (2) of the sensor with
the caulking gun. Recommended layer thickness: 2 mm.
Ensure that no Sikaflex-521UV or ergo 6305 is applied in the sensitive area.
TIP
Experience shows that at least half a cartridge ergo 1665
should be planned for this work step. On rippled surfaces, the
amount of adhesive required can be significantly greater.
6. Apply ergo 1665 (3) to the bottom side (2) of the sensor with the mixing gun.
Recommended layer thickness: 3 … 4 mm.
Observe the pot life of the adhesive: 3 … 6 minutes (temperature-dependent).
7. Press the sensor with the area with Sikaflex-521UV or ergo 6305 onto the
installation position.
8. Press the sensor evenly from back to front until adhesive is pressed out on all
sides.
9. If no adhesive is visible: The installation may have failed because not enough
adhesive has been applied.
10. Temporarily attach the sensor for curing with Kapton adhesive tape.
NOTICE
Incorrect installation due to curing error.
u
Observe curing time.
u
Do not move the sensor during curing.
11. Wait for 13 minutes until the adhesive has cured to a functional strength.
At temperatures lower than +12 °C, the curing time is significantly longer. At
temperatures higher than +25 °C, the curing time is shortened.
For exact curing time see data sheet of the adhesive.
The adhesive is cured when it has changed color from blue to green.
12. Remove adhesive tape or temporary attachment of the sensor.
13. Seal the edge of the sensor with Sikaflex-521UV or ergo 6305.
© fos4X 2019 4-10_1.3.x_4.0_fos4Strain expert-en-us 25 / 42