This document describes the Next Generation Diagnostic Platform NT726TS User's Manual V1.0, a brand new Android-based scan tool designed for car fault diagnostics, service functions, and accurate test data. It is suitable for busy garages and workshops seeking up-to-date technology.
Trademarks and Copyright
FOXWELL is a trademark of Shenzhen Foxwell Technology Co., Ltd. All other marks mentioned are trademarks or registered trademarks of their respective holders. The manual's content is copyrighted ©2022 by Shenzhen Foxwell Technology Co., Ltd., with all rights reserved. The information, specifications, and illustrations are based on the latest available data at the time of printing, and Foxwell reserves the right to make changes without notice.
For the safety of the user and others, and to prevent damage to equipment and vehicles, the manual emphasizes thorough reading before operating the tool. Safety messages are provided throughout to guide careful use. Users must always refer to and follow safety messages and test procedures from the vehicle manufacturer.
Safety Message Conventions:
- DANGER: Indicates an imminently hazardous situation that will result in death or serious injury if not avoided.
- WARNING: Indicates a potentially hazardous situation that could result in death or serious injury if not avoided.
- CAUTION: Indicates a potentially hazardous situation that may result in moderate or minor injury if not avoided.
Important Safety Instructions (WARNING):
- Do not route the test cable in a way that interferes with driving controls.
- Do not exceed specified voltage limits between inputs.
- Always wear ANSI-approved goggles to protect eyes from propelled objects, hot, or caustic liquids.
- Be aware of hazardous substances like fuel, oil vapors, hot steam, toxic exhaust gases, acid, and refrigerant, which can cause serious injury or death.
- Do not use the tool in areas where explosive vapors may collect (e.g., below-ground pits, confined areas, or areas less than 18 inches (45 cm) above the floor).
- Do not smoke, strike matches, or cause sparks near the vehicle during testing. Keep all sparks, heated items, and open flames away from the battery and fuel/fuel vapors due to high flammability.
- Keep a dry chemical fire extinguisher suitable for gasoline, chemical, and electrical fires in the work area.
- Be aware of high-speed rotating parts when the engine is running and maintain a safe distance to avoid serious injury.
- Avoid touching hot engine components to prevent severe burns.
- Block drive wheels before testing with the engine running. Set the transmission to park (automatic) or neutral (manual) and never leave a running engine unattended.
- Do not wear jewelry or loose-fitting clothing when working on the engine.
- Do not connect or disconnect equipment while the ignition is on or the engine is running.
- IMPORTANT: Do not soak the scanner in water to prevent damage. Do not use solvents like alcohol to clean the display; use a mild non-abrasive detergent and a soft cotton cloth.
One-Year Limited Warranty
Shenzhen Foxwell Technology Co., Ltd. ("FOXWELL") warrants this product to be free from defects in material and workmanship for one (1) year from the original purchase date. If the product fails under normal use during this period due to defects, FOXWELL will, at its sole option, repair or replace it without charge for parts or labor.
Terms and Conditions:
- Repaired or replaced products are warranted for the remainder of the original warranty period.
- The warranty does not cover abnormal use, improper storage, unauthorized modifications/repairs, misuse, neglect, abuse, accident, alteration, improper installation, or damage from shipping or external causes (e.g., collision, fire, flooding, natural disasters, battery leakage, theft, blown fuse, improper electrical source, or use with non-FOXWELL products).
- The customer bears the cost of shipping the product to FOXWELL, while FOXWELL covers return shipping after service.
- FOXWELL does not warrant uninterrupted or error-free operation. For problems during the warranty period, the consumer should return the product to the place of purchase, contact a local distributor, or visit www.foxwelltech.us.
- To process a return, the customer must include a return address, contact number, problem description, and original invoice with purchase date and serial number.
- The customer will be billed for charges not covered by the warranty.
- FOXWELL will repair the product within 30 days of receipt. If repairs cannot be completed within 30 days or after a reasonable number of attempts, FOXWELL will provide a replacement or refund the purchase price (less a reasonable amount for usage).
- If a returned product's problem is not covered by the warranty, the customer will be notified with an estimate of repair charges and shipping costs. If the estimate is refused, the product will be returned freight collect. Post-warranty returns are subject to FOXWELL's normal service policies, with the customer responsible for all shipping charges.
- Limitation of Liability: Any implied warranty of merchantability or fitness for a particular purpose is limited to the duration of the written warranty. This warranty is the consumer's sole and exclusive remedy. FOXWELL is not liable for special, incidental, punitive, or consequential damages (including loss of benefits, profits, savings, revenue, data, use of product/equipment, capital, substitute equipment, downtime, third-party claims, or property injury) resulting from product purchase/use or breach of warranty/contract/negligence/strict tort/other legal/equitable theory, even if FOXWELL was aware of potential damages. FOXWELL is also not liable for service delays or loss of use during repair.
- Some states do not allow limitations on implied warranty duration or exclusion/limitation of incidental/consequential damages, so these limitations may not apply to all consumers. This warranty grants specific legal rights, and consumers may have other rights that vary by state.
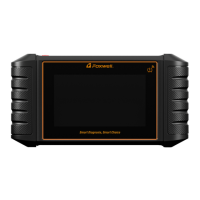
Device Description
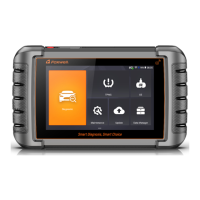
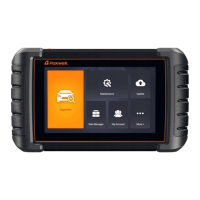
The NT726TS is an Android-based scan tool with a 5.5" TFT LCD Touch Screen (1280x720 pixels) that displays menus, test results, and operation tips. It features a Power Status Indicator.
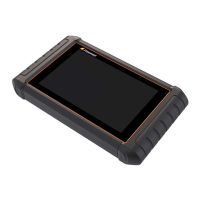
Top View:
- Power Switch: Turns the scanner on/off, enters/wakes from sleep mode. Press and hold for 3 seconds for start or emergency shutdown. Double-click for a screenshot.
- USB Type-C Port: Connects to a wall plug for charging and data transfer.
- USB Type-A Port: Provides a USB connection for external storage devices.
Back View:
- Rear-Facing Camera: Takes pictures of VIN numbers, faulty parts, plates, and shoots test videos.
- Speaker: Outputs audio.
Technical Specifications
- Operation System: Android 9.0
- Processor: Quad-core, 1.3GHz
- Memory: 1GB
- SSD Hard drive: 32GB
- Communication interface:
- Built-in WIFI 802.11 b/g/n Wireless LAN
- USB2.0 OTG/standard USB 2.0 HOST
- Bluetooth specification v2.1+EDR; Bluetooth 4.0 Low Energy (LE) (10-20 m)
- Built-in Battery: 4000mAh, Lithium-polymer battery, chargeable via 5V USB power supply
- Protocols: ISO9141-2, ISO14230-2, ISO15765-4, K/L lines, Double K Line SAE-J1850 VPW, SAE-J1850PWM, CAN ISO 11898, High-speed, Middle-speed, Lows-peed and Single wire CAN, KW81, KW82, GM UART, UART Echo Byte Protocol, Honda Diag-H Protocol, TP2.0, TP1.6, SAE J1939, SAE J1939, SAE J1708, Fault-Tolerant CAN, CAN FD, DOIP
- Working Temperature: -10 to 70°C
- Storage Temperature: -20 to 80°C
- Operating Humidity: 5%-95% Non-Condensing
- Dimensions: 23612438mm (LWH)
- Weight: 0.87kg (Main unit)
Usage Features
Getting Started
The scanner can be powered by its internal rechargeable battery (5 hours continuous operation when fully charged) or an external 5V USB power supply.
- Powering On: Press the power switch.
- Shutting Down: Press and hold the Power button for 3 seconds, then select Power off or Reboot. All vehicle communication must be terminated, and the Diagnostic application exited before powering down.
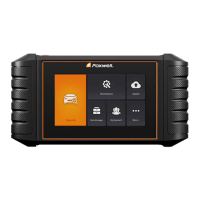
- Home Screen Layout: Displays the main menu with applications like Diagnostic, TPMS, OE, Maintenance, Update, Data Manager, My Account, Settings, Remote Control, Functions, Firmware Update, and VCI Manager.
My Account
This section covers user account registration, login, and device activation.
- Registration: Create a Foxwell ID via the built-in client by pressing My Account or Update, then Free registration. Enter your email (as username), press Send Code for a 4-digit verification code, create a password, and click Free Registration. A "The account has been created successfully" message confirms registration.
- Product Activation: After registration, the serial number will display. Click Submit to activate the product. If logging in for the first time, activation will be prompted upon successful sign-in.
- My Account: Allows checking and modifying account information (username, email, phone, address).
- My Products: Manages activated products, including serial number and expiration date.
- Feedback and Suggestions: Send feedback or suggestions to Foxwell by logging in with your email. Choose Diagnosis Feedback or General Feedback, select error type, add description/attachments, then Save or Email (for sending via an email account).
Update
The scanner can be updated to ensure the latest diagnostic developments. Registration and updates can be done via the Foxwell website or the built-in update client. Ensure a stable network connection and that the tablet is fully charged or connected to external power.
- Automatic Update: If enabled, an update symbol appears when new software versions are released. Enable this in Settings > Automatic Update.
- Manual Update: Access Update from the home screen. Available updates are displayed. Select desired software and click Update to download. An "Update Done" message appears upon completion.
VCI Manager
Used to unbind and bind the built-in VCI (Vehicle Communication Interface), especially when the VCI needs replacement. Unbinding automatically re-binds the VCI, rescans vehicle software, and restarts the APP. This function only binds to a built-in VCI, not external ones.
Firmware Update
Allows updating the NT726TS firmware.
- Click Update on the home screen.
- Download the firmware package.
- The system automatically jumps to the Firmware Update module.
- Ensure battery level is above 20%.
- Update starts automatically if available. Follow on-screen instructions for troubleshooting if the update fails.
NOTE: Firmware update files are downloaded automatically when diagnostic software is updated.
Vehicle Identification
Identifies vehicle specifications using information from the ECM. The process is menu-driven, requiring a series of choices.
- VIN Reading:
- Automatic Read: Automatically reads the VIN. Select Diagnostic > VIN > Automatic Read. If the VIN is correct, press OK. If it takes too long or fails, input manually or Cancel.
- Manual Entry: Manually input the VIN. Select Diagnostic > VIN > Manual Entry, use the keyboard, and press OK.
- Manual Selection: Select the vehicle brand to test.
- Smart VIN: Automatically reads the VIN. Select Diagnostic, choose the vehicle manufacturer's area, then the manufacturer, and select SmartVIN.
- Manual Selection: Identify the vehicle by making selections based on VIN characters (model year, engine type). Select Diagnostic, choose the vehicle manufacturer's area, then the manufacturer, and select Manual Selection. Follow prompts to enter vehicle information and display the controller selection menu.
Diagnosis
This section details how to read and clear diagnostic trouble codes (DTCs), view live data, access ECU information, and perform special functions.
- Vehicle Identification (Control Modules): After vehicle identification, identify installed control modules.
- Quick Scan: Performs an automatic system test to identify control modules and provides a DTC overview. Press Quick Scan to start, Pause to pause. After scanning, a list of DTCs displays; click the right-side button for descriptions. Report creates an overview, Save saves the report, and Erase clears information.
- Control Modules: Displays all available controllers for the vehicle manufacturer. Select a system to test, and the Function Menu appears.
- Diagnostic Operations (Function Menu):
- Read Codes: Reads trouble codes (Present/Permanent/Current, Pending, History). Select Read Codes. A code list displays with icons for help information (red icon) and freeze frame data (green icon).
- Freeze Frame: Select a fault code and click Freeze Frame to view critical vehicle operating conditions at the time of DTC set.
- Help: Select a fault code and click Help for detailed descriptions and repair guides.
- Clear Codes: Clears all current and stored DTCs and temporary ECU information (including freeze frame). Ensure the ignition is ON (engine OFF) and problems are corrected before clearing codes.
- Live Data: Views real-time PID data in text and plot formats.
- All Data: Views all live PID data. Press Select ALL or Deselect ALL, then OK.
- Custom List: Minimizes PIDs to focus on specific parameters. Select Custom List, tap desired lines (numbers indicate display order), then OK.
- Learn Mode: Records good live sensor data during various driving conditions (idle, KEKO, acceleration, deceleration, part load, heavy load) for future reference.
- Compare Mode: Compares faulty sensor readings to good readings, alarming when a fault is detected.
- Record Data: Records running data of the current control module. Press Record, then Stop to create a record, and OK to save to Data Playback.
- ECU Information: Displays identification data of the control module (identification string, coding). Press ECU Information to view details. Save stores the information.
Maintenance
This section provides instructions for common service and maintenance operations.
- Oil Light Reset: Resets service lamps on the instrument cluster. Methods vary by vehicle (One Button, Manual Reset, Auto Reset).
- Electronic Parking Brake (EPB) Service: Performs service and maintenance on brake systems (deactivation/activation, bleeding, pad replacement, setting brakes). Options include deactivating/activating SBC/EPB, adaptation on Audi A8, replacing hydraulic brake fluid on Mercedes SBC, performing service reset on BMW EPB, sensor calibration on Honda EPB, and parking brake unjam/longitudinal accelerometer calibration on Land Rover EPB.
- WARNING: Deactivate EPB systems before maintenance. Use proper tools to avoid injury/damage. Block the vehicle after deactivation.
- Battery Replacement (BRT): Validates new batteries, clears dashboard faults, and displays battery details. Replace the old battery (key out of ignition), connect scanner to DLC, select BRT, choose vehicle, and follow instructions.
- Diesel Particulate Filter (DPF) Regeneration: Cleans the DPF by burning particulates. DPF light turns off after completion.
- Throttle Body Alignment (TPS/TBA): Aligns the throttle body by learning full open and closed positions for proper engine control.
- Steering Angle Sensor (SAS) Calibration: Calibrates the SAS to permanently store the current steering wheel position as straight-ahead, clearing fault memory.
- Continuous Variable Transmission (CVT): Resets compensation code and initializes ECT after solenoid valve or valve body replacement.
- Gear Learning: Learns crankshaft tooth machining tolerance for accurate engine misfire diagnosis. Required after engine ECU, crankshaft position sensor, or flywheel replacement, or if DTC P1336 ("tooth not learned") is present.
- TPMS Relearn: Resets tire pressure and turns off the MIL after tire pressure maintenance.
- Injector Coding: Writes or rewrites injector actual codes in the ECU for accurate cylinder injection quantity control. Required after ECU or injector replacement.
- ABS Bleeding: Removes air from the brake system after component replacement (calipers, wheel cylinders, master cylinder, brake lines/hoses) to restore firm brake pedal feel.
- Key Programming/Immobilizer: Programs transponder keys for convenience and security.
TPMS Service Operations
The TPMS application checks sensor conditions, programs Foxwell T10 sensors, performs Relearn procedures, and basic diagnostics.
- Navigation: Tap TPMS on the home menu, select vehicle area and manufacturer, or use the Search box.
- TPMS Service Screen Layout: Includes Trigger, Programming, and Learn Help.
- Trigger Operations: Activates TPMS sensors to view sensor data (ID, pressure, temperature, battery, position, frequency). Tap Trigger, select wheel position, hold tablet near valve stem, and press Trigger.
- NOTE: Performs check in sequence: FL, FR, RR, RL, SP. Feedback icons (green for success, red for failure/duplicate ID) indicate status.
- Programming Operations: Programs sensor data to Foxwell T10 sensors to replace faulty ones.
- Manual Create: Manually enter sensor IDs (random or original). Tap Programming, select wheel, tap Manual Create, enter 7-bit ID, then OK. Place T10 sensor near tablet for programming.
- Clone by Activation: Bypasses OBD II to write retrieved original sensor data to T10. Activate installed sensor first, then place T10 sensor near tablet.
- Automatic Create (1-16): Programs T10 with random IDs created for the test vehicle when original ID is unavailable. Tap Programming, select wheel, tap Automatic Create, place T10 sensor near tablet.
- Copy by OBD: Writes saved sensor information to T10 after performing Copy by OBD. Select wheel, tap Copy by OBD, place T10 sensor near tablet.
- Learn Help: Introduces relevant sensor information (manufacturer, frequency, OE number, learning type, method, steps) and relearn procedures. Learning methods include OBD relearn, Automatic relearn, Static relearn, and Clone Sensor.
- OBD Relearn: Install sensor, inflate tires, activate sensors, turn ignition ON, connect tool to OBDII, use OBD relearn function, reactivate sensors, turn ignition OFF/ON, drive vehicle (30 km/h for 10+ min).
- Automatic Relearn: Install sensor, park for 15+ min, inflate tires, turn ignition ON, operate instrument panel to enter relearn mode, drive vehicle (30-100 km/h for 15+ min).
- Static Relearn: Install sensor, inflate tires, turn ignition ON, operate instrument panel to enter static relearn mode, complete learning process, drive vehicle (15+ min).
- Clone Sensor: Copy by activation or manually input sensor IDs (decimal or hexadecimal).
Data Manager
Reviews stored screenshots, test reports, and plays back recorded live data.
- Image: Reviews stored screenshots. Take a screenshot by pressing the camera icon on the title bar. Add a description and OK to save. To review, go to Data Manager > Image, then Diagnostic Screenshot or System Screenshot. Long press to rename or delete.
- PDF Report: Reviews vehicle test reports. Press the PDF icon on the test screen, add a description, and OK to save. To review, go to Data Manager > Report. Press PDF to view. Long press to rename or delete.
- Data Playback: Reviews recorded live data in text, graph, and graph merging formats. Playback speed and direction can be controlled. To review, go to Data Manager > Data Playback. Long press to rename or delete.
Settings
Configures scanner settings.
- Unit: Selects Imperial customary or metric units.
- Language: Selects system language.
- Font Size: Changes application font size.
- Module Sorting: Modifies the display order of modules on the home screen (except Diagnostic). Long press an icon and drag to reorder.
- Remote Control: Selects a remote control tool (TeamViewer QuickSupport or AnyDesk) for remote support.
- Automatic Update: Enables/disables automatic update notices.
- System Settings: Direct access to Android system settings (sound, display, security).
- General: Turns on/off prompts for saving files or login/registration at scanner startup.
- Uninstall Vehicle Software: Uninstalls vehicle software.
- Clear App Data: Clears cache data to improve device operation.
- Print Settings: Sets up printer connection for printing data via PC network or Wi-Fi. Tap Print Plugin Manager and enable Mopria Print Service.
- About: Displays information about the NT726TS (serial number, hardware/software version).
Remote Support
Enables remote support from Foxwell via TeamViewer QuickSupport or AnyDesk. To use QuickSupport, click the Remote Control icon on the main menu, then send your ID to the support team.