19
ENGLISH
TIG WELDING WITH HIGH-FREQUENCY
IGNITION (HF)
Warning! When the MAGIC WAVE 2000 Fuzzy resp. Tran-
stig 2000 is being used for TIG welding, the manual
electrode cable will always be live when:
the mains master switch is ON
the operating mode is in the or
position and when the “start welding” signal has been
given from the torch trigger.
Make sure, when the manual electrode cable is not in
use, that it is either disconnected from the machine or
else fastened to the machine in such a way
(insulated)
that the electrode holder and the coated electrode
cannot touch any electrically conductive or earthed parts
such as the housing, gas cylinder, workpiece etc.
Important!
The maximum setting for the HOT-START current is automatically
limited by the maximum circuit of the machine.
Connecting the remote control unit:
- Use the remote control cable to create an electrical link bet-
ween the connecting socket
on the power source and the
socket on the remote control unit.
Insert the plug-in connections into the correct sockets and
screw the coupling ring on as far as possible.
- Shift the function selector switch into the right position for the
operating mode in question
(see p. 9 item for an exact description)
Welding without a remote control unit:
The parameters for Hot-Start and arc force are pre-set within the
machine to average (mean) values (see p. 12, p. 2.2 "Electrode"
pre-setting level).
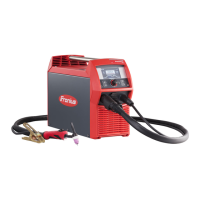
Fig. 24 Effect of arc force control dial on constant-current characteristic at the
moment of short circuiting. Welding current setting 100 A
V
ARC FORCE
CONTROL DIAL
60
50
40
30
20
10
50 100 150 200 2500
5100
A
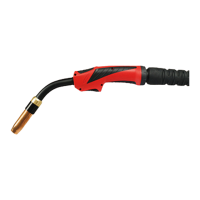
HOT-START control dial
only effective in the electrode ignition phase
Advantages:
- Improved ignition even with electrodes where ignition is
normally more difficult
- Improved melting of the base material in the ignition phase,
meaning far fewer cold laps
- Considerable reduction of slag inclusions
- Is added to the set welding current value on a percentage
basis
HOT-START
Fig. 25 Ignition phase using HOT-START control. Welding current setting 100 A
t sec
A
200
150
100
1.00
100%
50
0
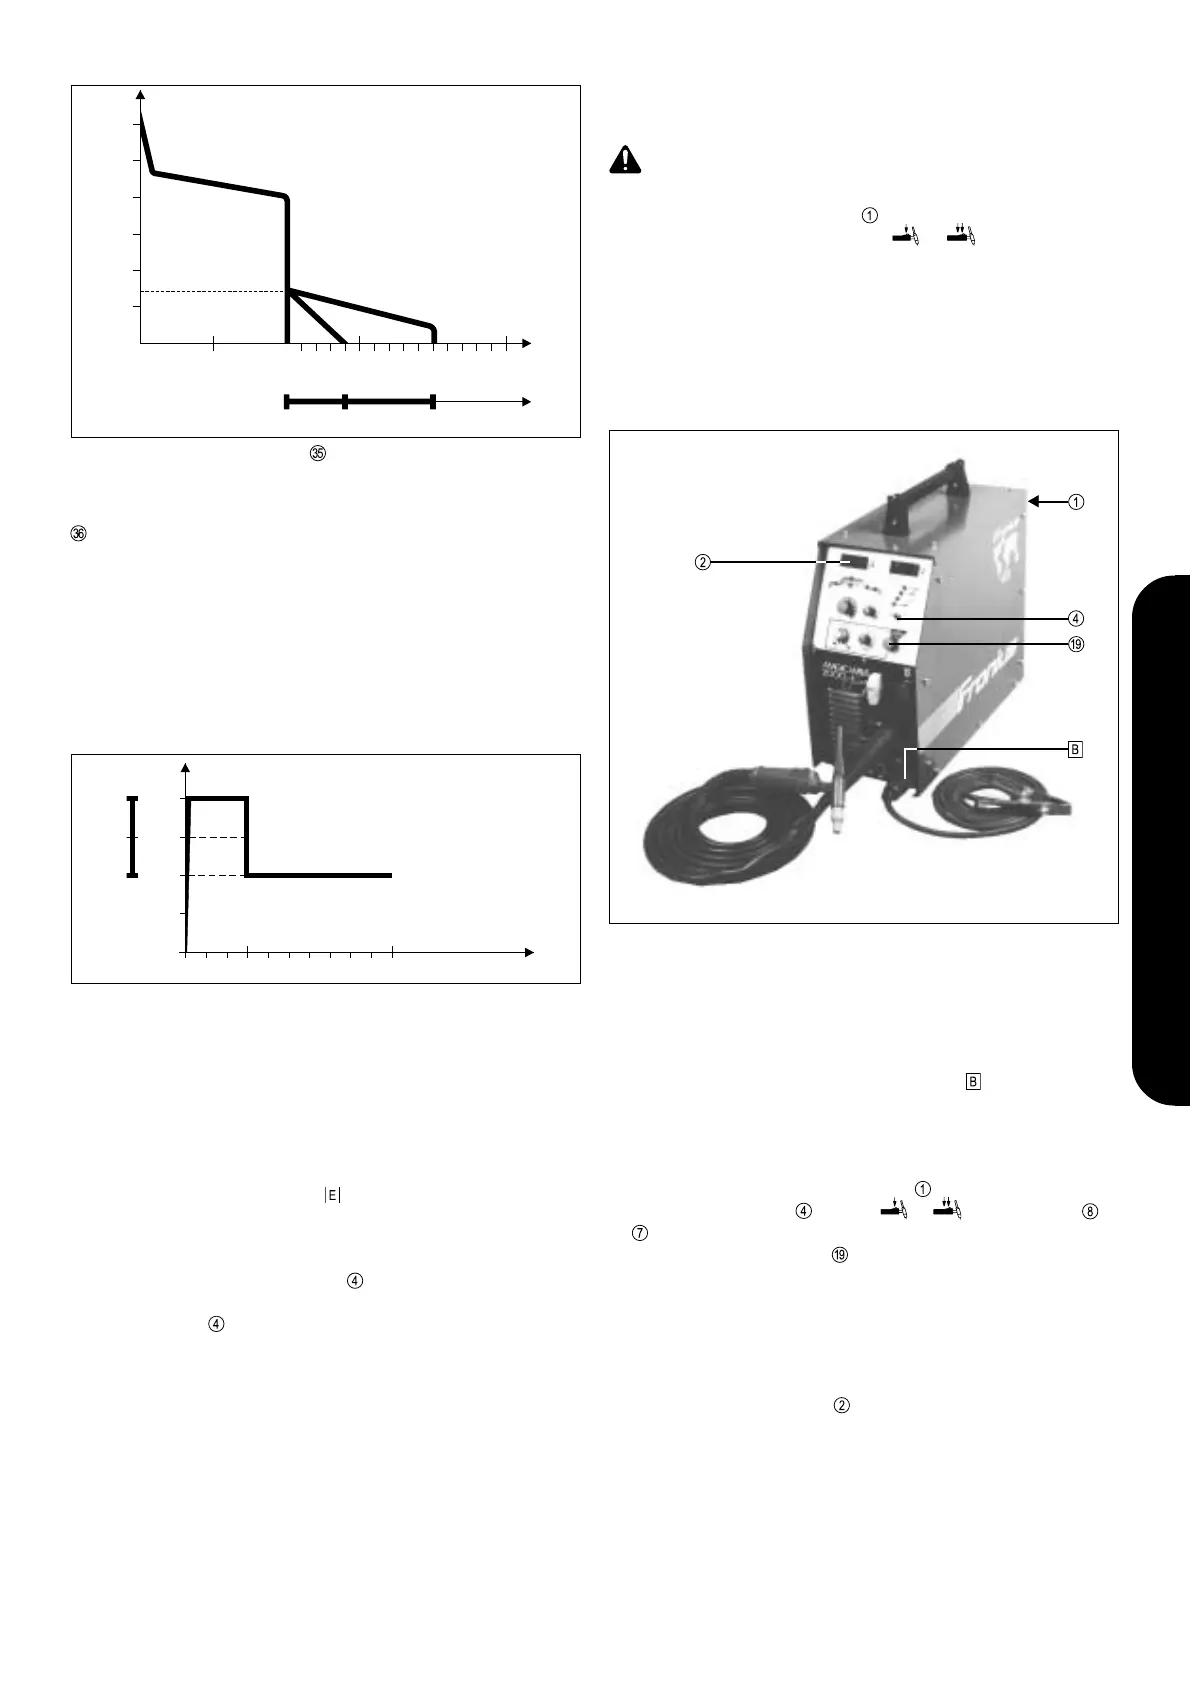
Fig. 26 Magic Wave 2000 Fuzzy resp. Transtig 2000 TIG welding machine consist-
ing of: power source with control unit, AL 22 manual torch, earth cable, gas
cylinder with pressure regulator.
START-UP
- Fit the torch with a tungsten electrode and a gas nozzle
(see the instruction manual for the torch concerned).
- Plug the earth cable into the current socket and latch in place
firmly.
- Connect the gas hose to the machine and the gas pressure
regulator.
- Plug in the mains plug.
- Switch on the mains master switch
- Shift selector switch into the or positions. LED or
lights up.
- Using the selector switch , select the type of current required
(only at MW 2000 Fuzzy)
- In the AC~ mode, set the balance and AC frequency
(only at MW 2000 Fuzzy)
- If necessary, connect a remote control unit (see description of
remote control operation on p. 14).
- Select welding parameters (command value for main current I
H
is displayed on ammeter ).
- Open the gas cylinder valve by turning it anticlockwise.
- Pull back the torch trigger and release it (4-step operation)
Warning! High-frequency ignition is now switched on !
- Turn the setscrew on the underside of the gas pressure
regulator in a clockwise direction until the working manometer
shows the required flow-rate in litres/min.
- Pull back and release the torch trigger once again
(= welding OFF)