En-9
(2)
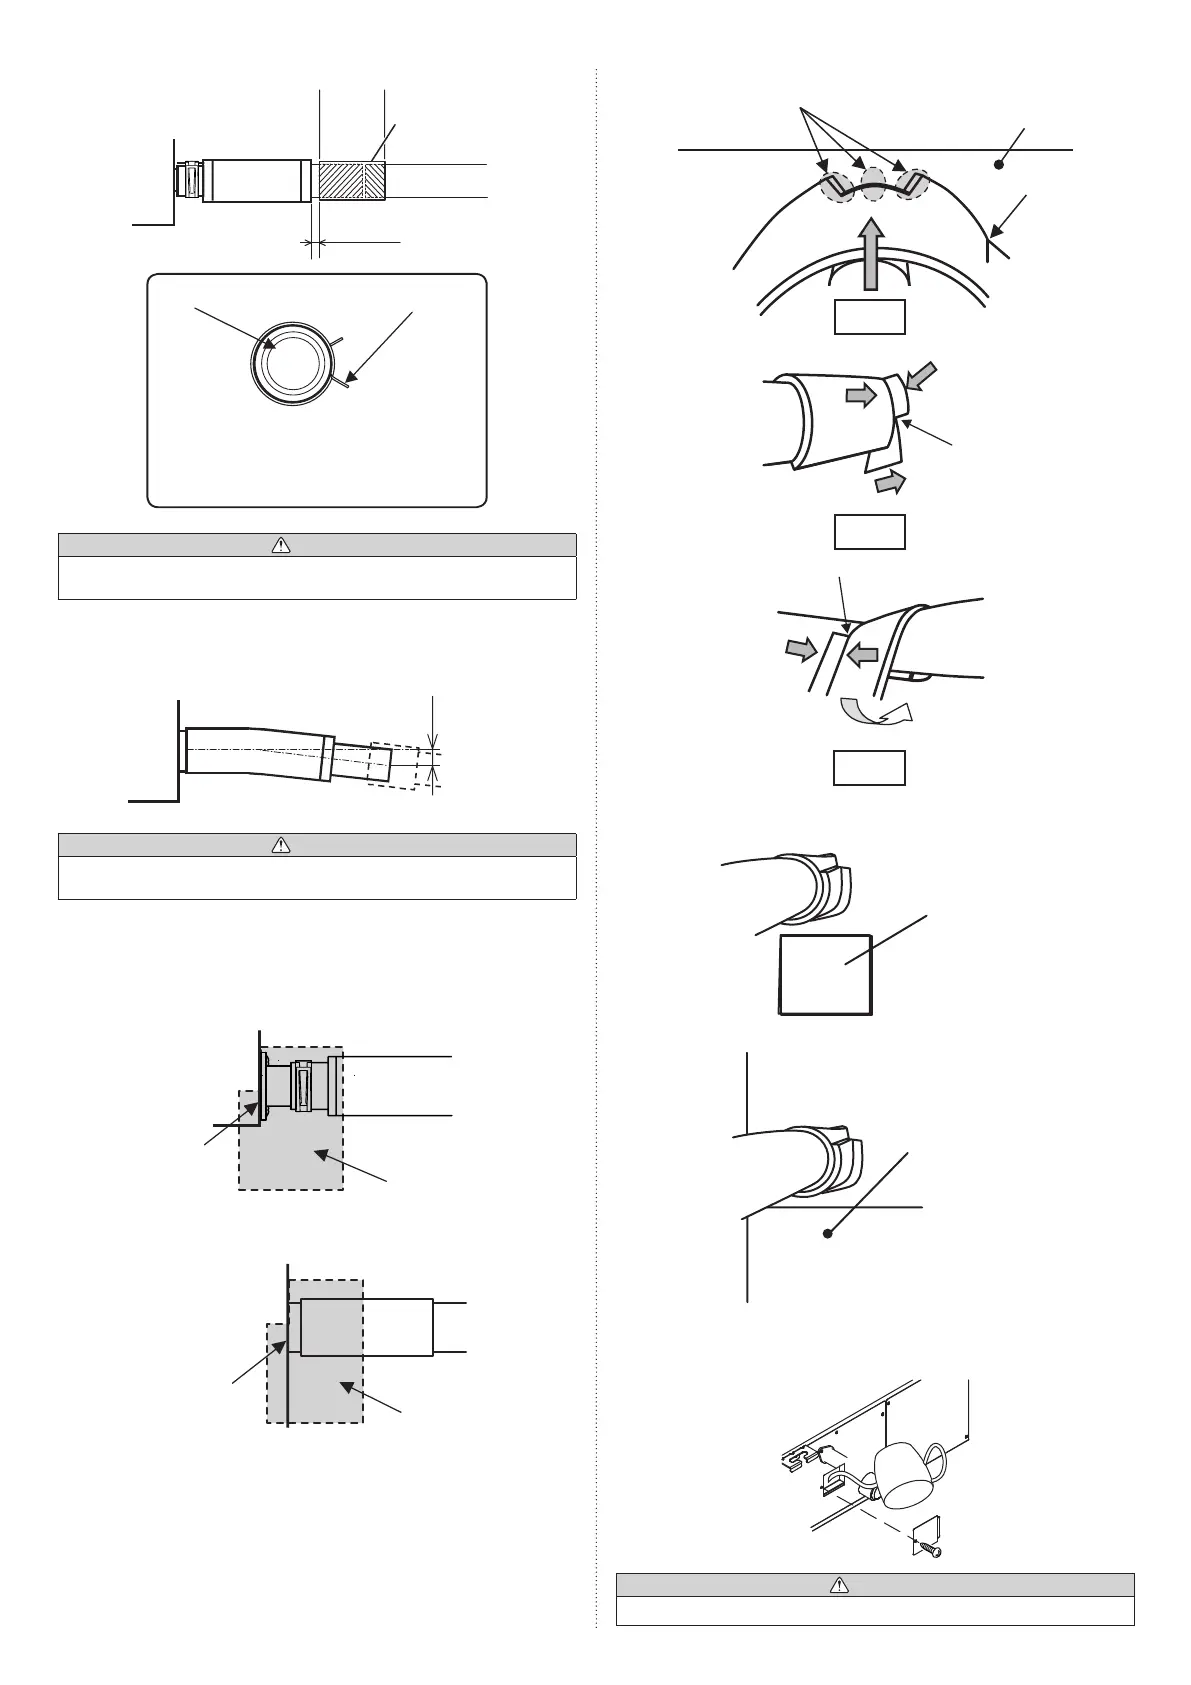
Be sure to insert Drain hose
1
to the very end of the Drain pan of the unit with no space
.
Applying
area of
adhesive
Jointpipe
(Fieldsupply)
Drainpipe(VP25)
(Fieldsupply)
4mmorless
2
Hoseband
1
Drain hose
FastentheHoseband
2
at the position where
vertical against ground.
TheHoseband
2
must be positioned at the right
side of the Drain hose
1
asinthegure.
CAUTION
• DonotconnecttotheDrainholewithadhesive.Usingadhesivemaycausedamage
and water leaks.
(3) AfterinstallingtheDrainhose
1
, check if the drainage is smooth.
• When drain pump is not used.(Naturaldrainage)
Downward
gradient
2.5-5.0mm
CAUTION
• TopreventexcessiveforceonDrainhose
1
,avoidbendsortwists.(Tobendortwist
maycausewaterleaks.)
(4) Aftercheckingfordrainage,attachtheDrainhoseinsulationB
3
to insulate, following
theinstructionsasinthegures.
To avoid space with Drain hose
1
andHoseband
2
,pressrmlytheDrainhose
insulation B
3
.
• When drain pump is used.(Ceilingconcealedtypeonly)
3
Drain hose
insulation B
Ensure there is
no space.
• When drain pump is not used.(Naturaldrainage)
3
Drain hose
insulation B
Ensure there is
no space.
• STEP1~STEP3
Butt the insulation against the unit.
STEP1
Unit
Slit
Pressrmly
Pressrmly
STEP2
Slit
Pressrmly
Roll the
insulation
over the joint.
STEP3
Pressrmly
Pressrmly
Slit
• FINISH
Checkthatthereisnogapbetweentheunitandthedrainhoseinsulation.
• When drain pump is used.(Ceilingconcealedtypeonly)
Do not cover the
panel window.
• When drain pump is not used.(Naturaldrainage)
Do not cover the
control box cover.
Note: Check for drainage
Pourabout1literofwaterfromthepositionshowninthediagramorfromtheairow
outlettothecondensatetray.Checkforanyabnormalitiessuchasstrangenoisesand
whether the drain pump functions normally.
CAUTION
•Makesurethedrainwaterisproperlydrained.
9374815173-04_IM.indb 9 9/21/2011 1:45:23 PM

 Loading...