MAINTENANCE & TROUBLESHOOTING 4
Questions? Call (315) 298-5121, or visit us online at www.fulton.com
4-7
VSRT_IOM_2018-1213
INSPECTION AND MAINTENANCE OF
THE PILOT ASSEMBLY
Your boiler is equipped with an interrupted pilot. This
pilot uses gas from the pilot gas train, and combustion
air The pilot is ignited via a spark from the ignition
electrode.
1. Remove the pilot assembly – This can be done
with the burner in place
» Shut the manual valve in the pilot line,
and ensure that power to the boiler is
disconnected
» Disconnect the pilot gas whip from the pilot
assembly
» Remove the ignition cable from the ignition
electrode
» Remove the bolts holding the pilot assembly
» Remove the pilot assembly by lifting straight
up, taking care not to lose the O-ring seal
2. Inspect the pilot assembly
» Ensure that the pilot orice is not clogged.
» Inspect and ensure that there are no signs of
overheating, these would be visible as burnt
or scaling metal, or distortion of the pilot
parts
» Inspect the gap from the ignition electrode
to the sparking notch in the pilot sleeve.
» Electrode should be centered vertically in the
notch, and the minimum gap from electrode
to sparking surface should be 3/16”
» Ensure that the ceramic on the ignition
electrode is not cracked or damaged
If any parts of the pilot assembly or the deadzone of the
burner are overheated, this could indicate a failure in the
seal at the burner plate, or the premix transition, which
allows combustion to ow upward. Inspect all seals if
this is the case.
OTE: Removing the burner plate will require
replacement gaskets.
OTE: The burner assembly drawings are located at
the end of this chapter, just before Troubleshooting.
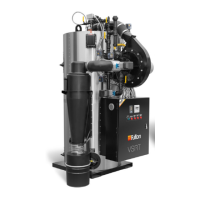
INSPECTION/CLEANING OF THE
BURNER ASSEMBLY
Most of the particulate matter in the combustion air
stream should be caught by a pre-lter or cyclone.
However it is necessary to pull the burner head once a
year, and inspect and clean it
1. Remove Burner
» Loosen the exible coupler between the
blower fan and the premix transition. It
should only be necessary to loosen the end
of the transition, but both can be loosened.
» Loosen the hose clamps on the ex
connector closest to the burner inlet elbow.
Once these hose clamps are loose, slide the
ex connector back towards the front of the
boiler.
» Lift the premix transition straight up, then
slide out of the exible coupler.
» You should now be able to lift the burner
straight out of the burner plate (NOTE: Do
not remove burner plate, as gasket will need
replacement if it is moved).
2. Inspect and Clean the Burner
» The burner should be clean and free of dust.
This can be accomplished using compressed
air. Blow compressed air through the
mesh from the outside in, then empty any
contaminates inside the burner can.
» Inspect the burner for signs of local
overheating, or soot. If soot is present, either
the pilot or the main burner is not running
the proper fuel air ratio, and the combustion
controls should be checked, while local
overheating will result in discolored mesh or
possible detaching or sagging.
EXAMINE THE VENTING SYSTEM
1. Check all joints and pipe connections
for tightness. Check vent for corrosion or
deterioration. If any venting needs replacing, do
so immediately.
2. Perform any recommended maintenance as
required by the vent material manufacturer.