1. MOUNTING
5
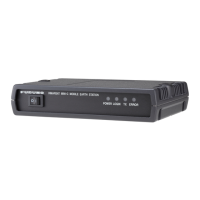
1.2 Transceiver Unit
1.2.1 Installation considerations
Keep in mind the following points when selecting a location.
• Locate the transceiver unit away from heat sources because of heat that can build
up inside the cabinet.
• Locate the unit where shock and vibration are minimal.
• Locate the transceiver unit away from places subject to water splash and rain.
• Leave sufficient space at the sides and rear of the unit to facilitate maintenance.
• Be sure to connect the copper strap (between the earth terminal on the chassis and
the ship’s earth).
• A magnetic compass will be affected if the transceiver unit is placed too close to the
magnetic compass. Observe the compass safe distances in the "SAFETY IN-
STRUCTIONS" (on page i) to prevent interference to a magnetic compass.
• Install the transceiver unit on the floor, or on a bulkhead.
1.2.2 How to install the transceiver unit
The transceiver unit can be mounted on a desktop or a bulkhead. See the outline
drawing for details.
Note 1: For desktop mounting, install the unit where it won’t get wet from rain or water
splash.
Note 2: For bulkhead mounting, fix the unit so that the notches on it are facing the
deck.
1. Make four pilot holes for hexagonal nuts (M8×25) in the mounting location.
2. Fasten the transceiver unit as shown below.
1.3 Transducer
The installation of the transducer and the tank should be accomplished by a dockyard
referring to the installation drawings at the back of this manual. An example of trans-
ducer installation method is also shown in paragraph 1.3.2.
Note: Discussions should be taken place and agreement reached with the dockyard
for sufficient reinforcement and watertightness of the hull to comply with the regula-
tions concerned.
Notches
(Face the deck for bulkhead mounting.)
Bolt
Flat washer
Spring washer
Nut
Pilot hole (M8×25)
Mounting
location

 Loading...