F3B R/C Gliders
• Variable Wing Camber (Flaps and Flapperons) and Glide Path Control ("Butterfly" or "CROW" Mixing)
• CH1 and CH6 are used for Aileron servos. CH7 is used for the inboard Flaps. (2 servos with Y harness or
1 servo with dual linkage.)
Setting Method
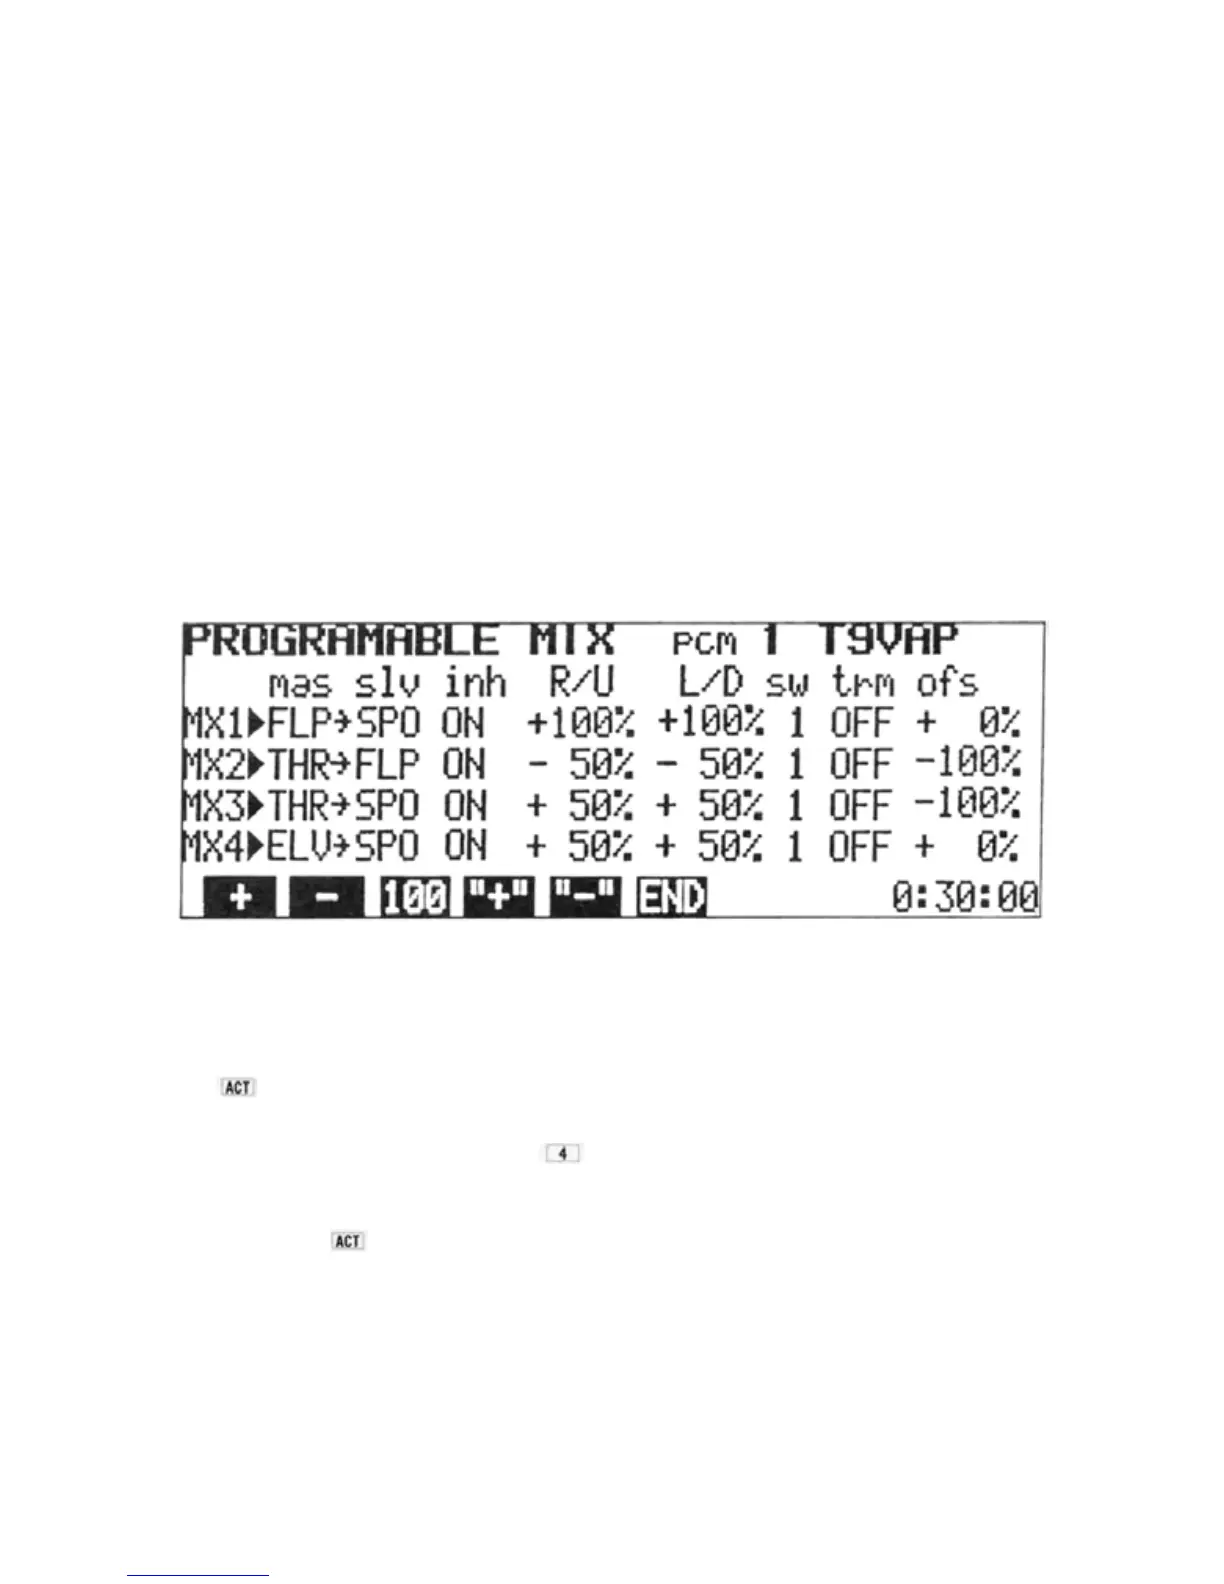
1) Select the PROGRAMABLE MIX screen and 3)
press the SET program key.
2) Set the Master and Slave channels up as 4)
shown (See page 25):
->FLP->SPO
THR->FLP->
THR->SPO
ELV->SPO
Return to the PROGRAMABLE MIX screen
by pressing the END key.
Set the screen up initially as shown:
NOTE: Set Offset on MX2 and MX3 with the Throttle control stick at the full HIGH position.
5) Select the FLAPPERON screen and press the
program key. Move the cursor to
the
TRIM position and set the rate at 100%.
6) Return to the MIXING screen and move the
cursor bar to the 2ND line. Press the
program key to display the AIR-BRAKE
screen.
7) Move the cursor to the ACT/INH position
and press the key.
8) Move the cursor to the FLP-TRIM position
and set the trim rate to 100%.
• Right and left aileron servos (CH1 and
CH6) operate to give normal aileron action
when the aileron control stick is deflected.
•The
Flap (CH6)
Knob
can be used
to
raise
or lower all four wing surfaces simultane-
ously to vary wing camber.
• Moving the Throttle (CH3) stick from high
to
low
will
lower
the
flaps
and
raise
the
ailerons for Glide Path Control ("Butter-
fly" or "CROW") mixing.
•Moving the AIRBRAKE (6-7 -> 2 MIX)
Switch to the ON position will lower all
wing surfaces to a pre-set position. Slight
DOWN camber is suggested for launching.
9) Change mixing and/or servo directions as
necessary due to aircraft linkage, etc.
10)
Adjust mixing rates, throws, etc. as desired.
Be careful that combined throws are not
excessive for the servo mechanics, linkage,
etc.
11) Elevator -> Flap mixing can be used if desir-
ed (See page 40).