30
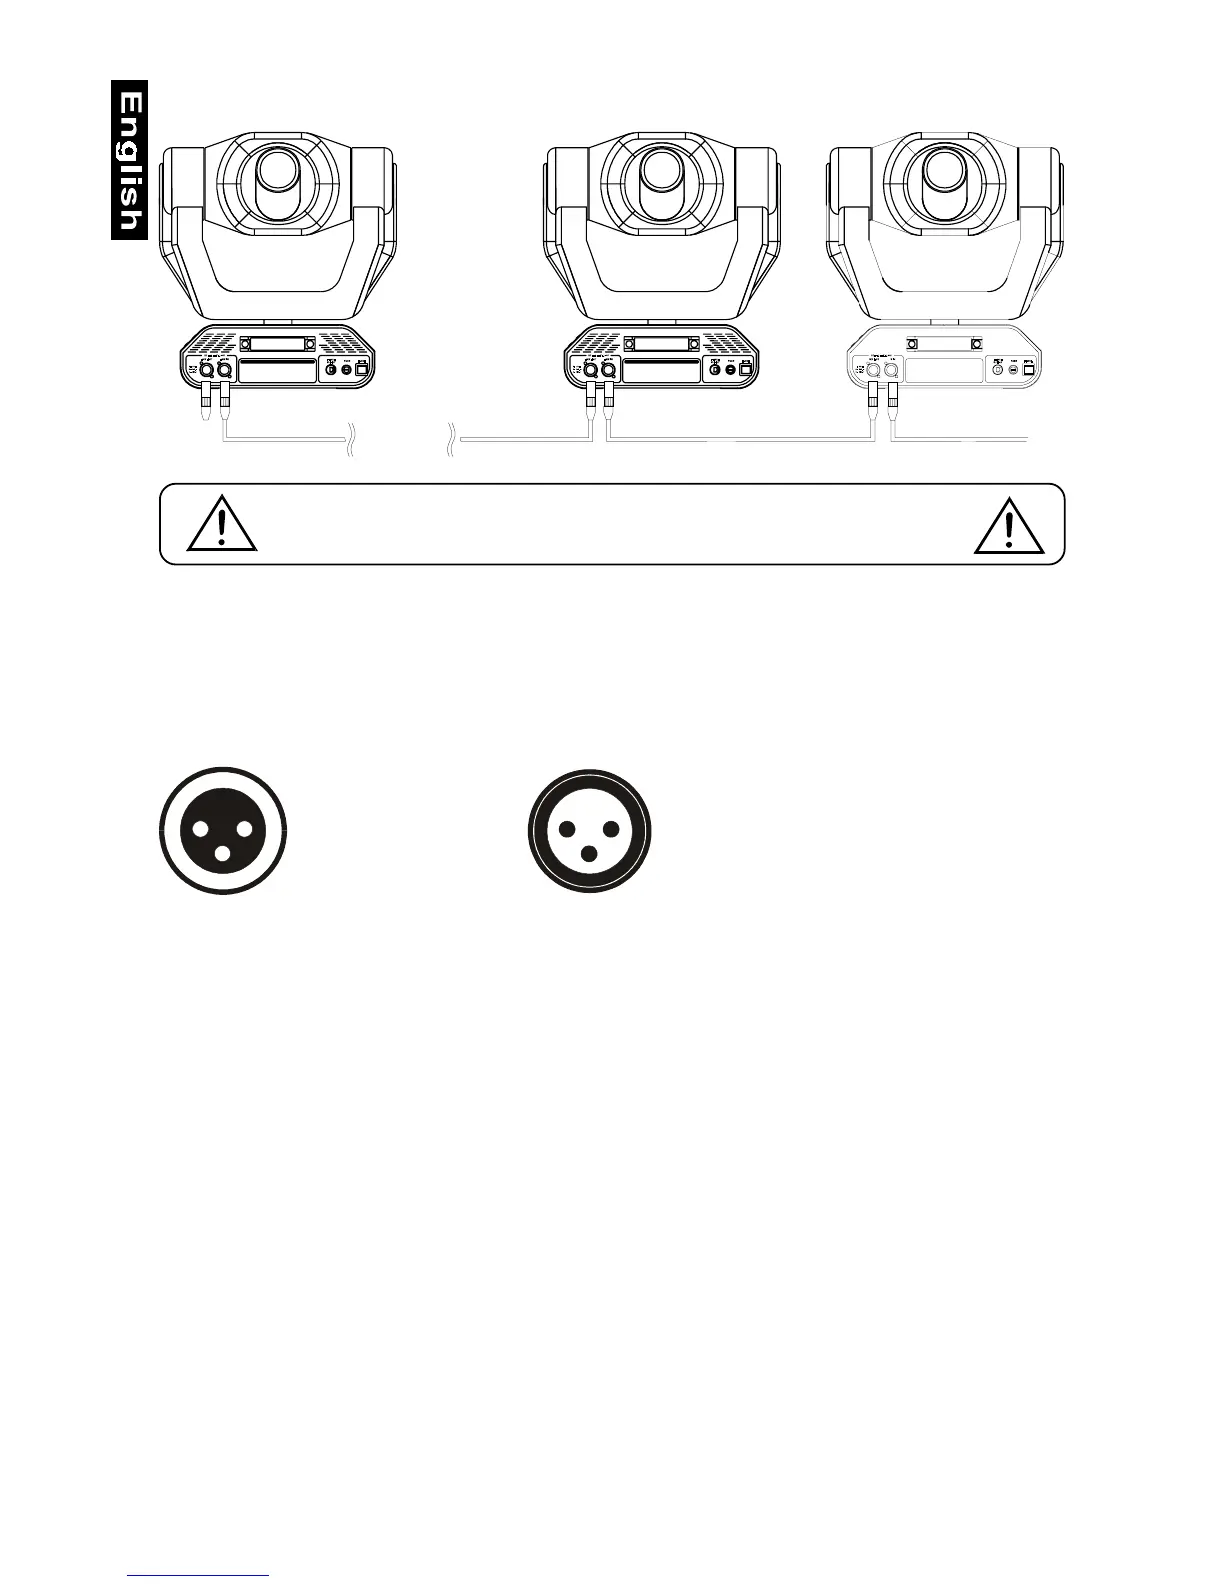
3.4 DMX-512 connection / connection between fixtures
The wires must not come into contact with each other, otherwise
the fixtures will not work at all, or will not work properly.
Only use a stereo shielded cable and 3-pin XLR-plugs and connectors in order to connect the controller with the
fixture or one fixture with another.
Occupation of the XLR-connection:
DMX-output
XLR mounting-socket:
DMX-input
XLR mounting-plug:
1: Ground
2: Signal ()
3: Signal (+)
12
3
1: Ground
2: Signal ()
3: Signal (+)
12
3
The XLR-connection of the FUTURELIGHT-devices complies with the DMX-standard. If you are using the
recommended FUTURELIGHT-controllers, you can connect the DMX-output of the controller directly with the
DMX-input of the first fixture in the DMX-chain. If you wish to connect DMX-controllers with other XLR-outputs, you
need to use adapter-cables.
Building a serial DMX-chain:
Connect the DMX-output of the first fixture in the DMX-chain with the DMX-input of the next fixture. Always connect
one output with the input of the next fixture until all fixtures are connected.
Caution: At the last fixture, the DMX-cable has to be terminated with a terminator. Solder a 120 W resistor
between Signal (–) and Signal (+) into a 3-pin XLR-plug and plug it in the DMX-output of the last fixture.
 Loading...