27
2 Phillips screws
2 Phillips screws
Top cover
Bottom cover
Bottom cover
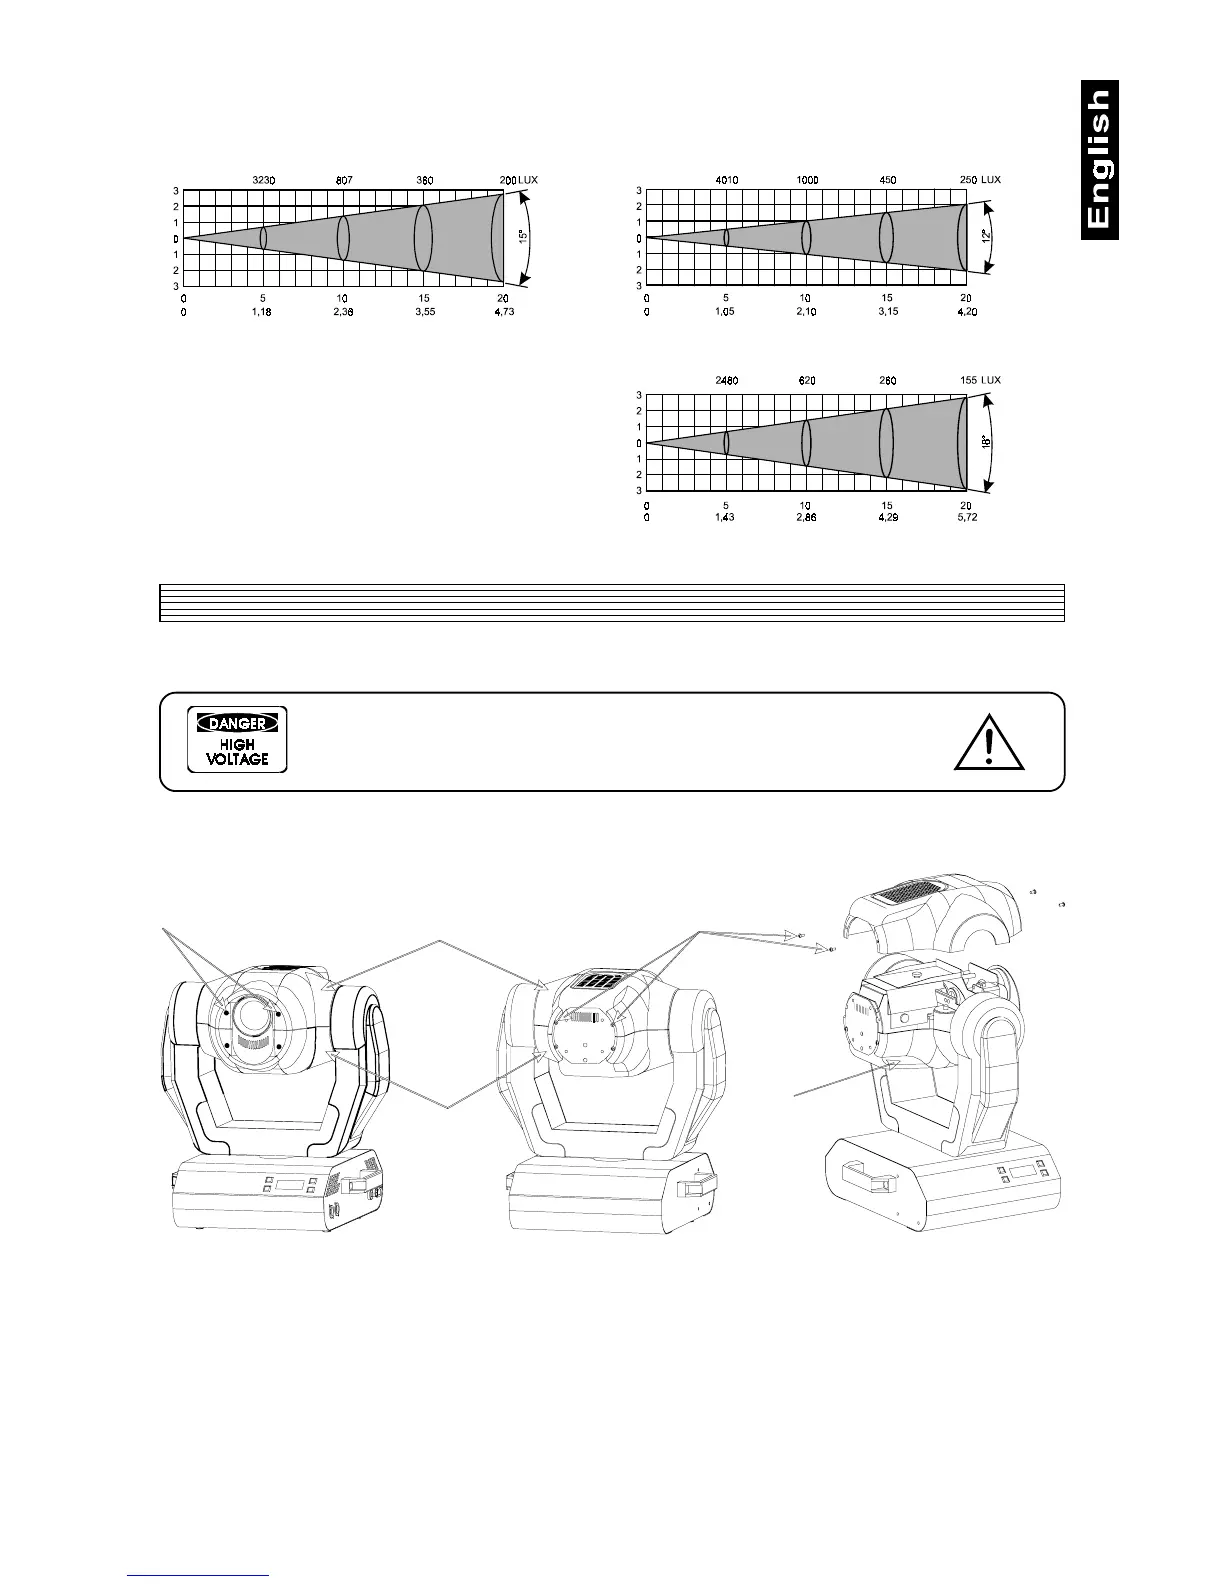
2.3 Beampath
3. Installation
3.1 Fitting the lamp
DANGER !
Install the lamps with the device switched off only.
Unplug from mains before !
To insert the lamp MSD 230 V/250 W or MSD 230 V/200 W open the top cover of the head (see the drawings to
identify which cover is top) by loosening the 4 Phillips screws on the front and rear sides of the top cover.
Then open the small lamp cover by loosening the 3 fastening screws (see the drawing).
If changing the lamp, remove the old lamp from the socket. Insert the lamp to the socket.
Do not install a lamp with a higher wattage! A lamp like this generates temperatures the device is not designed for.
Damages caused by non-observance are not subject to warranty. Please follow the lamp manufacturer‘s notes!
Do not touch the glass-bulb bare-handed during the installation! Make sure that the lamp is installed tightly into
the lampholder system.
Adjust the optimal distance 1-1.5 mm from the lens by turning the screw "A" (see the drawings "Lamp adjustment"
below).
Then close the small lamp cover by tighten 3 fastening screws again.
Reclose the top cover of the head and tighten the 4 Phillips screws.
Optional wide 18°objective
Beam opening (m)
Beam opening (m)
Beam opening (m)
Distance (m)
Diameter (m)
Distance (m)
Diameter (m)
Distance (m)
Diameter (m)
Standard 15° objective Optional narrow 12°objective