28
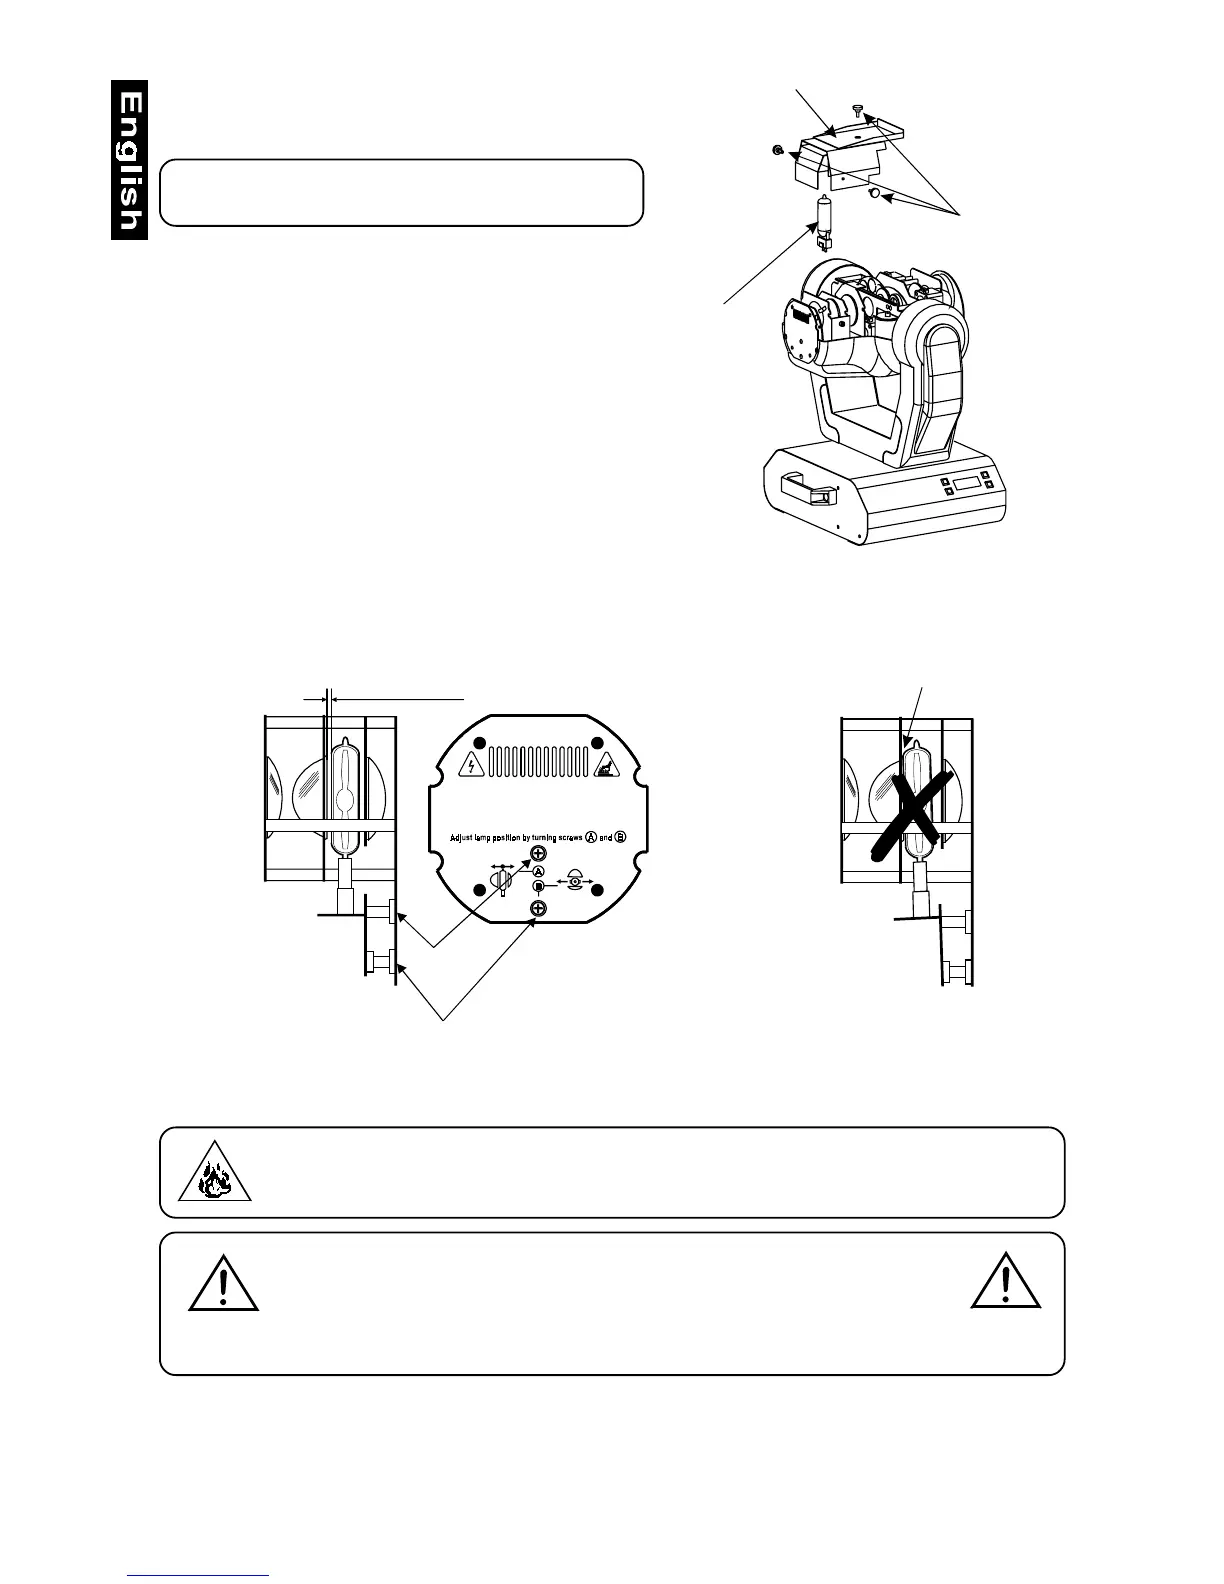
Lamp cover
Lamp
3 fastening screws
Keep optimum distance to lens
Optimum distance 1-1.5 mm
Screw "A"
Screw "B"
CORRECT INCORRECT
Before striking the lamp, reset the "LAti" counter in the main
menu of the Control Board, by pressing the "Up" and "Down"
buttons in one time and then confirming with the Enter-button.
Do not operate the fixture with opened
housing-cover!
Lamp adjustment
The MH - 660 lampholder is aligned at the factory. Due to
differences between lamps, fine adjustment may improve light
performance.
Strike the lamp and focus the light on a flat surface (wall). As
the optimum distance of lamp from lens was adjusted during
the installing or changing the lamp (by turning the screw "A"),
it is necessary to adjust only the second position by turning
the screw "B", in order to center the hot-spot (the brightest
part of the beam).
If the Hot Spot seems to be too bright, you can lower its
intensity by moving the lamp closer to the reflector. Do so by
turning srew "A" until the light is evenly distributed.
If the light on the edge seems to be brighter as in the center,
the lamp is too close at the reflector. In this case, you need to move the lamp away from the reflector until the light
is evenly distributed and the beam appears bright enough.
3.2 Rigging the fixture
Danger of fire !
When installing the device, make sure there is no highly inflammable
material (decoration articles, etc.) in between a distance of min. 0.5 m.
Warning !
Use 2 appropriate clamps to rig the fixture on the truss.
Follow the instructions mentioned at the bottom of the base.
Make sure that the device is fixed properly! Ensure that
the structure (truss) to which you are attaching the fixtures is secure.