39
To set the grind size:
1. Correctly prepare the appliance for operation. (see: ´Preparing the Appliance for Use`)
2. Turn the grind size dial at the right side of the appliance.
You can turn the grind size dial in several revolutions. Depending on the set range, each
grading line on the scale corresponds to various settings of the dial.
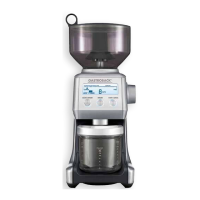
Tip: The arrow on the scale (COARSE to FINE) moves over the scale while turning the GRIND
SIZE dial, always showing the current setting. In the grind size range for coffee machines
(PLUNGER to PERCOLATOR) and manual preparation, the number of cups is indicated as
CUPS whereas the grind size range for espresso machines it is indicated as SHOTS.
Solving Problems
If any problems occur during operation, you will find solutions in this section. Further informa-
tion is given in section ´Tips for Best Results`.
Problem Reason The Solution
Emergency stop Press the START/CANCEL button to stop
the milling works.
Then, unplug the power cord from
power outlet.
You cannot lock the bean
hopper.
Coffee beans are
obstructing the
bean hopper lock.
Remove bean hopper. Remove coffee
beans from the top of the milling works.
Re-assemble the bean hopper and try
again.
The message “LOCK
BEAN HOPPER” is
displayed on the screen.
There is no reaction to
any operating element.
The bean hopper is
not installed or not
properly locked.
Ensure assembling the appliance correctly
according to the instructions in section
Preparing the Appliance for Use. Turn
the lock of the bean hopper clockwise
to lock the bean hopper properly on the
grinder.
Appliance does not start
after pressing START/
CANCEL button
Appliance is not
plugged in!
Plug power cord into power outlet.
Check, whether power outlet is live.
Appliance is
overheated.
Remove power plug from power outlet.
Leave for 20 minutes to cool down befo-
re trying again.
Bean hopper is not
attached correctly.
“LOCK BEAN
HOPPER” will be
displayed on LCD
screen.
Lock bean hopper into position.