30 Maintaining and Troubleshooting Your E-3200 System
6.
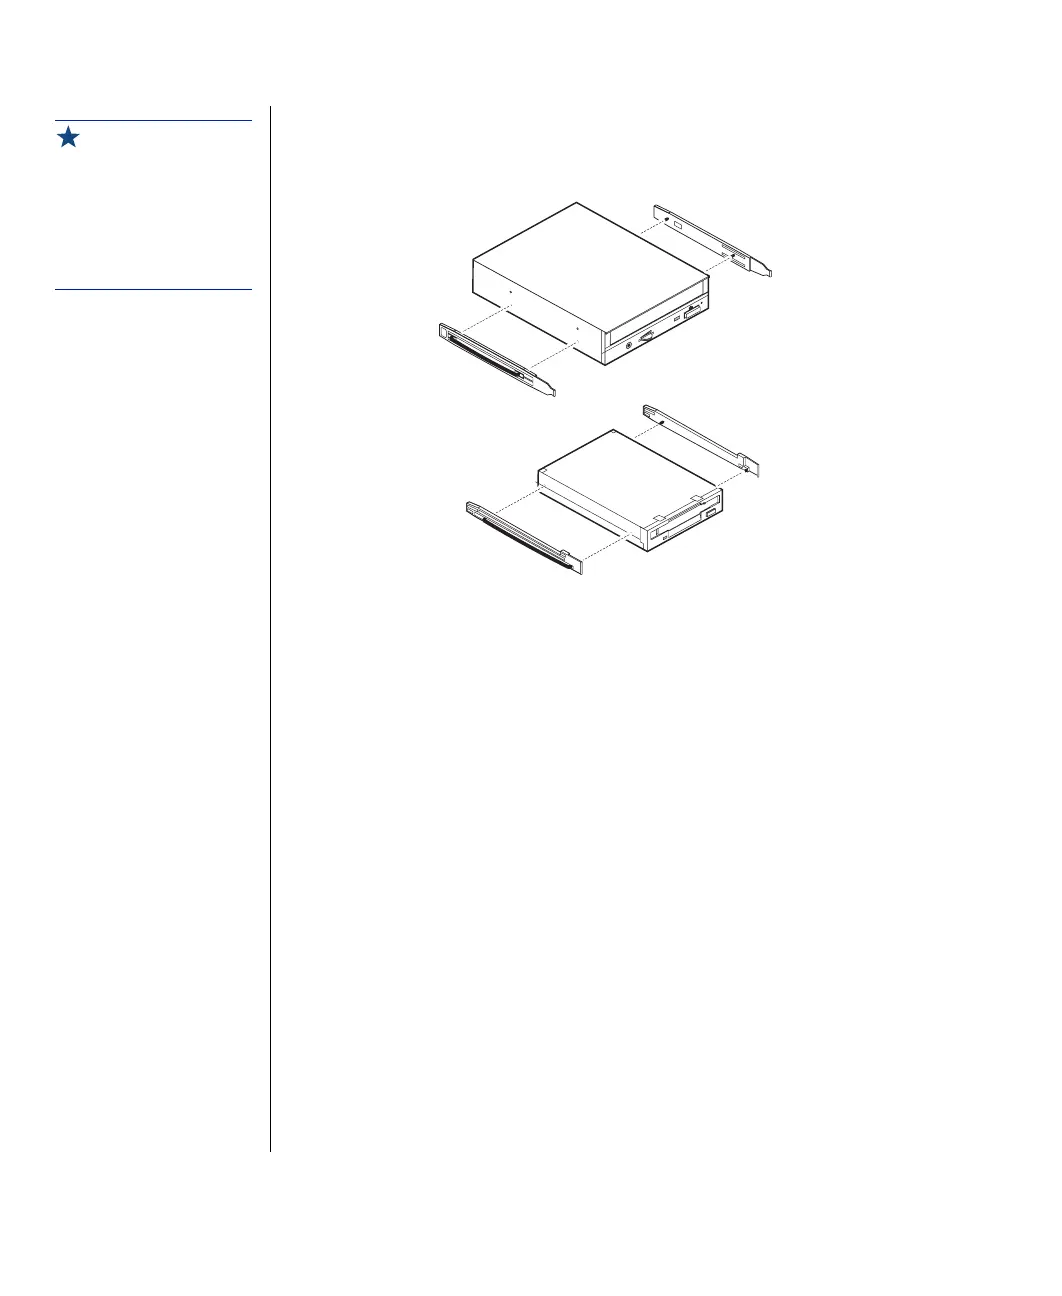
Remove the rails on both sides of the drive, and snap them onto the
new drive in the same positions. Make sure the front rail extensions
are towards the front of the drive.
7.
Align the rails with the appropriate bay, and slide the drive into the bay
until the locking tabs snap into place.
8.
Connect the power and data cables, making sure the cables match their
original position. (See drive documentation for proper drive jumper
settings and cable orientation.)
9.
Close the case, as described in Chapter 1.
10.
Reconnect the power cord and turn on the system.
Installing an additional 3.5-inch device
The second 3.5-inch drive bay can be used to install a 3.5-inch device, such
as a tape drive or 100MB or 120MB disk storage device. A set of rails are
included with your system and are used during the installation. You will
have to purchase an IDE cable with three connectors and of sufficient
length to connect the existing hard drive and the new drive to the riser card
IDE connector.
Important!
The rails on the 3.5-inch
drive are different from
those on the CD-ROM
drive. Make sure you install
the correct rails on each
drive.

 Loading...


