EasyManuals Logo

Gateway Notebook Hardware Reference Manual

Gateway Notebook
72 pages
To Next Page IconTo Next Page
To Previous Page IconTo Previous Page
Page #41 background imageLoading...
Page #41 background image
Adding or replacing memory modules
www.gateway.com
37
5 Disconnect all peripheral devices connected to the notebook and remove
any PC cards.
6 Turn your notebook over so the bottom is facing up, then remove the main
battery and optional secondary battery. For more information, see
“Changing batteries” on page 31.
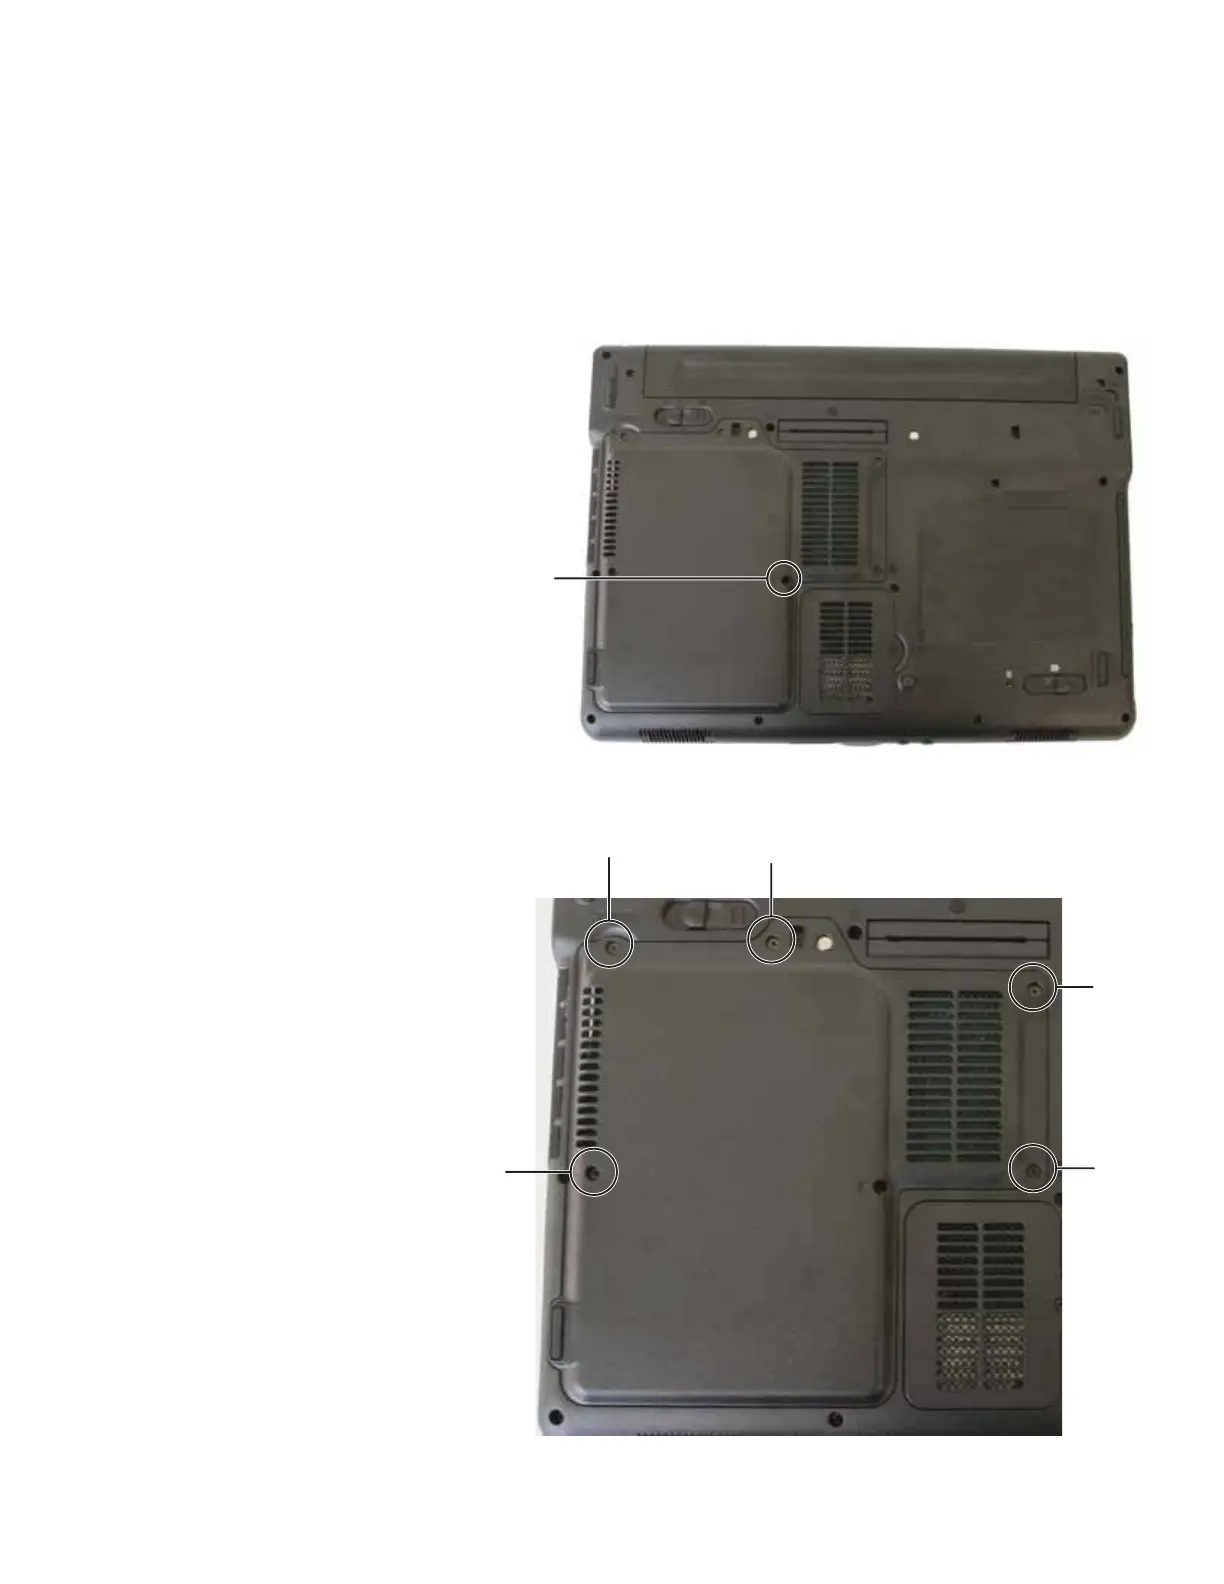
7 Remove the keyboard screw.
8 Loosen the five memory bay cover screws (these screws cannot be
removed).
Screw
Screw
Screw
Screw
Screw
Screw

Table of Contents

Other manuals for Gateway Notebook

Questions and Answers:

Question and Answer IconNeed help?

Do you have a question about the Gateway Notebook and is the answer not in the manual?

Gateway Notebook Specifications

General IconGeneral
BrandGateway
CategoryLaptop
ProcessorVaries by model (Intel Celeron, Pentium, Core i3, Core i5, AMD Ryzen)
RAMVaries by model (8GB, 16GB)
StorageVaries by model (256GB SSD, 512GB SSD, 1TB HDD)
DisplayVaries by model (14-inch, 15.6-inch, FHD)
Operating SystemWindows 10 or Windows 11
GraphicsIntel UHD Graphics
BatteryVaries by model
WeightVaries by model

Related product manuals