91
232001240G(08)
OPERATION:
1) With the air compressor unit and applicable SmartAIR Nozzle properly installed. Switch on the air
compressor unit and make sure that the airflow regulator on the air assist valve is opened (turn
clockwise to increase the airflow, counter-clockwise to decrease the airflow). The air nozzle under
the laser head should emit a steady flow of air.
2) With the SmartAIR nozzle and air compressor properly installed and operating, all configurations and
settings relating to air-assist functions are controlled through the LaserPro X252RX & X380RX print
driver and hardware control panel. Please refer to the LaserPro X252RX & X380RX print driver and
graphic control panel sections of this manual for details on how to enable and configure air-assist
functionalities.
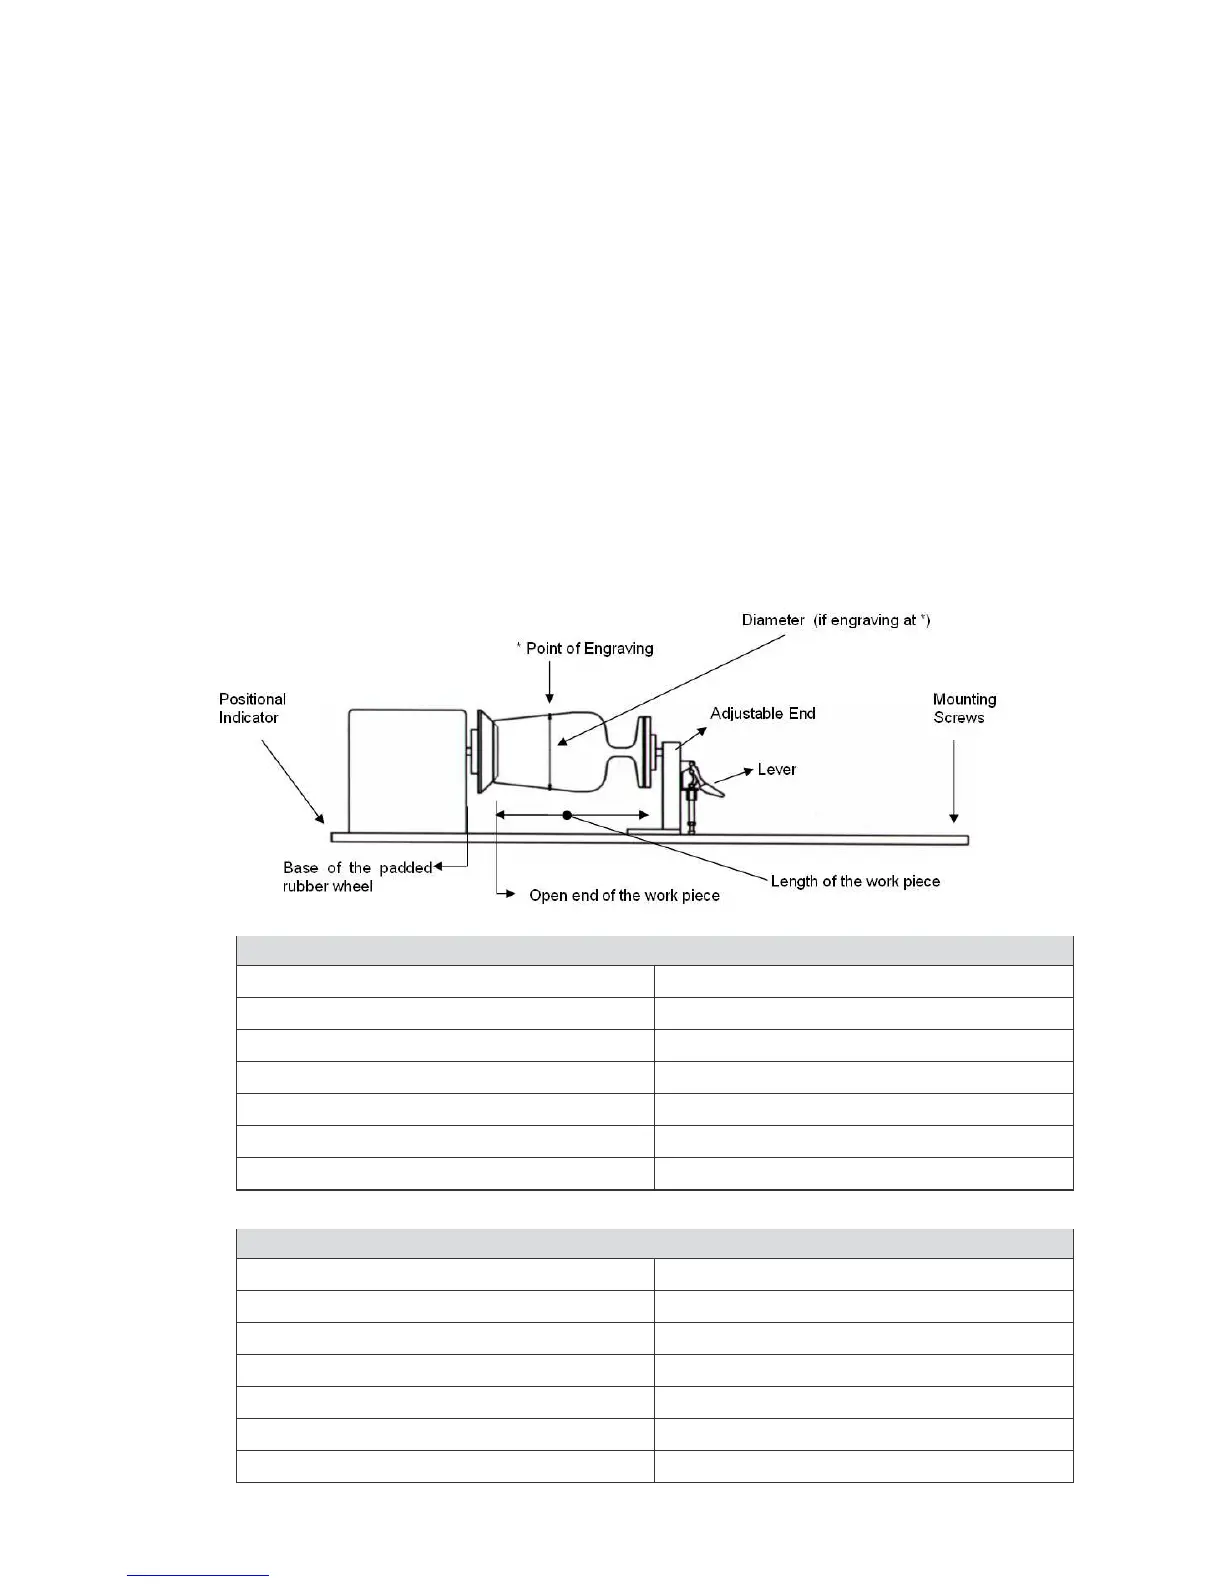
7.4 Rotary Attachment Option
The rotary attachment option provides the X252RX/ X380RX with the ability to engrave on
cylindrical or spherical objects. In addition to the standard X, Y, Z axis, the rotary attachment
allows for a fourth axis which rotates your object 360° to allow for engraving on cups, wine
glasses, and even balls.
Medium Rotary Attachment for X252RX:

 Loading...