46
3. Disconnect the gas line and remove the 1/4 in.
hex screw from the rear.
4. Remove the drum.
5. Disconnect the wiring to the igniter and gas
valves.
6. Remove the two 1/4 in. hex burner bracket
mounting screws and slide the entire burner as-
sembly toward the front of the dryer to remove
from the unit.
7. Remove the three 1/4 in. hex gas valve mounting
screws and remove the gas valve and the gas
pipe.
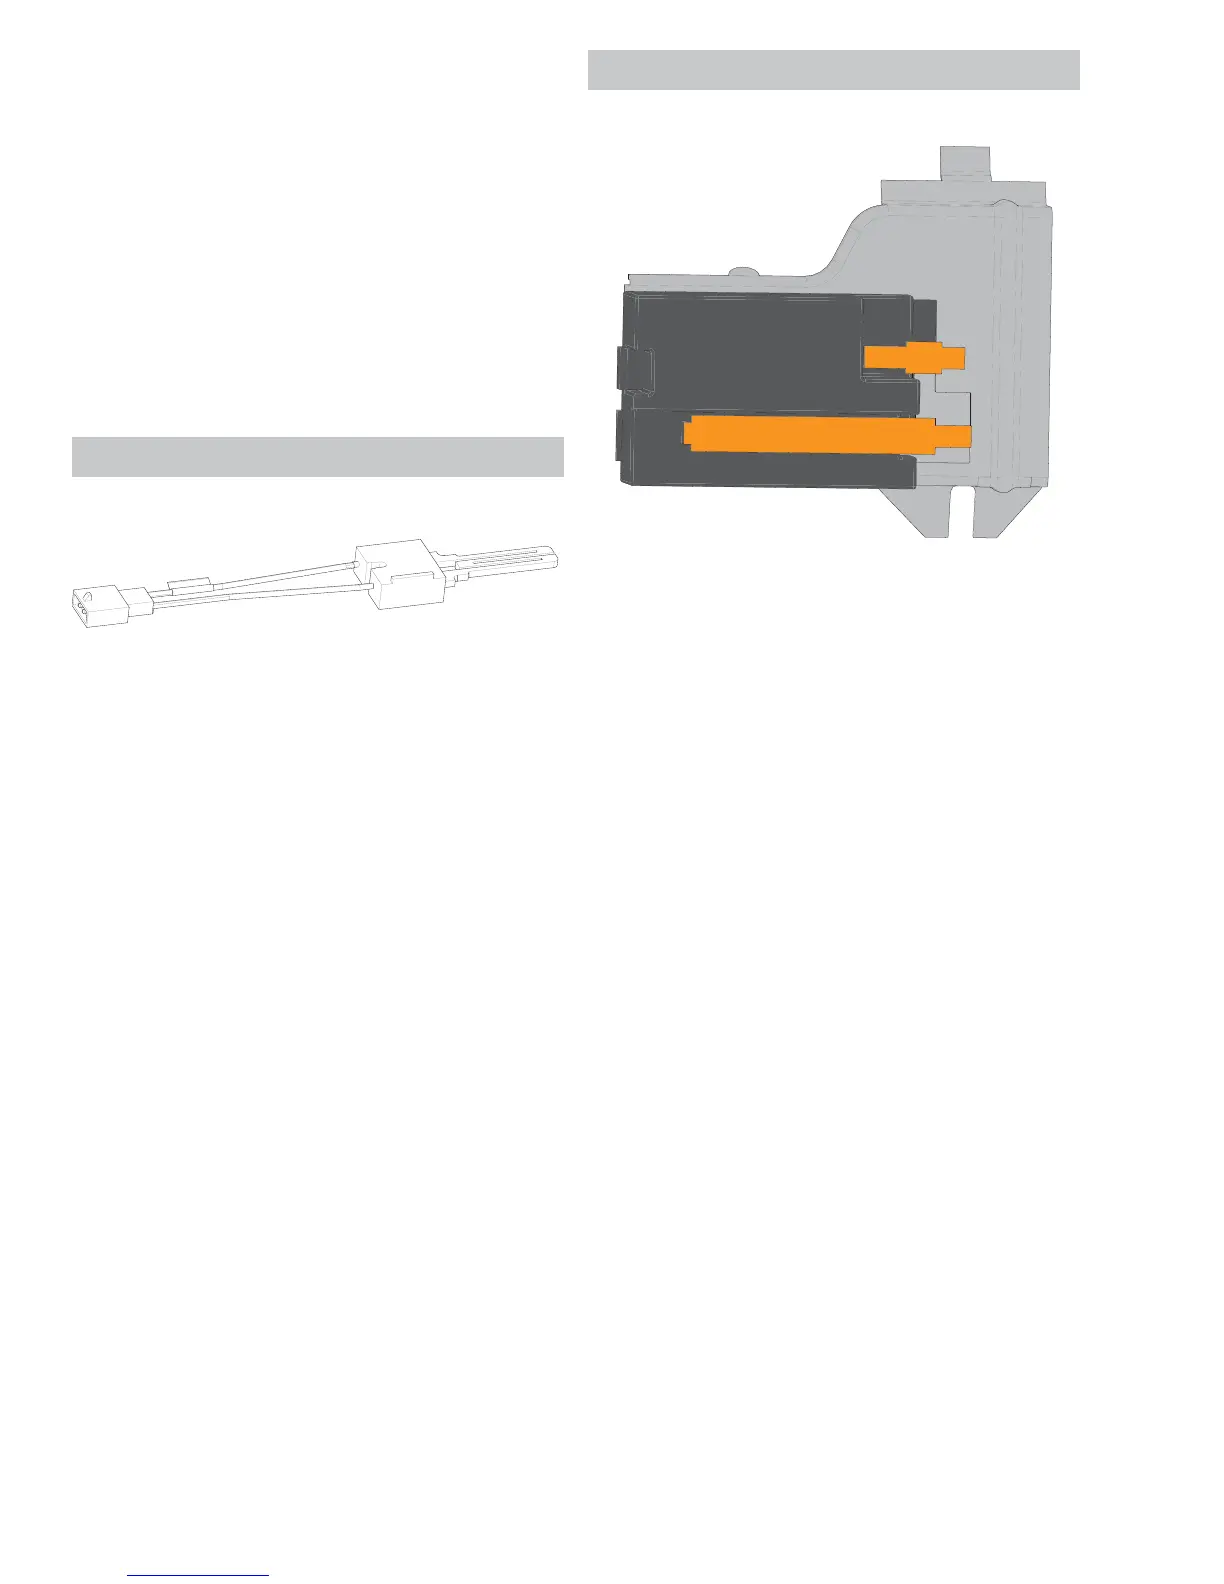
Igniter
Operating Voltage: 120 VAC
ResistanceaűDWURRPWHPSHUDWXUH
Igniter Removal
1. Disconnect power from the unit.
2. Remove the control panel.
3. Remove the front panel.
4. Remove the trap duct.
5. Remove the drum lamp.
6. Remove the front drum support.
7. Remove the belt.
8. Pull the drum out from the front of the dryer.
9. Remove the burner.
10. Disconnect the igniter harness.
11. Remove the one 1/4 in. hex screw and remove
the igniter.
12. Make sure the igniter harness is routed through
the burner bracket hole.
Flame Detector
Flame Detector Removal
1. Disconnect power from the unit.
2. Remove the control panel.
3. Remove the front panel.
4. Remove the trap duct.
5. Remove the drum lamp.
6. Remove the front drum support.
7. Remove the belt.
8. Pull the drum out the front of the dryer.
9. 'LVFRQQHFWWKHÀDPHGHWHFWRUKDUQHVV
10. 5HPRYHWKHÀDPHGHWHFWRUPRXQWLQJVFUHZ
11. 5HPRYHWKHÀDPHGHWHFWRU
See Drum Removal on page 35.
See Igniter Location on page 44.
See Control Panel Removal on page 20.
See Front Panel Removal on page 24.
See Trap Duct Removal on page 38.
See LED Drum Lamp Removal on page 33.
See Incandescent Drum Lamp Removal on
page 34.
See Flame Detector Location on page 44.
See Control Panel Removal on page 20.
See Front Panel Removal on page 24.
See Trap Duct Removal on page 38.
See LED Drum Lamp Removal on page 33.
See Incandescent Drum Lamp Removal on
page 34.