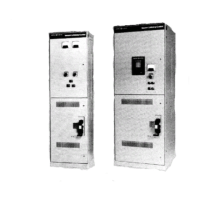
CR194 Two-High Vacuum Limitamp@ Control
TERMINATION OF SHIELDED CABLE
It is recommended that when shielded cable is used,
“stress-relief cones” be built up at the cable termina-
tions, or else GE Termi-Matic@ stress cones or similar
kits be used as shown in Figures 37 and 38. This will
relieve the electrical stress which occurs in the area
around the termination of the ground shield. When
making shielded cable terminations to Limitamp@, the
following procedure is recommended:
Use GE Termi-Matic’ or similar system per Figure 38,
or build stress cones with tape as follows:
NO. 8380 TAPE INSIDE FOR RUBBER OR
992 VC TAPE FOR VARNISHED CAMBRIC
ECOMMENDED. ALTERNATE: BUILD ENTIRE
SEAL WITH GE IRRASIL” NO. 42005 TAPE
CABLE INSULATION
GE NO. 8380 TAPE
NO. 19 AWG
TINNED COPPER WIRE
GE IRRASIL” NO. 42005 TAPE
SHIELDING TAPE
GE NO. 8380 TAPE
GE IRRASIL” NO. 42005 TAPE
figure 37. Termination of shielded, 5000-volt cable
showing stress cone construction
1. Maintains tight fit under
load cycling and all cable
operating conditions,
T
--I
2. Track-proof insulating EPDM
rubber. ‘La
3. Heavily-insulated shield 7’
edge protects high stress
area of stress cone.
5”
4. High conductivity semi-
conducting rubber relieves
electrical stress.
L/
: p\
09
5. Internal step positions
qt;;-! g
stress cone properly on
cable shield.
6. Ground clamp provides
i
4
‘i
i .t
SEMI-
positive ground.
CONDUCTOR
Figure 38. TERMI-MATIC@ preformed stress cones (5 kV)
Step 1.
Mark the cable at least 10 inches from the
terminal point.
Step 2.
Remove all shielding from the terminal end to this
point, leaving sufficient ground strip to reach the
nearest ground connection.
Step 3.
Proceed to build stress cones as prescribed by
the cable manufacturer. Refer to Figures 36 and 37
for details.
Step 4.
Tie all of the ground strips together and fasten them
to the ground bus link or ground bus.
If the preceding recommendations, along with the
cable manufacturer’s recommendations, are followed,
the cable terminations should be satisfactory and reli-
able. These instructions apply to both rubber-covered
and varnished-cambric insulated shielded cables.
Control Connections
Conduit for control wires should be brought into
Limitamp’ enclosures at the locations shown in the
Outline Detail section of the drawings provided with
the equipment. If the control wire is entering a CR194
two-high enclosure, these incoming control conduit
locations are shown in Figure 50, and removable con-
duit cutout covers are provided in both top & bottom
( if a bottom is provided ). These covers are shown in
Figure 30. Figure 2 shows the two-high with both low-
voltage doors open, and shows the low-voltage termi-
nal boards on the left portion of the low-voltage area.
There is a 2-inch hole on the left in the area between
the upper & lower starters that allows passage of low-
voltage wires between the starters. Normally this hole
will be plugged at the factory, with the customer hav-
ing the option of unplugging and using the hole for
low-voltage wires if needed. Customer’s low-voltage
wiring will normally be confined to the left, front area
of each two-high starter.
Mechanical Operation Check
ISOLATION SWITCH HANDLE TO CONTACTOR
MECHANICAL INTERLOCK
The CR194 two-high vacuum Limitamp@ is equipped
with a quick-make, quick-break isolation switch in each
starter for isolating the power bus when the switch
handle is in the “OFF” position. This isolation switch is
not designed to make or break motor load current. To
insure that the isolation switch handle cannot be oper-
ated when the contactor is energized, a mechanical in-
terlock mechanism is provided between the contactor
and the isolation switch handle. Operation of this me-
chanical interlock for each starter should be checked
per the following procedure.
WARNING:
Confirm that equipment is de-ener-
gized before performing this check.
21

 Loading...