REAR INSULATION u
BARRIER BEING
PULLED FORWARD 2% :
FOR REMOVAL \
‘? ;
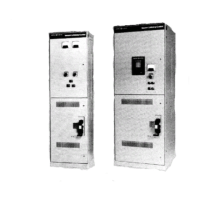
CtW4 Two-High Vacuum Limitamp@ Control
Taping Instructions for 5kV
For electrical clearance, motor terminals and bus
splices in the CR194 two-high must be taped. Use
Scotch #13OC linerless rubber splicing tape. Apply
tape using a medium tension to thin the 0.030” X 2”
tape to 0.024” X 1.75”. When completing wrapping, do
not keep tension on the last 2 or 3 inches of tape in
order to improve adhesion. Apply tape in two layers
with 2/3 overlap ( 6 thicknesses ). For bus splicing, ex-
tend the tape out of the two-high enclosure only
far enough to realize a 3.5” clearance from bare bus
to ground. When taping motor cable terminations,
tape the lug and entire cable terminal pad, and if win-
dow CT’s are used, overlap the tape onto the terminal
pad insulator support approximately one inch.
Reassembly
Reassembly of the equipment should be done by fol-
lowing the disassembly sequence in the reverse order,
being sure that all removed barriers get reinstalled
properly and following the contactor installation
procedure below.
WARNING:
Do not attempt to operate equipment
without all barriers in place.
CONTACTOR LOWER TERMINAL
ASSEMBLY MOVED FORWARD
* I
f
Figure 26.
Removal of rear insulation barrier to expose main
to vertical bus joints (stationary contactor design)
Since reinstallation of the high-voltage stationary
contactor involves bolted high-voltage power connec-
tions, not only is it necessary to follow the correct reas-
sembly sequence, but also the bolted power connec-
tions need to be properly torqued as well. When re-
placing the contactor in the enclosure, the following
procedure should be followed:
Step
1.
If the contactor is a stationary type, insure that the
cables attached to the line side of the contactor are
properly torqued to 39 ft-lb.
NOTE:
Do not grasp the contactor by the top mouing arma-
ture during installation.
Step 2.
Place the contactor onto its mounting base and slide
the contactor in until the slide safety stop engages and
latches the contactor in the intermediate position.
Then pull up on the safety stop and push the contactor
fully into the unit. Insure that the armature interlock
is properly engaged in the interlock paw1 on the right
side wall. See Figure 13 for close-up of interlock paw1
and Figure 40 for view of proper engagement.
WARNING:
The interlock paw1 transmits the
contactor armature motion to the mechanical
j( I
barriers
Figure 27.
view of
main
and vertical bus area with
removed (stationary contactor design)
16
 Loading...