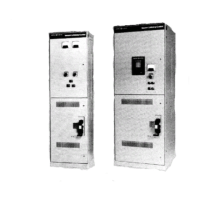
CR194 Two-High Vacuum Limifamp@ Control
DISASSEMBLY SEQUENCE:
WARNING:
Confirm that equipment is de-ener-
gized before proceeding with disassembly.
NOTE:
If
the rear of the enclosure is accessible, access to the
horizontal bus for splicing can be accomplished simply by re-
moval of the upper cover from the rear of the enclosure. Figure
28 shows the rear of the enclosure with the upper and lower
covers removed.
Step 1.
Move the isolation switch handles in both the upper &
lower starters to the full “OFF” (down) position (i.e.
the handle latch release pops back out). Refer to the
handle operating instruction nameplate attached to
the high-voltage door near the handle (See Figure 4).
Figure 1’7 shows the method of first depressing the
handle latch release with one hand and moving the
handle with the other.
Step 2.
Open both the upper & lower high-voltage doors.
f
Figure 17. Operate handle by depressing handle latch release
with ode hand and moving the handle with the other hand.
Contactor Removal
NOTE:
Before starting Contactor Removal procedure, per-
form Steps I U
2
above.
NOTE:
The following steps describe the pocedure for contactor
removal for either the upPer or lower starter, but in order to gain
access to the main bus splices, removal of only the upPer starter
contactor is necessary.
Step 3.
Remove the two wing nuts holding the contactor um-
bilical cord plug on the right side of the contactor.
Disconnect the plug and place it to the lower, right
out of the way.
NOTE:
For stationary mounted contactors, follow Steps 4
and 5, then go to Step 7. For drawout contactors, go to Step 6.
xes LOAD SIDE CONNECTION BOLTS
Figure 18. View of the stationary contactor showing removal of
load side connection bolts and contactor umbilical
plug wing nut locations
Figure 19. View of high voltage section showing the two
drawout contactor positioning bolts and wing nut locations.
Step 4.
Remove the three load side connection bolts at the
bottom, front of the contactor. Do not loosen the
R.T.V. covered bolts. See Figure 18.
Step 5.
Remove the three line side cable bolts at the bottom of
the power fuse assembly. See Figure 20.
Step 6.
Remove the two positioning bolts. See Figure 19.
12

 Loading...