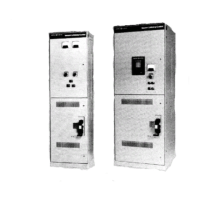
CR194 Two-High Vacuum Limitamp@ Control
TEST PROCEDURE
Step 1.
Move the isolation switch handle to the “OFF” position.
Step 2.
Open the high-voltage door.
Step 3.
For stationary contactors, remove the three load side
connection bolts at the bottom, front of the contactor
(do not loosen the R.T.V. covered bolts). Then re-
move the three line side cable bolts at the bottom of
the power fuse assembly.
Step 4.
For drawout contactors, remove the two positioning
bolts on the front of the contactor.
Step 5.
Slide the contactor forward approximately four (4)
inches until the slide safety stop engages in the plate
that is attached to the bottom of the contactor. Insure
that the line side cables on the stationary contactors
are sufficiently electrically isolated.
Step 6.
With the contactor in the open position, connect the
test leads to the contactor power terminals as shown in
Figure 44. Apply 20.0 kV RMS and hold for a mini-
mum of five seconds.
Figure 44.
Method of
connecting test leads to interrupter for
vacuum integrity test (stationary contactor
shown)
Step 7.
Reverse the leads and repeat the test.
Step 8.
If no breakdown occurs, the interrupter is in accept-
able condition. If a breakdown occurs, the interrupter
should be replaced. Refer to “Interrupter Replace-
ment” section in GEH-5306.
NOTE: No
attempt
should be made to compare the condition
of one
vacuum intewuper with another nor to correlate the
condition
of
any interrupter to low values
of
DC leakage cur-
rent. There is no significant correlation.
Step 9.
After the high potential voltage is removed from the
interrupters, the metal end caps of the interrupters
should be discharged with a grounding stick to remove
any residual electrical charge.
Step 10.
Reverse the above procedure to return the equipment
to the original starting condition. For stationary
contactors, torque the line side cable bolts at the bot-
tom of the power fuse assembly to 9 ft-lb and torque
the load side bolts at the bottom front of the contactor
to 16 ft-lb.
WARNING:
Be absolutely certain that these bolts
are properly installed and torqued. These are cur-
Preparation of Controller for Operation
Clean the inside of the equipment with a brush, soft
cloth, or dry compressed air. Make certain that any
dirt, dust or bits of packing material which may inter-
fere with successful operation of the panel devices are
removed from the panel.
CAUTION:
Care should be taken during the
cleaning operation to prevent any dirt from being
Check to confirm that no tools or loose wires have
been left in the panel during the installation process.
Operate relays, contactors, push-buttons, selector
switches, etc. by hand to see that the moving parts op-
erate freely and without binding.
Consult the drawings supplied with the equipment to
confirm that all the external low-voltage control con-
nections have been made, and that protective and
control relays are set properly for the equipment
being controlled.
Do a visual inspection of all devices and connections.
The controller is now ready for megger check.
Megger Check
WARNING:
Confirm that equipment is de-ener-
gized before performing this check.
With all power removed from the equipment and the
isolation switch handle “OFF”, megger the motor ter-
minals between each phase and ground link. Also
megger the main bus bars between each phase and
ground bus.
25
 Loading...