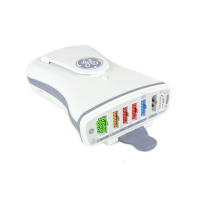
3-2 Patient Data Module 2030047-001A
Installation
Battery
Test the battery charge
Before installing a battery, verify the battery’s state of charge. Press the green TEST
button on the battery. The number of charge level indicator LEDs that illuminate
measures the approximate charge remaining in the battery.
Four LEDs illuminated: 75% – 100% of full charge capacity.
Three LEDs illuminated: 50% – 74.9% of full charge capacity.
Two LEDs illuminated: 25% – 49.9% of full charge capacity.
One LED illuminated: 10% – 24.9% of full charge capacity.
One LED flashing: < 10% of full charge capacity remaining.
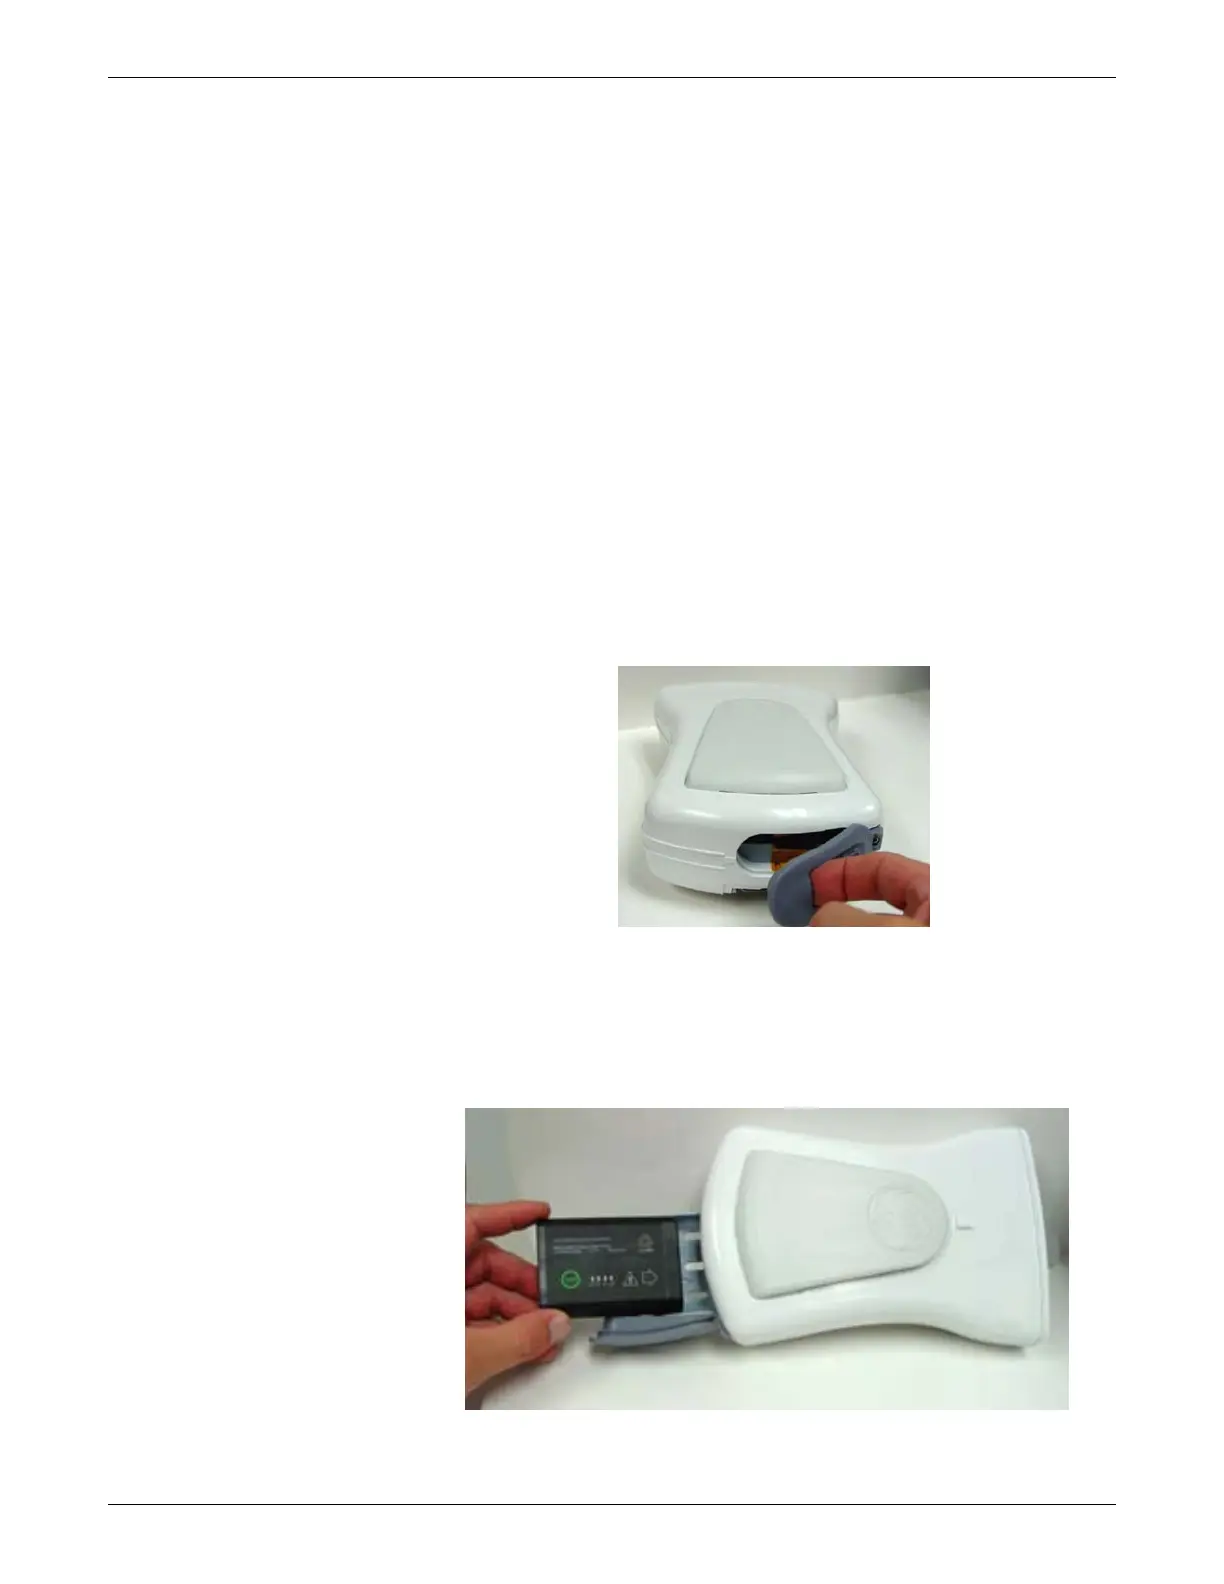
Install or change the battery
1. Open the battery door by gently pulling on the battery door pull tab.
862A
2. Pull the battery tray out of the Patient Data Module using the battery tray strap
and remove the battery.
3. Insert the new battery with the test button facing up and the arrow pointing into
the Patient Data Module.
855A