– 38 –
Operation of the water level control can be checked
by using service test mode t09. (See Service Test
Mode.)
Specifi c failures associated with the water level
control can initiate error codes E6 and E14. (See
Error Codes.)
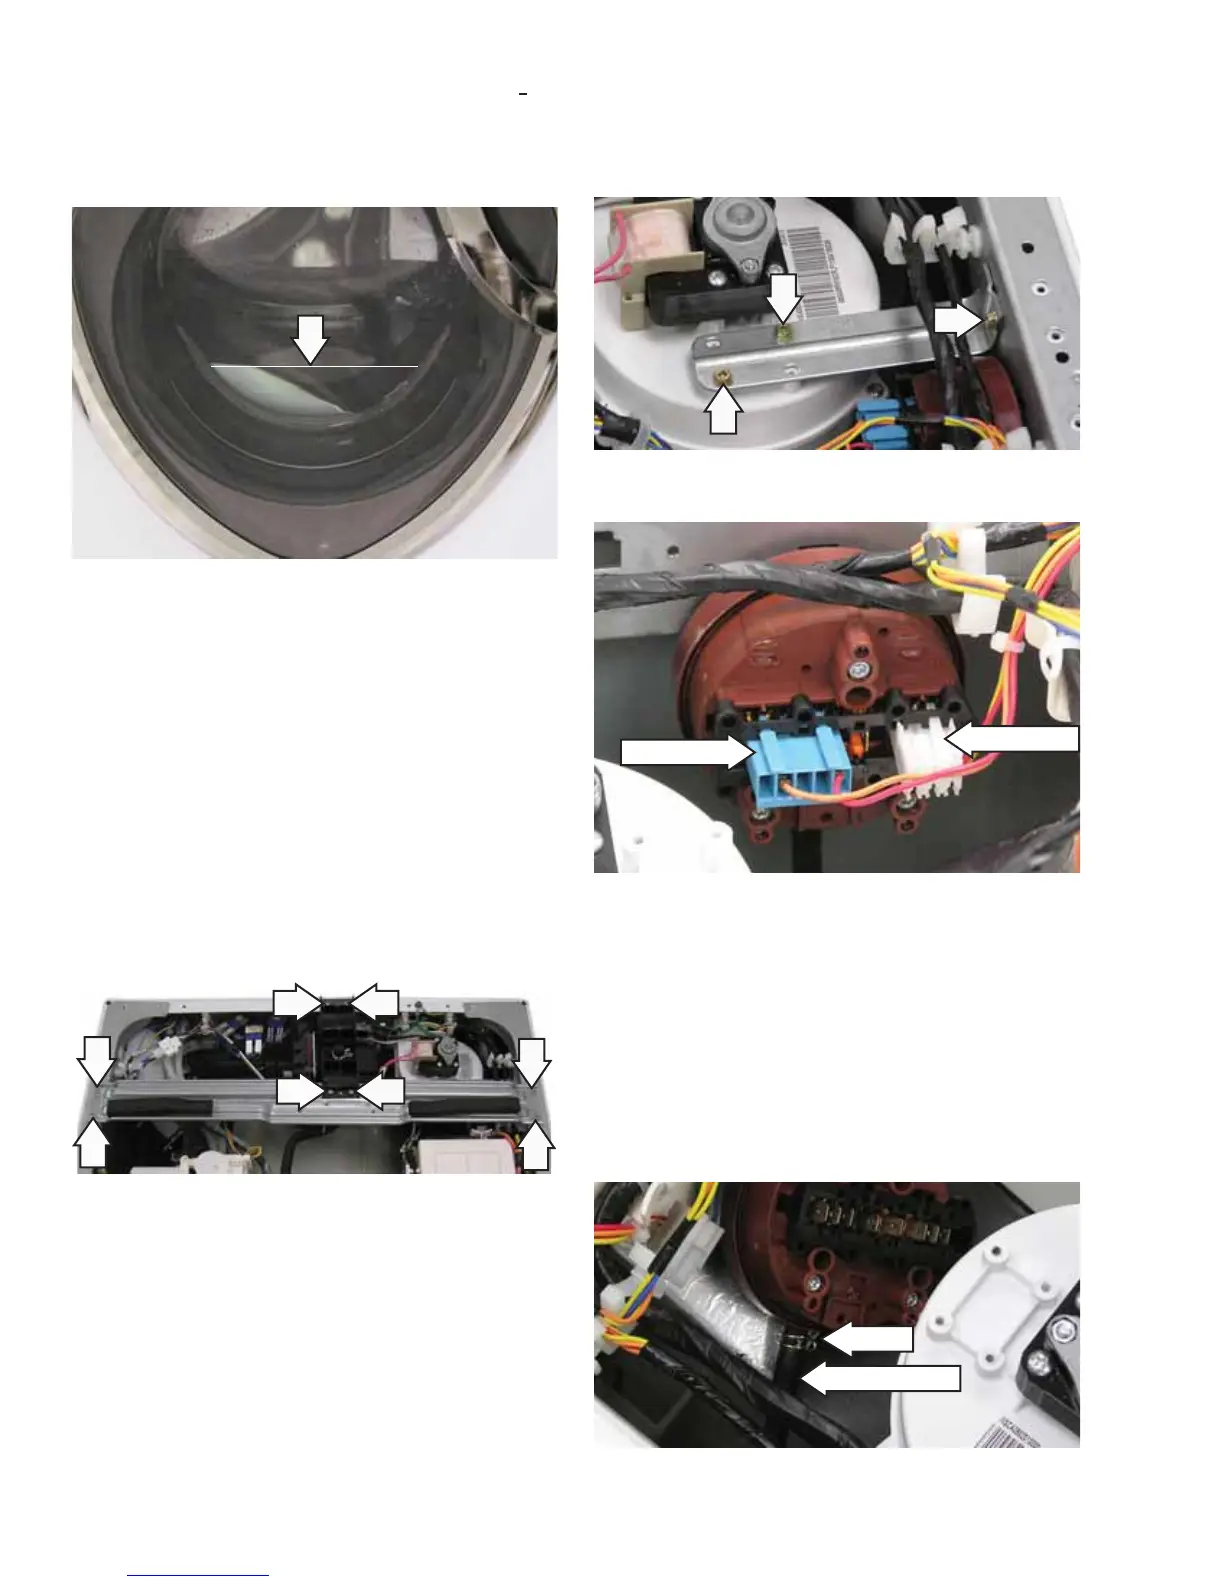
6. Remove the pressure tube.
Note: The pressure tube is diffi cult to remove.
a. Squeeze the clamp and slide it back.
b. Carefully break the hose loose by inserting a
small, fl at blade screwdriver under the hose
to break the seal.
c. Remove the hose.
Pressure Tube
Clamp
Disconnect
Disconnect
To remove the water level control:
1. Remove the top panel. (See Top Panel.)
2. Remove 4 Phillips-head screws from the cross
support and 4 Phillips-head screws from the
steam generator.
3. Remove the two 6-mm hex-head screws holding
the overnight ready fan bracket to the overnight
ready fan housing.
Note: The fan bracket is attached to the washer
frame with 1 screw and a tab.
5. Disconnect the 2 wire harnesses.
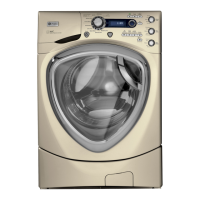
Overfl ow Water Level
The overfl ow water level is approximately 7 inches
above the door opening. Overfl ow protection will
occur when this water level is reached.
4. Remove the 6-mm hex-head screw from the
overnight ready fan bracket and remove the
bracket by sliding it up and out to release the
tab.
7. Rotate the water level control 1/4-turn clockwise
and pull it out of the cabinet.