– 31 –
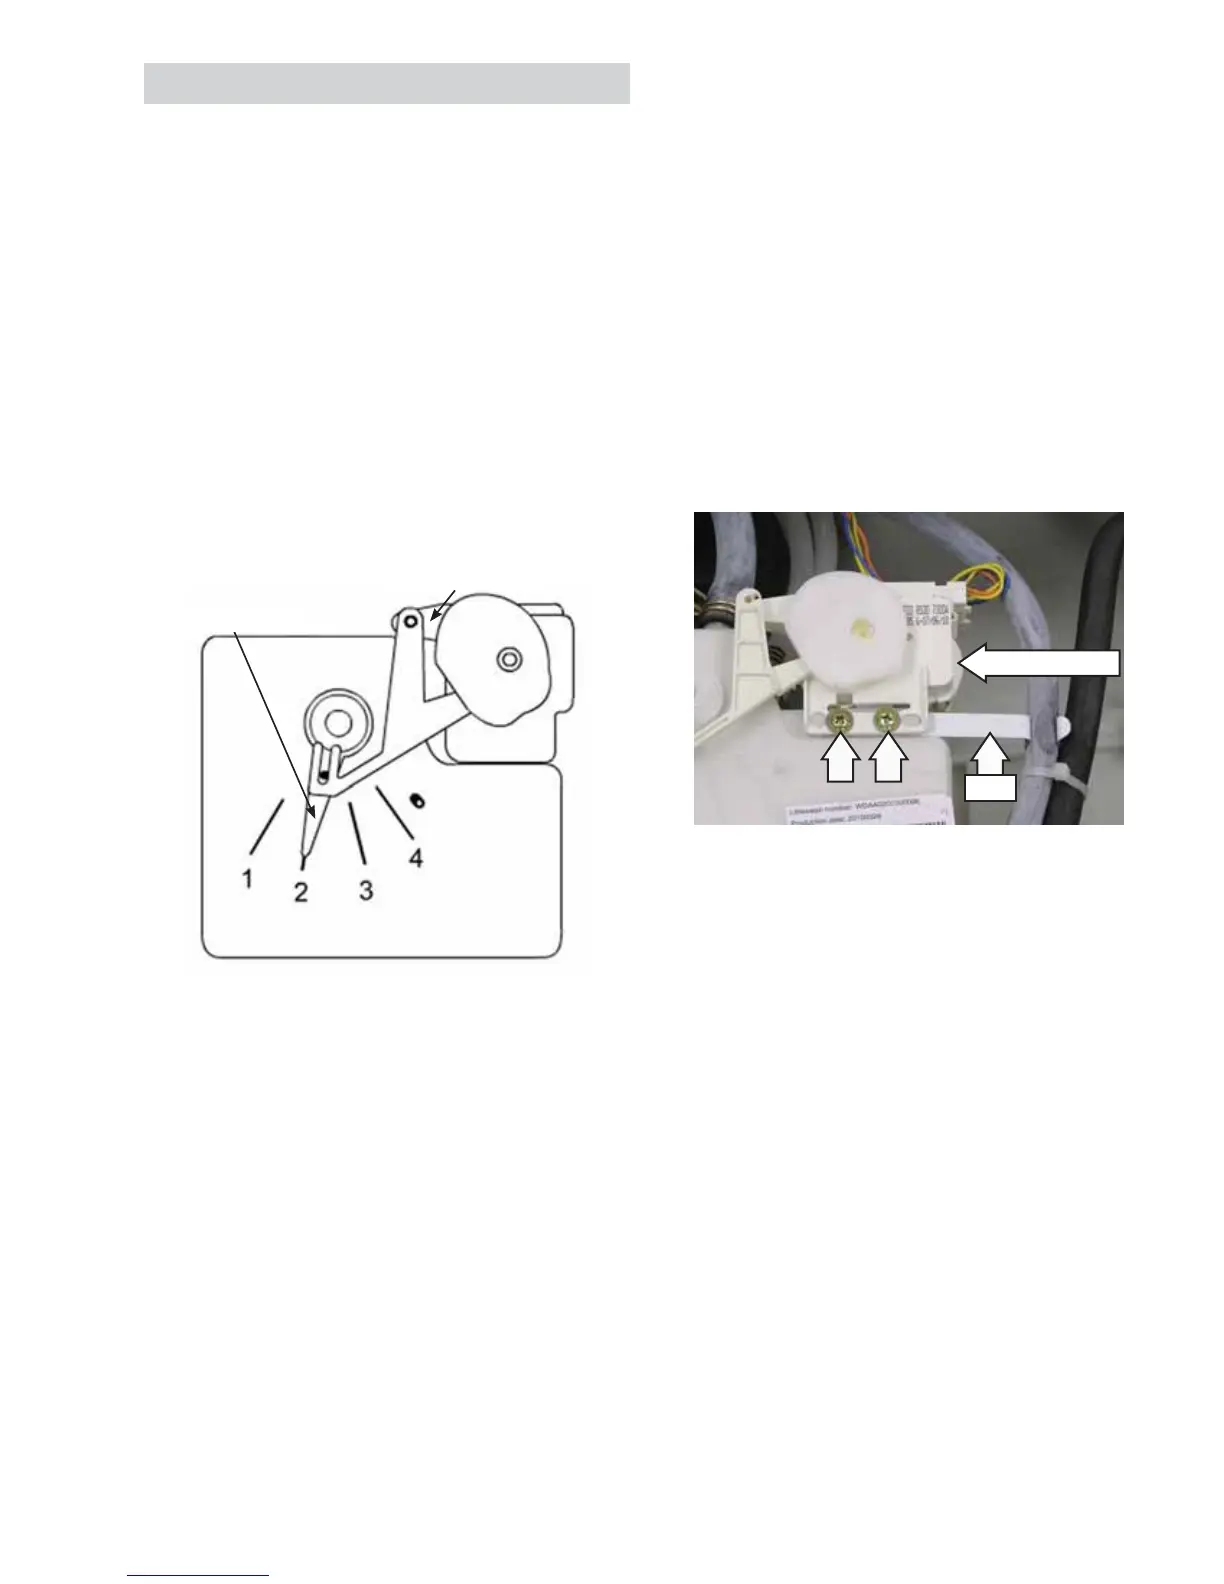
Dispenser Assembly
The dispenser assembly provides automatic
dispensing of detergent, bleach, and fabric softener
as long as the user fi lls the compartments prior to
starting the washer.
The products added to the dispenser are diluted
with water before they are dispensed into the wash
tub. This is accomplished by a water diverter that
sprays a controlled jet of water into the proper
compartment at the correct time. The water diverter
movement is provided by a motor-driven cam
located on the dispenser tank. The diverter motor
and water valve are operated by the control board.
At the start of a cycle, after the wake-up routine
is completed, the dispenser moves into the proper
position before fi ll takes place.
Position Dispenser Function
1 Pre Wash
2 Main Wash
3 Fabric Softener
4 Liquid Bleach
Operation of the dispenser can be checked by using
service test mode t15. (See
Service Test Mode.)
Specifi c failures associated with the dispenser can
initiate error code E9. (See Error Codes.)
Water Diverter
Motor Driven Cam
Dispenser Tank
Caution: When testing the diverter motor, DO NOT
remove the wiring harness from the diverter motor
unless replacing the motor assembly. The motor
assembly has a special locking connector, and the
wiring harness will not stay reconnected if removed
and reinstalled on the same motor.
To remove the dispenser assembly:
1. Remove the top panel. (See
Top Panel.)
2. Remove the gasket inlet hose from the clip
attached to the dispenser.
3. Remove the 2 Phillips-head screws that attach
the diverter motor and gasket inlet hose clip
to the dispenser tank. Place the motor and clip
aside.
Clip
Diverter Motor
4. Remove the water inlet, dispenser vent, and
bulk dispenser inlet hoses from the dispenser.
Note: The water inlet, dispenser vent, and bulk
dispenser inlet hoses are diffi cult to remove.
a. Squeeze each clamp and slide it back.
b. Carefully break each hose loose by inserting
a small, fl at blade screwdriver under the
hose to break the seal.
c. Remove the hoses.
(Continued Next Page)
Motor-Driven Cam
Water Diverter