4. Conventional Operation: Menu System, Keypad, and Displays
PHASOR XS Operating Manual Page 55
Step 2: Press
next to the selection titled LAN-
GUAGE. To change the selected language, continue
pressing
or turn the function knob. You’ll note that
the options available are English, German, French,
Spanish, Italian, Romanian, Polish, Czech, Rus-
sian, Japanese and Chinese. The default language is
English.
Step 3: The display-screen and report language will be
set to the choice last selected.
Setting the Date and Time Formats (CONFIG-
REGIONAL-DATE FORMAT)
Step 1: Activate the REGIONAL submenu (located in the
CONFIG Menu) by pressing
below it.
Step 2: Press
next to the selection titled DATE FOR-
MAT. To change the selected format, continue pressing
or turn the function knob. Choose from the following
date and time formats:
Y-M-D (12 or 24 hour time format)
M/D/Y (12 or 24 hour time format)
D.M.Y (12 or 24 hour time format)
Step 3: The date and time formats shown on the display-
screen and in outputted reports will be set to the choice
last selected.
Setting the Date (CONFIG-STARTUP-DATE)
Step 1: Activate the STARTUP Submenu (located in the
CONFIG Menu) by pressing
below it. Functions will
appear down the left side of the display screen.
Step 2: Press
next to the selection titled DATE. The
date is displayed to show the Day, Month, and Year. Note
that the first time you press
, the day character is
highlighted. The next time you press
, the month
character is highlighted. Finally, pressing
again
will cause the year character to be highlighted.
Step 3: To change the month, days, or year, turn the func-
tion knob while the desired character is highlighted.
Step 4: When complete, press
one more time. The
current date will be set to the date displayed.
Setting the Time (CONFIG-STARTUP-TIME)
Step 1: Activate the STARTUP Submenu (located in the
CONFIG Menu) by pressing
below it. Functions will
appear down the left side of the display screen.
Step 2: Press
next to the selection titled TIME. Time is
displayed in 12 or 24-hour format. Note that the first time
you press
, the hours character is highlighted. The next
time you press
, the minutes character is highlighted.
Step 3: To change the hours or minutes setting, turn the
function knob while the desired character is highlighted.
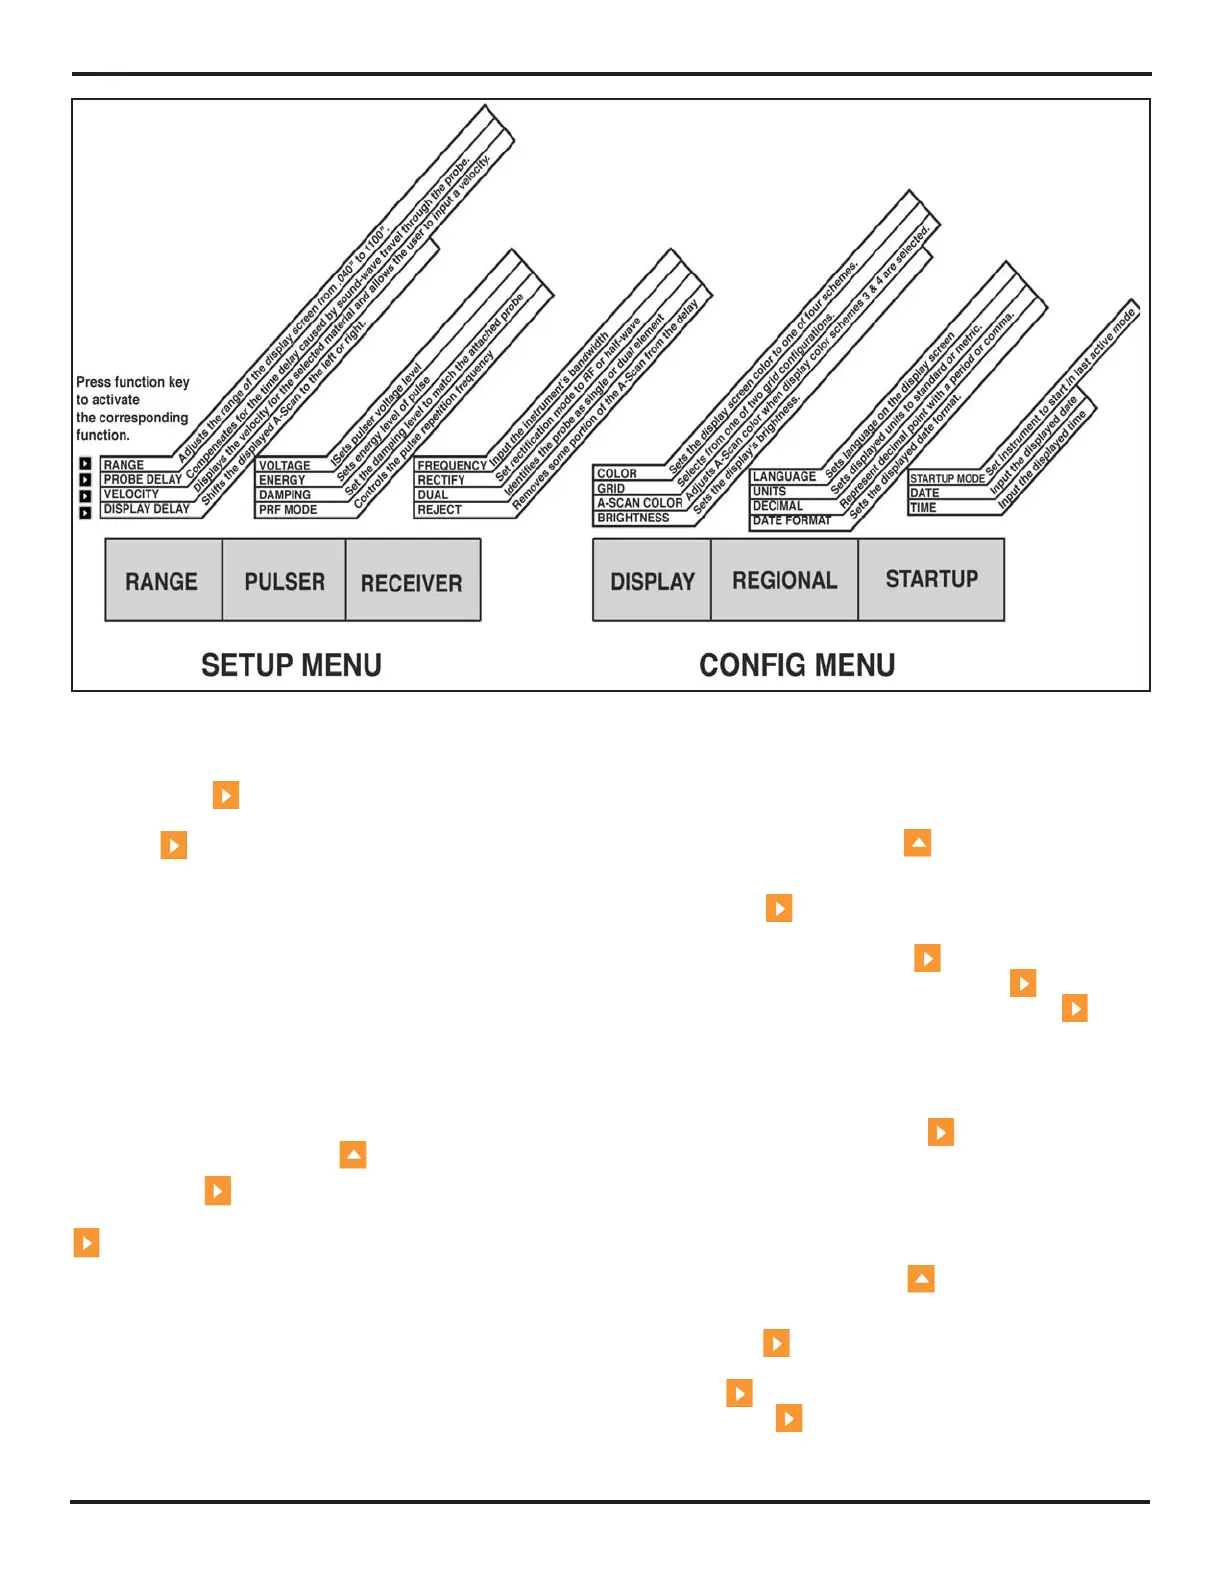
FIGURE 4-7—The CONFIG Menu allows the user to adjust most of the instrument’s display and operating features. The
SETUP Menu allows for pulser, receiver, and A-Scan adjustments.