4. Conventional Operation: Menu System, Keypad, and Displays
PHASOR XS Operating Manual Page 47
4. Conventional Operation: Menu System, Keypad, and Displays
When operating in conventional ultrasonic mode, the
instrument provides ultrasonic flaw detection and thick-
ness measurement. In this mode, it is capable of storing
A-Scans, operating parameters, and reports. This chapter
of your manual will help you become more familiar with
the menus and functions of the conventional (non-phased
array) system.
After reviewing this chapter, you’ll be able to
• Supply power to the instrument (
Section 4.1)
• Power up the instrument (
Section 4.2)
• Understand the function of each key on the keypad
(
Section 4.3)
• Access each conventional mode function using the
built-in menu system (
Section 4.4)
• Interpret the symbols that most often appear on the
display (
Section 4.5)
• Set up the instrument’s display and basic operating
features (
Section 4.6)
• Install a conventional probe and configure the Pul-
sar/Receiver to match the probe type (
Section 4.7)
• Adjust the A-Scan display screen’s appearance
(
Section 4.8)
• Calibrate the instrument (
Section 4.9)
• Set the reminder alarm (
Section 4.10)
• Input option activation code (
Section 4.11)
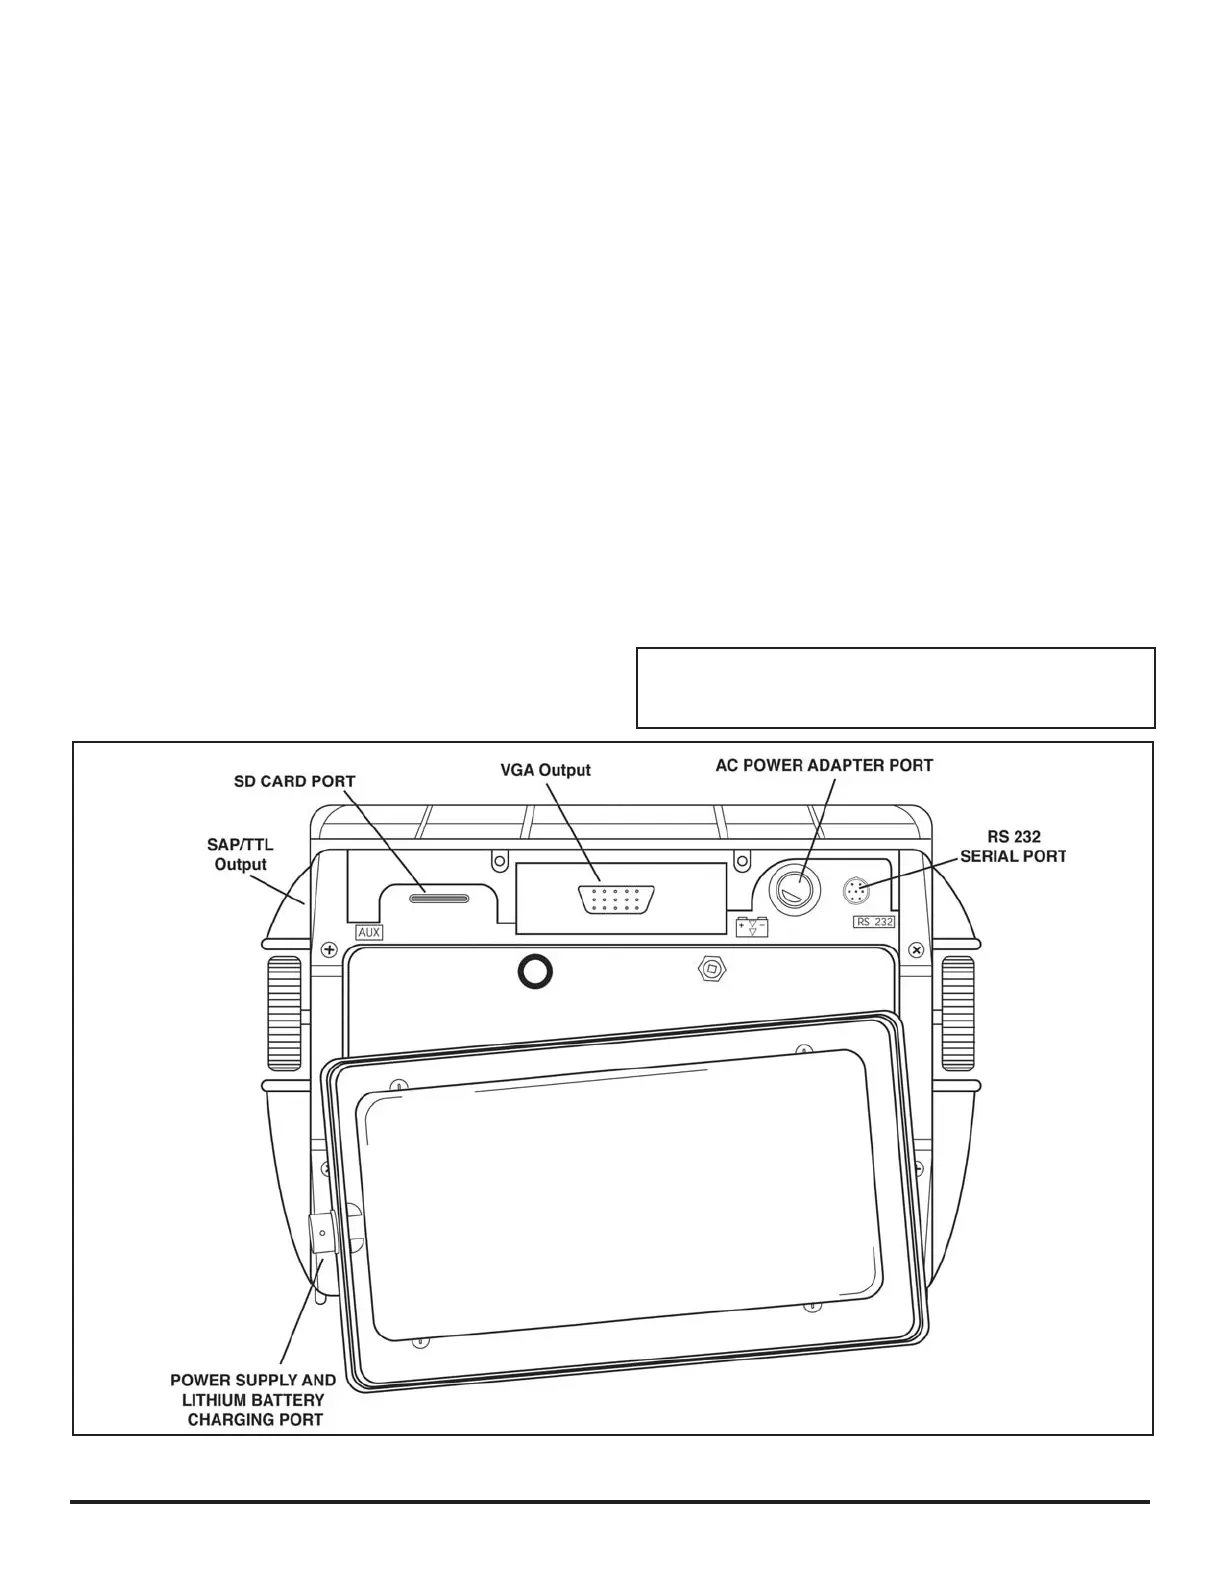
4.1 Supplying Power
The instrument operates on a Lithium battery pack located
in the rear of its housing, or by using the power adapter
(
Figure 4-1). To remove the battery compartment cover,
first remove the four thumb-screws. The standard Lithium
battery pack will provide maximum operating life between
charging.
NOTE: Only the dedicated GEIT Lithium battery pack
should be used. Only this pack can be charged while
installed in the instrument.
FIGURE 4-1—Installation of standard Lithium battery pack. Note the location of the Power Adapter Port and Lithium
battery pack on-board charging port.