4. Conventional Operation: Menu System, Keypad, and Displays
PHASOR XS Operating Manual Page 61
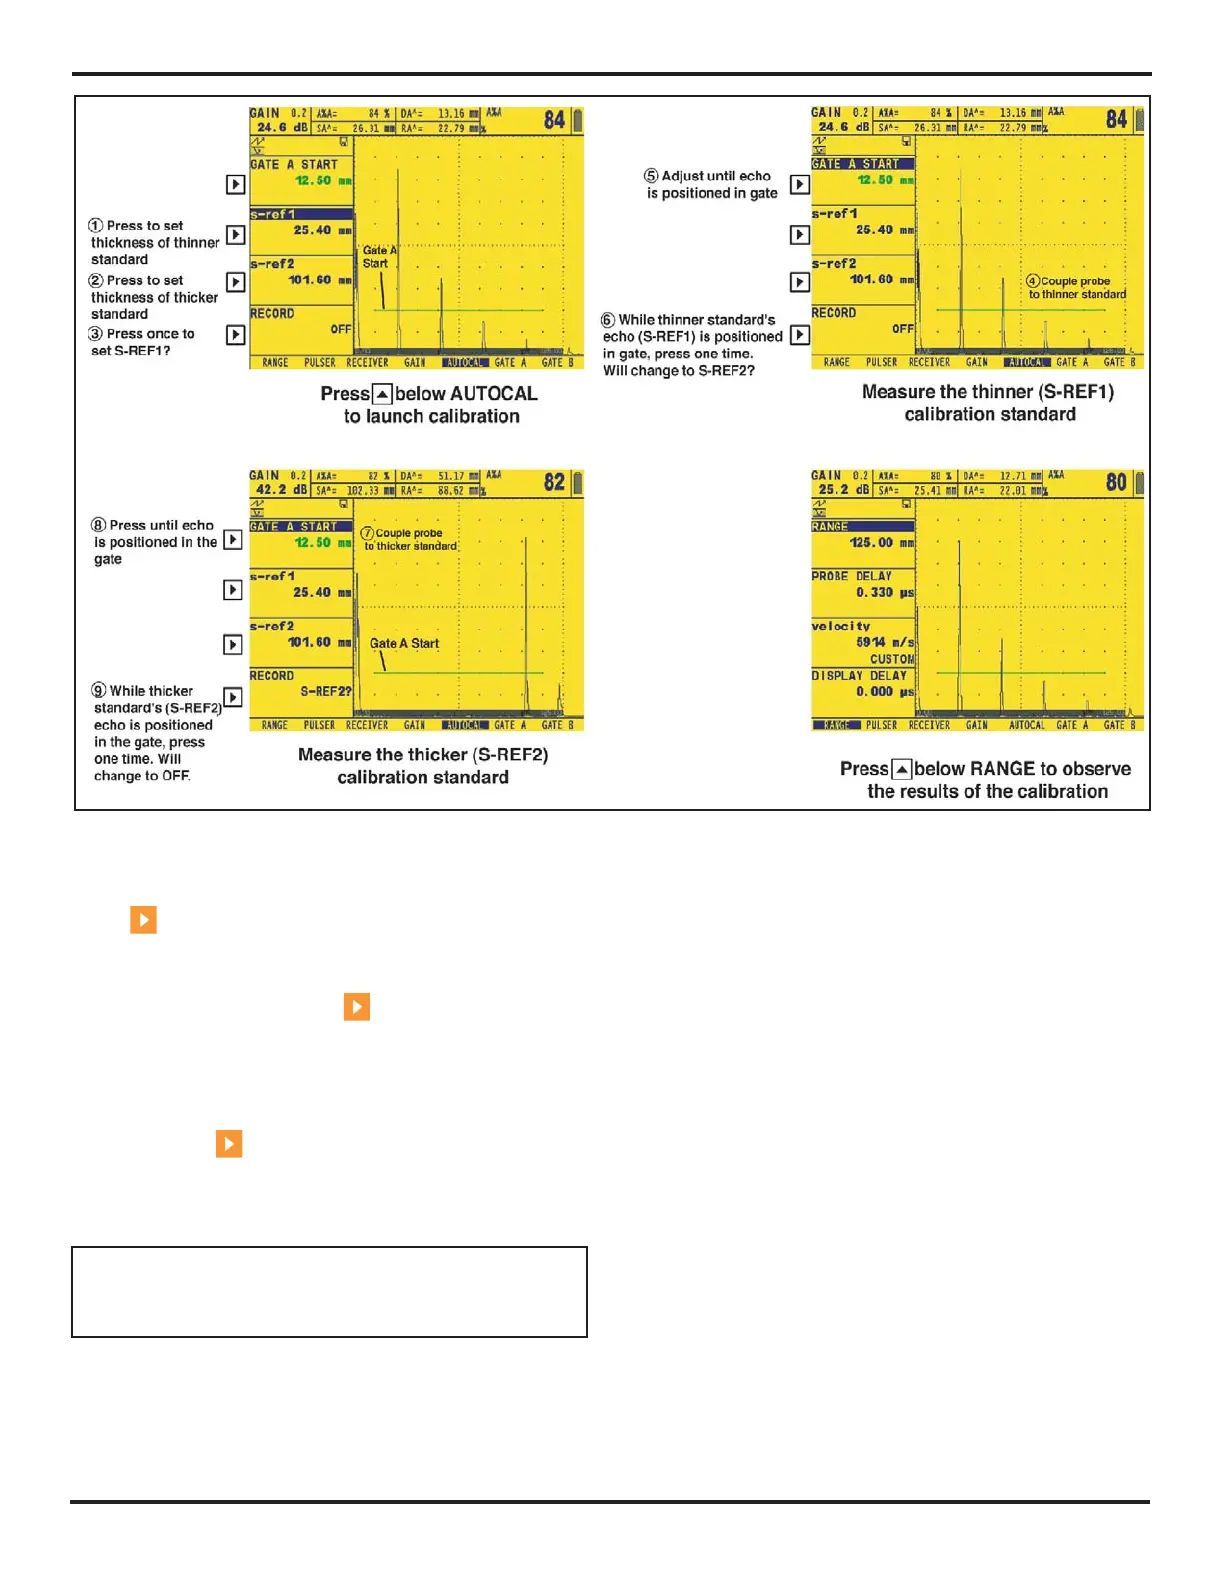
press
next to RECORD again. The value in the func-
tion box will now read “S-REF2?”.
Step 6: Apply couplant and couple the probe to the thicker
calibration standard. Press
next to the selection
titled A START. Turn the function knob (this will shift the
starting point of the A-Gate) until the A-Gate lies over the
echo corresponding to the thicker standard’s thickness
(
Figure 4-12).
Step 7: Press
next to the selection titled RE-
CORD. The value in the function box will change from
“S-REF2 ?” to “OFF”. The instrument will automatically
calculate the material’s velocity and the probe delay.
NOTE: The instrument’s AUTOCAL Function applies
only to conventional operation, not to phased-array
operation.
Checking Calibration Results
Following the calibration procedure, the calculated acous-
tical velocity and probe delay are displayed. To view these
calculated values:
Step 1: Access the HOME Menu.
Step 2: You’ll find these selections:
• PROBE DELAY—Adjustment made as a result of
the AUTOCAL (zeroing) procedure. This represents
the time delay caused by sound-wave travel through
a probe’s membrane, wear plate, or delay line.
• VELOCITY—Display’s the calculated velocity after
calibration. (Note that the material type is listed as
custom)
4.10 Using the Calibration Reminder
Alarm
The instrument incorporates a timed alarm feature that
causes an icon to appear on user input intervals between
0.5 and 4.0 hours. To use the alarm:
Step 1: Access the CALALARM Submenu (located in the
CONFIG Menu).
FIGURE 4-12—Auto Calibration Procedures