EasyManua.ls Logo

GE Spacemaker GSM1800J Series - User Manual

GE Spacemaker GSM1800J Series
45 pages
Print Icon
To Next Page IconTo Next Page
Loading...
TECHNICAL SERVICE GUIDE
GE Consumer Products
Spacemaker 18-In. Built-In Compact
Dishwasher
PUB # 31-9114 11/03
MODEL SERIES:
GSM1800J

Questions and Answers

  • C
    Craig FergusonAug 18, 2025
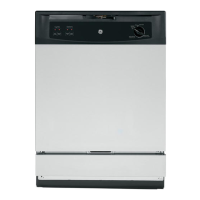
    Why my GE Spacemaker GSM1800J Dishwasher will not turn on?
    • K
      katie85Aug 18, 2025
      If your GE Dishwasher won't turn on, it could be due to several reasons. First, check for a blown fuse or tripped circuit breaker and replace or reset it. Other potential causes include damaged wiring (repair the wiring), defective timer contacts (replace the timer), improper motor resistances (replace the motor), defective door switch contacts (replace the door switch), or a defective door latch (replace the door latch).
  • S
    stevenhardyAug 20, 2025
    How to fix GE Spacemaker GSM1800J that will not fill with water?
    • N
      newmanamandaAug 20, 2025
      If your GE Dishwasher isn't filling with water, start by ensuring the water supply is turned on and that you have a minimum water pressure of 20 PSI. Other possible causes include a defective water fill valve (replace it), an obstructed water fill valve or hose (disassemble and clean them), a defective timer (replace it), or a defective pressure switch (replace the pressure switch). Also, make sure the timer is set correctly and consider using the dishwasher when water usage in your home is low. Damaged wiring can also be a factor, so repair it if necessary.
  • J
    Jennifer CarterAug 22, 2025
    What to do if GE Dishwasher is leaking water?
    • S
      Sandra HernandezAug 23, 2025
      If your GE Dishwasher is leaking water, several factors could be responsible. The causes can be: too much water fill, a defective tub seal (replace the tub seal), a defective vent plate (replace the vent plate), or the dishwasher door not being level (adjust the dishwasher door). Ensure the dishwasher is level. Check for loose hose clamps (tighten or replace the hose clamps), a loose heater element (tighten the heater element mounting nuts), or defective water seals (replace the water seals). Also, make sure the motor and pump assembly are properly seated in the tub liner bottom (remount the motor and pump assembly in the tub liner bottom).
  • J
    Jill GomezAug 26, 2025
    Why is my GE Spacemaker GSM1800J running but not heating?
    • M
      Michael MilesAug 26, 2025
      If your GE Dishwasher runs but doesn't heat, the issue might stem from a defective heat selector switch (replace it), an open heater element (replace the heater element), defective timer contacts (replace the timer), or damaged wiring (repair the wiring).
  • M
    Michael CunninghamAug 28, 2025
    How to fix GE Dishwasher that will not pump out?
    • C
      Christopher LambertAug 28, 2025
      If your GE Dishwasher isn't pumping out water, the problem could be a defective drain pump (replace it), a defective impeller (replace it), or a defective timer (replace it).
  • M
    Melissa CurryAug 30, 2025
    Why GE Dishwasher motor hums but will not start?
    • B
      browndebraAug 30, 2025
      If the motor in your GE Dishwasher hums but won't start, it could be due to defective motor bearings (replace the motor), the knob position being advanced beyond fill (advance the knob to the next wash cycle), or a defective motor capacitor (replace the motor capacitor).
  • D
    Donald HarperSep 1, 2025
    What causes GE Dishwasher to run but not stop?
    • M
      Martha LinSep 1, 2025
      If your GE Dishwasher runs continuously, the issue might be due to an inoperative timer motor, damaged wiring, or a defective timer. To resolve this, replace the timer or repair the wiring.
  • M
    middletonkaitlynSep 4, 2025
    How to solve too much water fill in GE Spacemaker GSM1800J Dishwasher?
    • M
      Michael FoleySep 4, 2025
      If your GE Dishwasher is filling with too much water, this could be due to a defective water fill valve (replace the water fill valve) or a defective timer (replace the timer). Ensure that the timer hasn't advanced past the start of the drain cycle and instruct the customer on the proper setting of the timer.
  • K
    kyleandersonSep 7, 2025
    Why GE Spacemaker GSM1800J timer does not advance automatically?
    • J
      johnstonjenniferSep 7, 2025
      If the timer on your GE Dishwasher isn't advancing automatically, it might be because the timer motor is stalled or open (replace the timer), the timer isn't providing power to the timer motor (replace the timer), or the timer shaft is binding or the knob is interfering with the escutcheon (repair or adjust the timer shaft or knob).
  • J
    Jordan EllisonSep 9, 2025
    What to do if GE Spacemaker GSM1800J Dishwasher motor trips on thermal overload?
    • C
      Crystal MontgomerySep 9, 2025
      If the motor in your GE Dishwasher trips the internal thermal overload protector, it could be due to improper motor voltage, motor shaft binding, or shorted motor windings. In any of these cases, replace the motor.

Summary

GE Dishwasher Safety Information

Important Safety Notice

Information for qualified individuals; potential for injury and damage.

Electrical Safety Warning

Disconnect power before servicing to avoid personal injury.

Grounding Device Reconnection

Ensure grounding wires, screws, and clips are properly reattached after service.

Dishwasher Introduction and Specifications

Product Overview and Features

Details the compact size, ENERGY STAR compliance, and available wash cycles.

Technical Specifications

Provides electrical, component resistance, and water supply requirements for the dishwasher.

Dishwasher Identification and Nomenclature

Model Number Breakdown

Explains the meaning of each part of the model number for identification.

Serial Number Information

Details how to determine the month and year of manufacture from the serial number.

Control Panel Functions and Operation

Control Timer Cycles

Describes the dishwasher cycles selectable via the control timer knob.

Door Latch and Heated Dry Switches

Explains the function of the door latch and heated dry selector switches.

Component Location Identification

Exterior Component Views

Identifies external components like the control panel, insulation, and access panel.

Control Panel Component Layout

Locates switches and the timer on the control panel interface.

Interior Component Locations

Dishwasher Interior Layout

Shows the location of racks, detergent module, and static vent inside the tub.

Detergent;Rinse Module Details

Identifies parts of the detergent and rinse agent dispenser.

Internal Component Views

Dishwasher Tub Internals

Locates spray arm, heating element, filters, and clamp nut within the tub.

Side and Bottom Component Views

Shows fill funnel, pressure switch hose, sump, motor pump, capacitor, and drain pump.

Timer Component Service

Timer Description and Warnings

Explains timer function, safety precautions, and voltage check notes.

Timer Removal and Installation

Step-by-step guide for removing and installing the timer assembly.

Heated Dry Switch Service

Heated Dry Switch Function

Details the switch's role in controlling the heating element for drying.

Heated Dry Switch Installation

Provides instructions for removing and installing the heated dry switch.

Door Latch and Switch Service

Door Latch Assembly Function

Explains the latch mechanism and safety switch operation for door closure.

Door Switch Removal and Installation

Step-by-step guide for removing and installing the door switch assembly.

Static Dry System Maintenance

Static Dry System Operation

Describes how the vent system removes moisture during drying.

Static Vent Channel Removal

Instructions for removing and inspecting the static vent channel cover.

Door Panel and Static Vent Installation

Door Panel Description

Covers the door panel's role in protecting electronics and the detergent module.

Static Vent Installation

Steps for installing the static vent channel and cover into the door.

Detergent;Rinse Module Service

Detergent Dispensing Operation

Explains how the module dispenses detergent and rinse agent during cycles.

Detergent Module Removal and Replacement

Step-by-step guide for removing and replacing the detergent/rinse module.

Door Assembly Service

Door Assembly Removal Steps

Detailed instructions for disconnecting electrical components for door removal.

Door Assembly Component Disconnection

Guide for disconnecting wires from timer, door switch, and heated dry switch.

Door Hinge Service

Door Hinge Removal Procedure

Instructions for removing the spring bolt key and lifting the hinge arm.

Door Hinge Arm Adjustment

Details on lifting the hinge arm to expose the hook for removal.

Bottom Door Seal Service

Bottom Door Seal Description

Explains the seal's function in preventing water leakage at the door bottom.

Bottom Door Seal Replacement

Guide for removing and installing the bottom door seal in its groove.

Heating Element and Tub Seal Service

Dishwasher Tub Seal Function

Details the tub seal's role in preventing leaks around the tub rim.

Heating Element Service

Explains heating element function, testing, and removal/replacement steps.

Fill Funnel and Heating Element Removal

Heating Element Removal Steps

Instructions for removing nuts, brackets, clamps, and the heating element.

Fill Funnel Service

Details the fill funnel's purpose and how to remove and install it.

Water Valve Service

Water Valve Description

Explains the timer-controlled, solenoid-operated water valve and its flow rate.

Water Valve Removal and Installation

Step-by-step guide for disconnecting the water line and removing the valve.

Pressure Switch Service

Pressure Switch Function

Explains the pressure switch's role in monitoring water level via air pressure.

Pressure Switch Removal

Guide for accessing and removing the pressure switch from the dishwasher frame.

Drain Pump Assembly Service

Pressure Switch Removal

Instructions for removing the capillary tube and float switch from the pressure switch.

Drain Pump Removal and Installation

Step-by-step guide for disconnecting the drain tube and terminals for the drain pump.

Motor Pump Assembly Service

Drain Pump Removal Details

Instructions for removing bolts, lock-washers, nuts, and clamps for the drain pump.

Motor Pump Assembly Description

Details the capacitor start induction motor, its rotation, and power draw.

Motor Pump Assembly Component Removal

Motor Pump Hose Disconnection

Steps for removing clamps and hoses from the motor sump, washer arm, and main conduit.

Motor Pump Ground Wire Removal

Instructions for removing the ground wire screw from the wash pump motor assembly.

Sump Assembly Service

Motor Pump Assembly Removal

Guide to pulling the motor mount, motor tab, and removing the assembly.

Sump Assembly Description

Explains the sump assembly's components and their functions.

Sump Assembly Component Removal

Sump Hose and Filter Removal

Steps for removing clamps, hoses, filter assembly, and micro-filter from the sump.

Sump Clamping Nut and Sump Removal

Instructions for removing the clamping nut, gasket, and sump itself.

Troubleshooting - Door Switch

Door Switch Testing

Procedure to test the door switch for continuity using an ohmmeter.

Door Switch Circuit Diagram

Schematic showing the door switch's wiring within the appliance circuit.

Troubleshooting - Heating Components

Heated Dry Switch Troubleshooting

Guide for testing the heated dry switch using an ohmmeter and wiring diagram.

Heating Element Troubleshooting

Procedure to test the heating element's continuity and resistance.

Troubleshooting - Timer

Timer Troubleshooting Steps

Steps for diagnosing timer faults, including checks for voltage and resistance.

Timer Operation Charts

Provides wiring schematics and cycle charts for timer diagnostics.

Troubleshooting - Water Inlet and Pump

Wash Pump Motor Troubleshooting

Diagnosing issues with the wash pump motor not starting or running.

Water Fill Valve Troubleshooting

Steps for diagnosing no water, low water, or fill valve not shutting off.

Water Fill Valve Diagnostics

Water Level Diagnostics

Checks for water not reaching heating element or not shutting off.

Water Fill Valve Circuit

Wiring diagram for the water fill valve for diagnostic purposes.

Troubleshooting Checklist (Part 1)

Common Dishwasher Symptoms

Lists common issues like 'not operating', 'won't heat', 'won't stop'.

Troubleshooting Symptom Remedies

Provides remedies for symptoms like 'runs with door open' and 'motor hums'.

Troubleshooting Checklist (Part 2)

Additional Symptom Checks

Covers issues like 'no heat', 'no water', 'no pump out', and 'water siphons out'.

Leak and Water Fill Issues

Addresses water leaks, too much fill, and loose components.

Troubleshooting Checklist (Part 3)

Washability and Drying Issues

Diagnoses poor washability, poor drying, door latch, and noisy pump assembly.

Detergent Dispenser and Loading Issues

Troubleshoots detergent left in dispenser and loading problems.

Troubleshooting Checklist (Part 4)

Noisy Pump and Spotting Issues

Covers noisy pump assembly and spotting/filming on glasses.

Water Temperature and Installation Issues

Addresses high/low water temperature and food disposal installation.

Washability Performance Factors

Water and Detergent Factors

Discusses hot water, water level, detergent amount, and rinse agent use.

Loading and Drying Performance

Covers proper loading, spray arm function, and drying conditions.

Appliance Schematic Diagram

Electrical Wiring Schematic

Detailed wiring diagram showing all electrical components and connections.

Component Color Code

Key for wire colors used in the schematic diagram.

Illustrated Parts Catalog (Part 1)

Front View Parts Identification

Diagram identifying external and control panel components with part numbers.

Door and Harness Components

Illustrates parts related to the door assembly and wiring harness.

Illustrated Parts Catalog (Part 2)

Main Body and Frame Components

Diagram showing parts of the main dishwasher body, frame, and panels.

Lower Front Components

Illustrates parts for the lower front section, including toe kick and access panel.

Illustrated Parts Catalog (Part 3)

Dishwasher Racks and Basket

Illustrates the upper rack, lower rack, and silverware basket assemblies.

Rack Studs and Rollers

Shows the studs and rollers used for the rack movement.

Illustrated Parts Catalog (Part 4)

Water Inlet and Pump Components

Diagram identifying parts related to water inlet, pump, and hoses.

Filter and Spray Arm Components

Illustrates filter assemblies, spray arms, and related parts.

Parts List - Components 1-51

Main Conduit and Filter Parts

Lists parts for main conduit, O-rings, filters, sump, and heating element.

Control and Hose Components

Details parts for the timer, switches, hoses, and control panel.

Parts List - Components 52-84

Door, Hinge, and Rack Components

Lists parts for door hinges, racks, baskets, and related assemblies.

Miscellaneous Components and Hardware

Includes parts like leveling legs, junction box, screws, and toe kick.

GE Dishwasher Warranty Information

Warranty Coverage Details

Explains what GE will replace and the duration of the warranty.

Exclusions from Warranty Coverage

Lists items not covered by the warranty, such as improper installation and accidental damage.

GE Spacemaker GSM1800J Series Specifications

General IconGeneral
BrandGE
ModelSpacemaker GSM1800J Series
CategoryDishwasher
LanguageEnglish

Related product manuals