Fig.22
2.
Actuate the main stroke with the manual override (Y1) so that the valve insert
moves into the mousing under its own weight.
Fig.23
3.
Mount the clamp connection (43.1) between housing and lantern.
! Ensure that the clamp connection (43.1) is mounted correctly.
4.
Aerate the actuator at (Y1).
5.
Screw on the cleaning hose (30).
6.
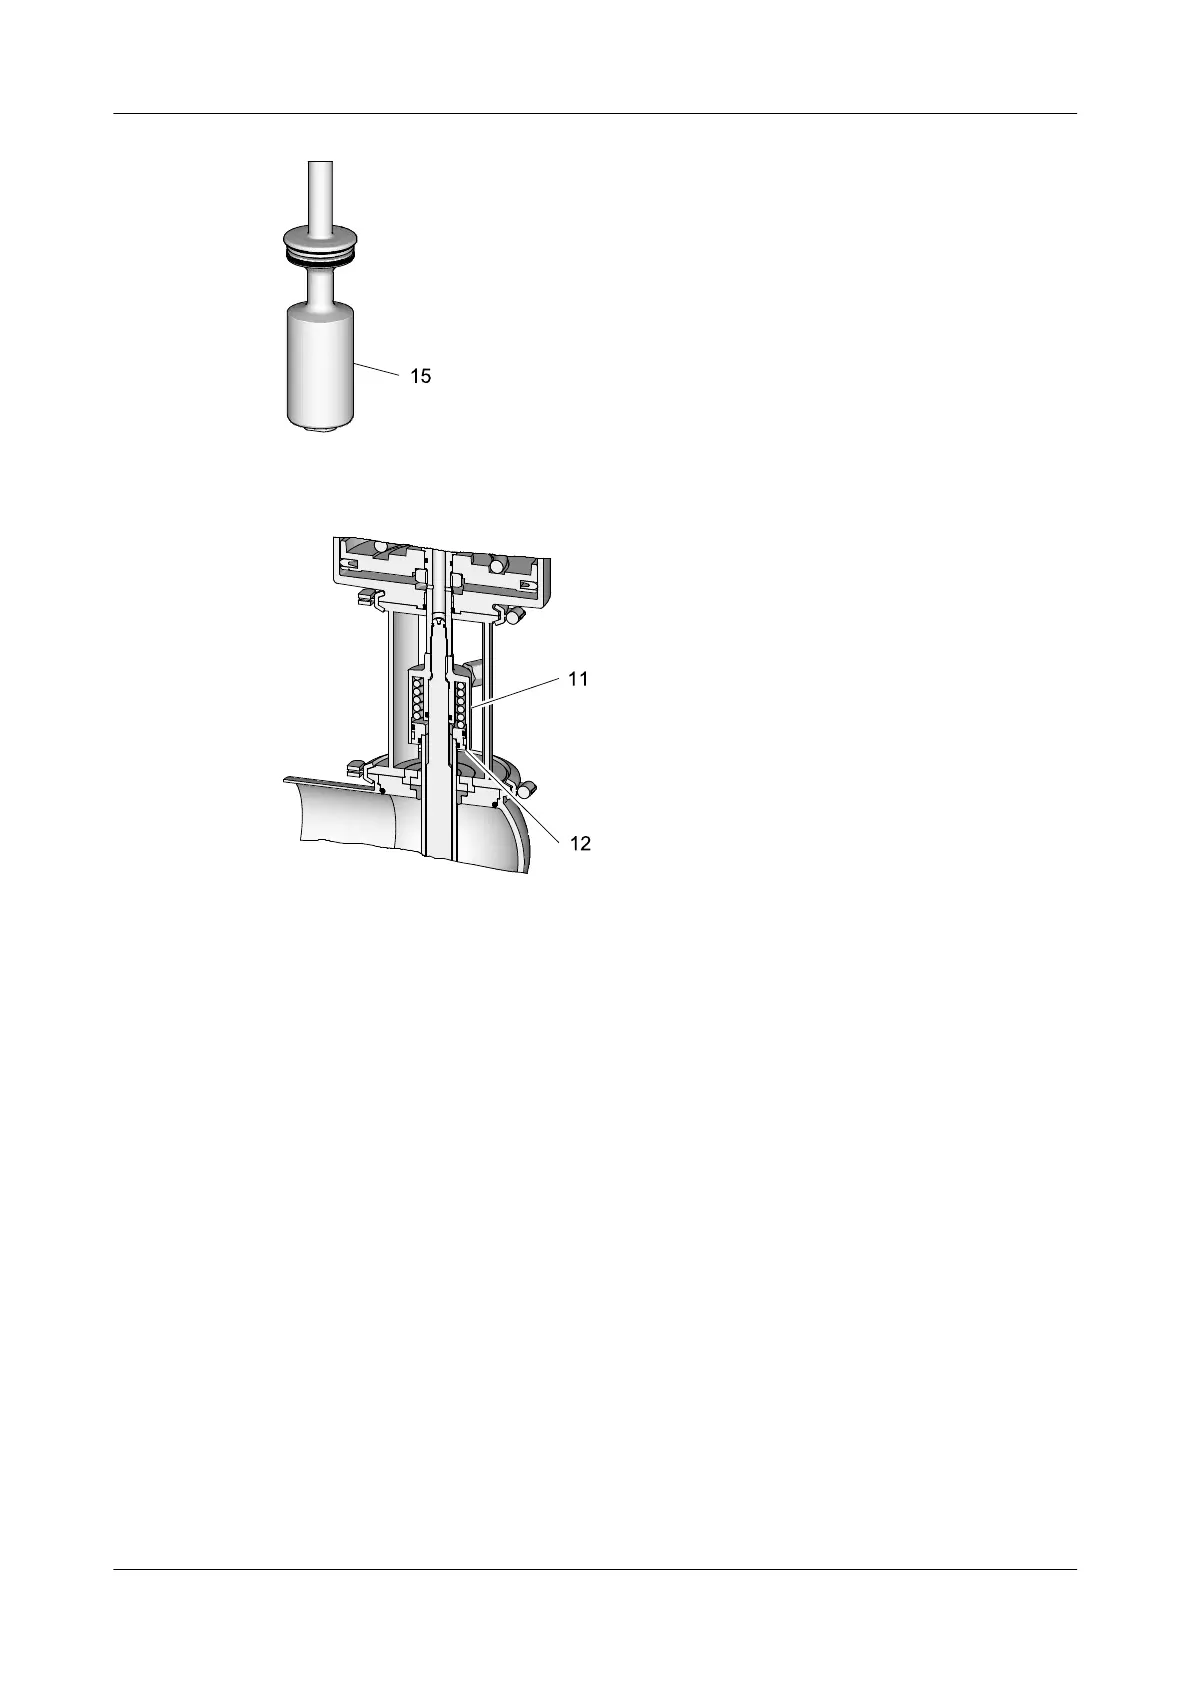
Fix the hood of the control top (B).
! When the valve is closed, the lower edge of the cleaning hood (11) should
be flush with the underside of the abutment (12).
®
Done
10.6.7 Checking the function
Checking valve strokes and adjusting feedback
Carry out the following steps:
1.
Actuate the valve with compressed air.
2.
Check stroke between the bottom housing and the end of the valve disk.
For this purpose see table “valve stroke” (Page 54).
3.
When strokes are correct, adjustment and checking of the feedback can take
place.
Maintenance
Installation
430BAL008386EN_3
07.02.2022 53

 Loading...