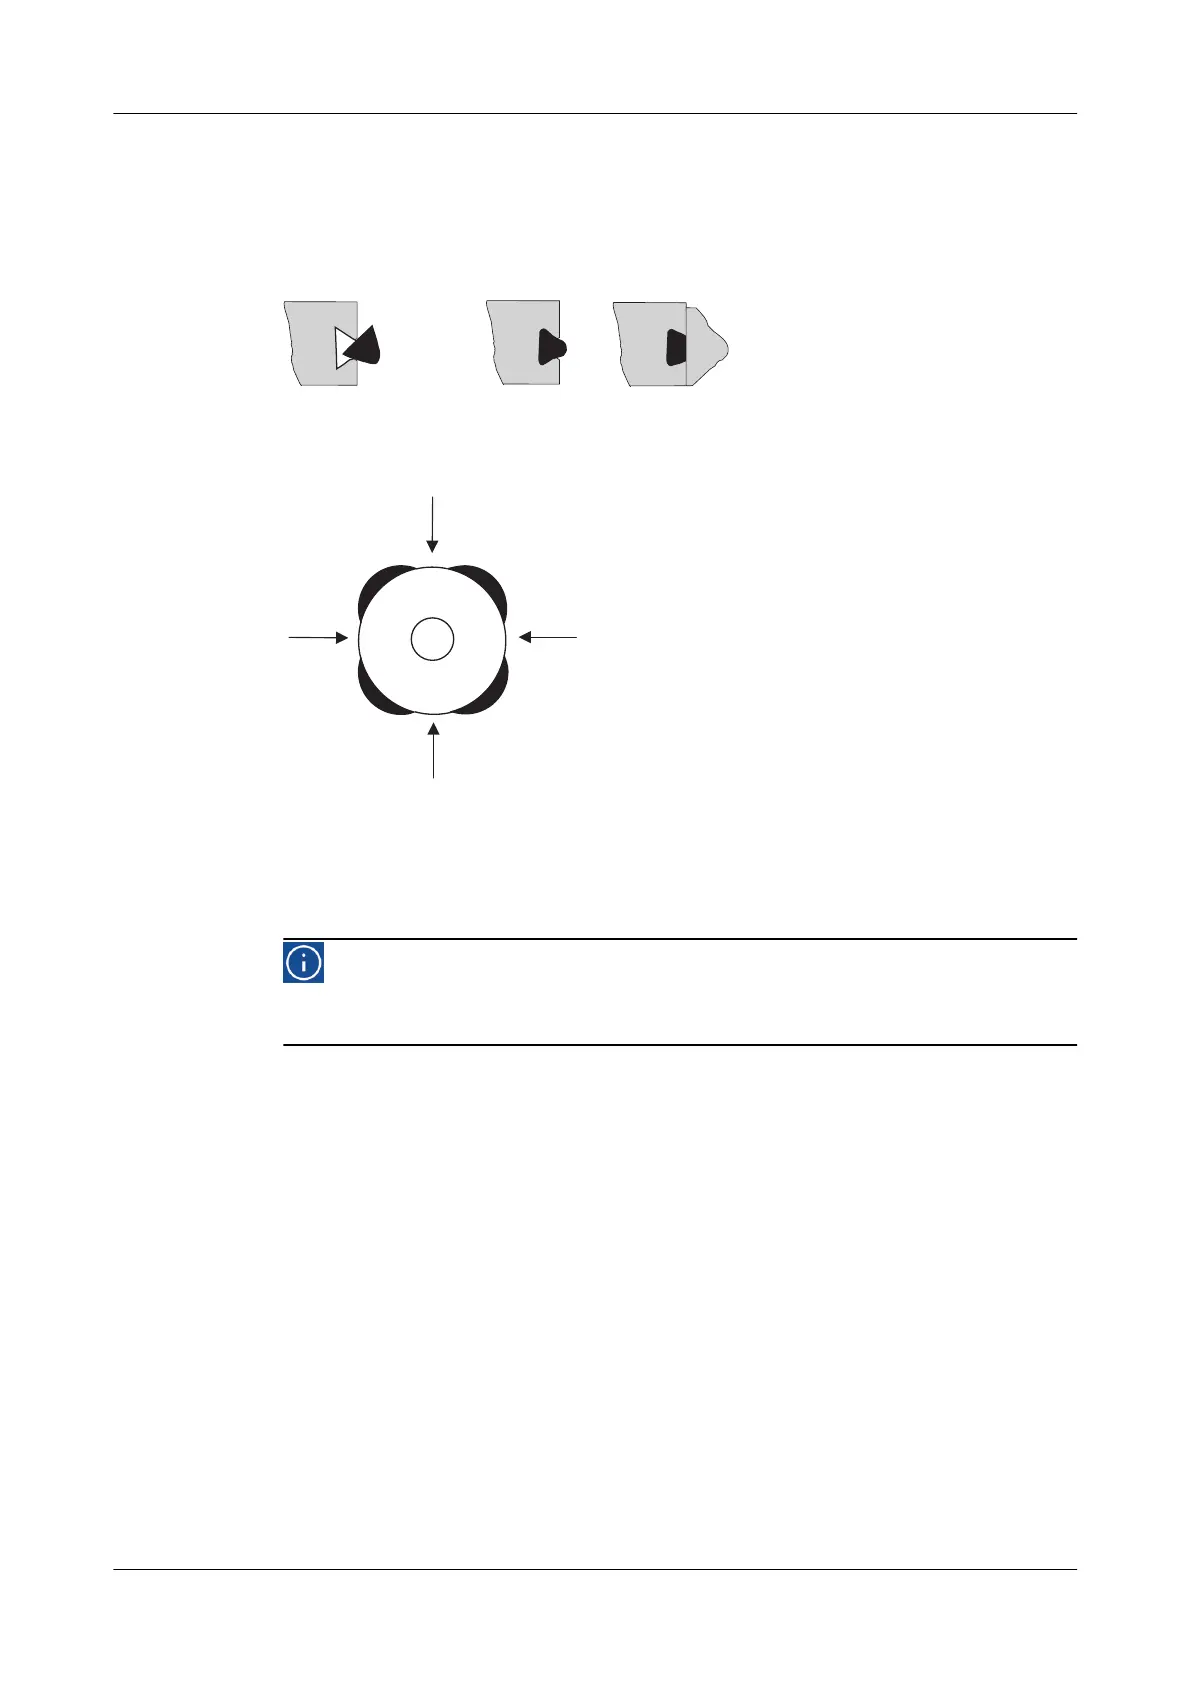
2.
Before fitting, wet V-ring RA on the side not in contact with product (rear side).
Pay attention that water does not drip into the V-ring groove on the valve disc.
3.
Put in V-ring RA.
! Make sure the installation position of V-ring RA is correct (see illustration).
Fig.30
4.
Use the insertion tool to press in the V-ring RA – evenly press in at several
opposite points along the circumference.
Fig.31
5.
Insert V-ring RA evenly.
! Check that the V-ring RA is evenly and correctly inserted.
®
Done
Hint!
Used seals must not be used again, since the proper function of the
seal can then no longer be ensured.
10.7.2.3 Replace more seals
Insert all other seals.
Maintenance
Maintenance
430BAL008386EN_3
58 07.02.2022

 Loading...