Caution!
Danger of injury!
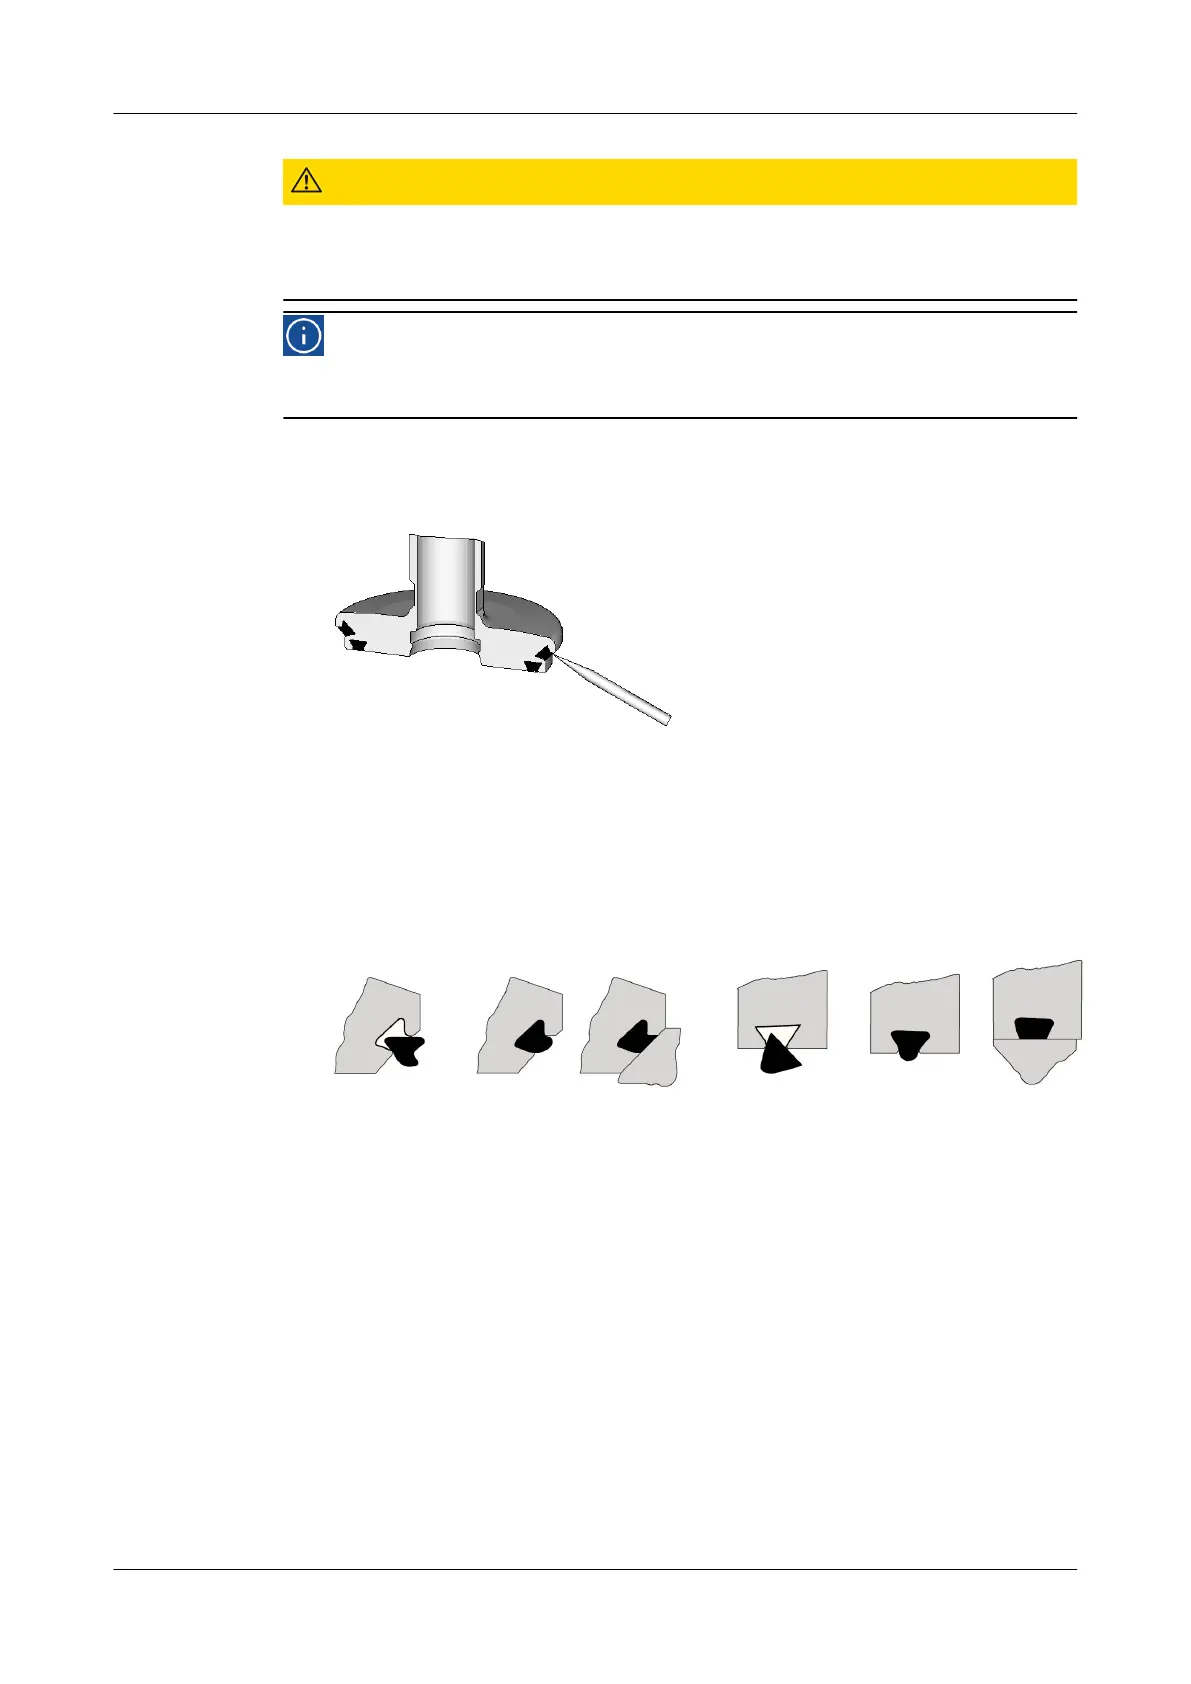
The pickset tool can slip off when the V-ring is removed
► Clamp the valve disk in the vice using vice supports
Hint!
Functional and running surfaces of the valve disks must not get
damaged.
Carry out the following steps:
1.
Put a tool from the pickset into the V-ring and take it out.
Fig.25
2.
Before fitting, wet the V-ring on the side not in contact with product (rear side).
Pay attention that water does not drip into the V-ring groove on the valve disc.
3.
Put in the V-ring. Make sure the installation position of the V-ring is correct
(see illustration).
Fig.26: Semi-axial V-ring
Fig.27: Axial V-ring
4.
Use the insertion tool to press in the V-ring – evenly press in at several
opposite points along the circumference.
Maintenance
Maintenance
430BAL008386EN_3
56 07.02.2022

 Loading...