Page Title
Getting Started
The DVI KVM over IP Sender and Receiver units can either be connected over a Local
Area Network (LAN) or they can be directly connected to one another.
Using a Direct Connection
By default, the DVI KVM over IP is shipped in Auto IP mode. In Auto IP mode, each
Sender and Receiver unit assigns itself a unique IP address within the range of
169.254.x.x. Auto IP mode is only used when Sender and Receiver units are directly
connected to one another. When connecting to a network, the DVI KVM over IP must be
set to DHCP mode or Static IP mode. See Setting the IP Mode for more information.
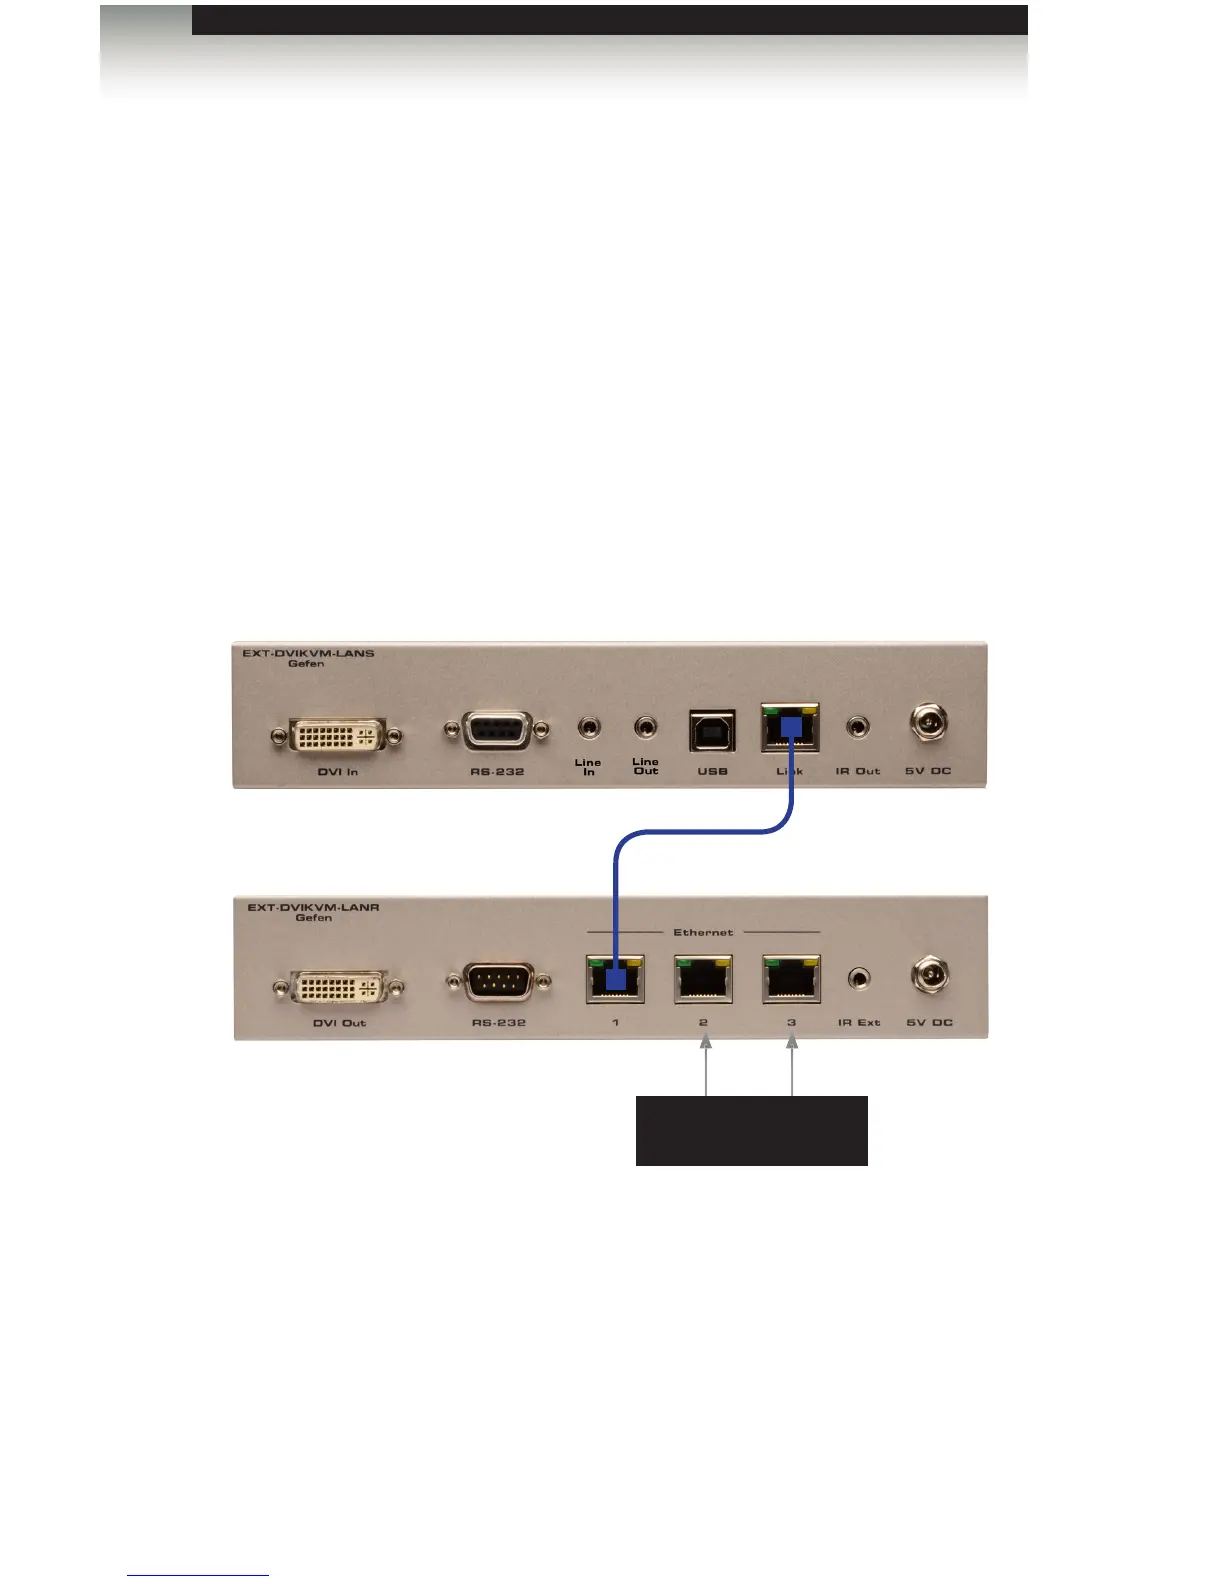
1. Connect a CAT-5e (or better) cable from the LAN port on the Sender unit to the
LAN 1 port on the Receiver unit.
Figure 1.1 - Directly connecting the Sender and Receiver unit
Although any LAN port on the Receiver unit can be used, using the LAN 1 port makes
it easy to identify which Ethernet cable is used to connect the Sender and Receiver
unit. LAN 2 and LAN 3 ports can then be used for connecting additional devices or
when daisy-chaining Receiver units.
2. Use the included DVI cable to connect the DVI source to the DVI In port on the
Sender unit.
3. Connect a DVI cable from the DVI display to the DVI Out port on the Receiver unit.
page | 6
Installation
Connect to other
Receivers / IP devices
Sender unit
CAT-5e cable (or better)
Receiver unit